


Hardware Installation 2-11
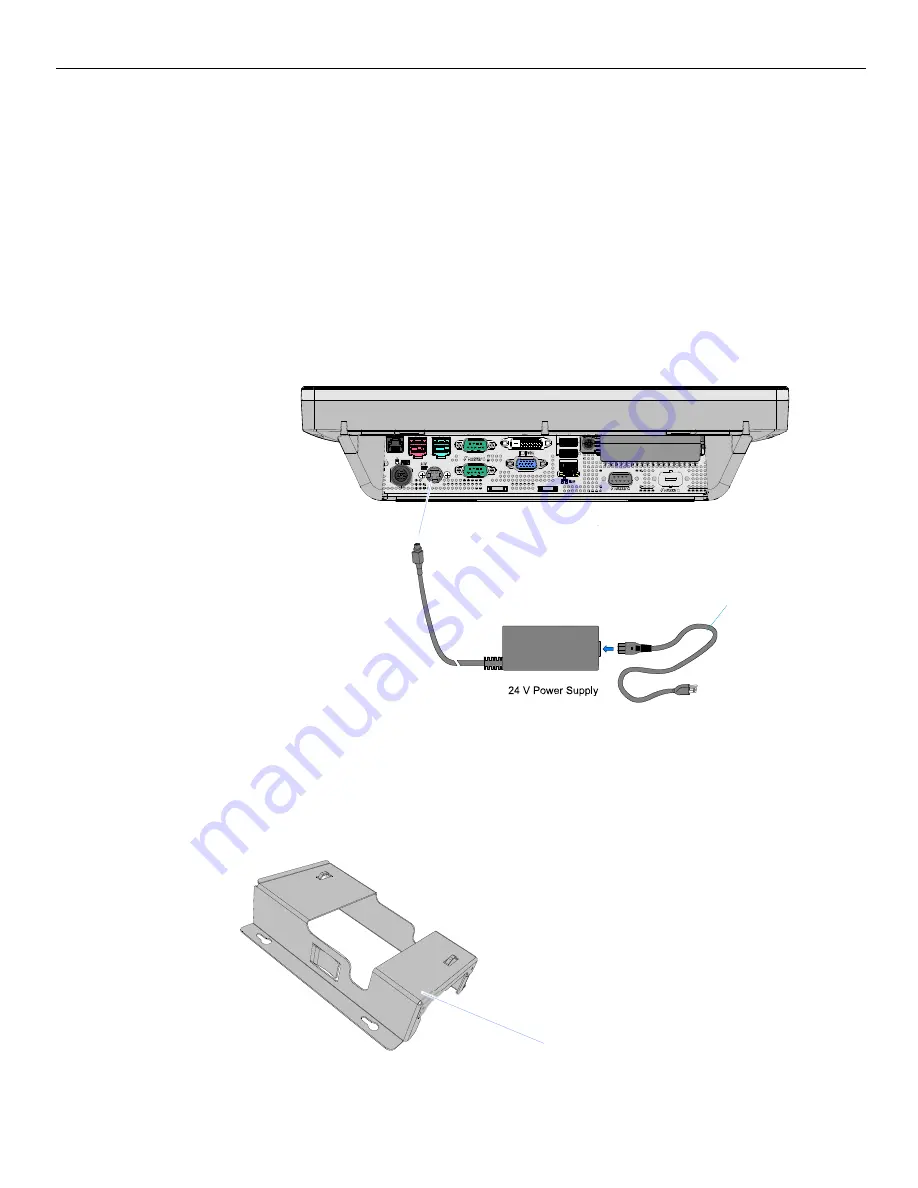
Connecting AC Power
The
7611
receives
power
from
an
external
24
V
power
brick.
Caution:
The
7611
requires
the
NCR
24
V
power
supply
that
is
shipped
with
the
terminal.
Use
of
other
power
bricks
may
cause
damage
to
the
unit.
1. Connect
the
Power
Supply
cable
to
the
DC
Power
connector
on
the
terminal.
2. Connect
the
AC
Power
Cord
to
the
Power
Supply
and
to
an
AC
outlet.
Caution:
Do
not
connect
or
disconnect
the
24V
Power
Cable
from
the
terminal
with
the
AC
Power
Cord
connected
to
an
AC
outlet.
Power Supply Bracket
An
optional
power
supply
bracket
is
available
to
mount
the
power
supply
on
a
vertical
surface
or
under
a
table
top
(see
the
Wall
Mount
Power
Supply
Bracket
Kit
Instructions
(7600
‐
K310).
29247
AC Power Cord
(Country Specific)
28772
7600 Wall Mount Power Supply Bracket
497-0469772
Содержание RealPOS 50
Страница 1: ...NCR RealPOS 50 7611 Release 1 1 User Guide B005 0000 2017 Issue C...
Страница 10: ...x...
Страница 48: ...1 38 Product Overview...
Страница 58: ...2 10 Hardware Installation USB Keyboard w Glide Pad 29246...
Страница 88: ...2 40 Hardware Installation...
Страница 94: ...3 6 Touch Screen Calibration Do NOT get your hand and other fingers too close to the bezel 27737...
Страница 122: ...6 6 BIOS Updating Procedure...
Страница 136: ...7 14 Solid State Drive Optimization...
Страница 143: ...2x20 Customer Display Interface 9 5 CP437...
Страница 144: ...9 6 2x20 Customer Display Interface CP858...
Страница 145: ...2x20 Customer Display Interface 9 7 CP866...
Страница 146: ...9 8 2x20 Customer Display Interface CP932...
Страница 147: ...2x20 Customer Display Interface 9 9...
Страница 148: ...9 10 2x20 Customer Display Interface...
Страница 154: ...10 6 Touch Screen Operation...
Страница 156: ...A 2 Windows 7...