background image


35 


¾


2

nd

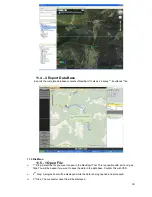
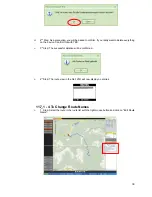
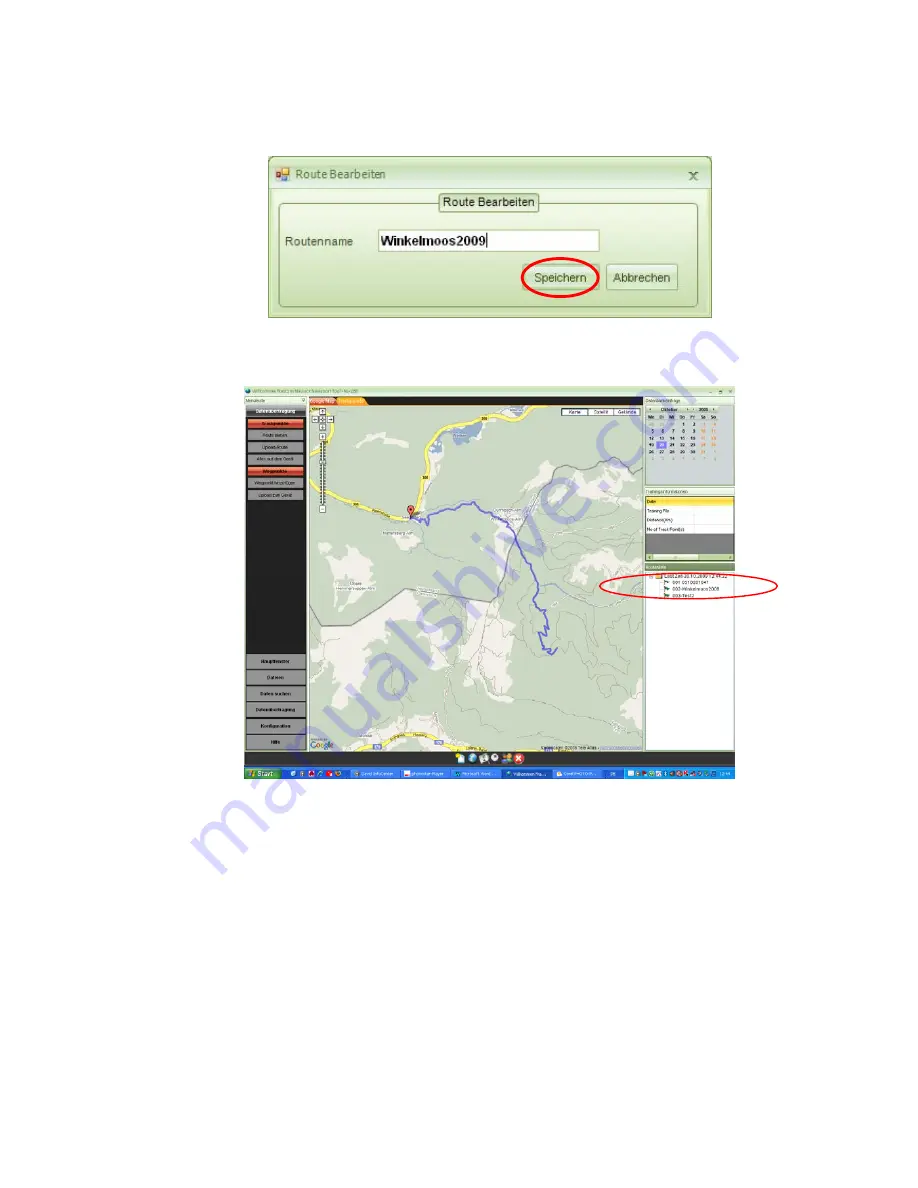
 Step: Edit the route name as desired, blanks may not be used.


¾


3

rd

 Step: After saving, your route name will have been changed. 


11.7.2 Waypoint 
11.7.2 – 1 Adding a Waypoint  

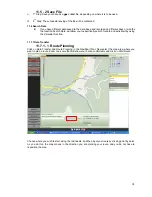
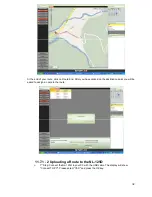
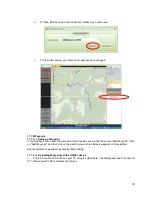
In the NaviSport Tool, under the menu item Data Transfer, you will find the choice "Add Waypoint". Click 
on "Add Waypoint", and then click on the position you wish to add as a waypoint on Google Map. 
 
End the addition of waypoints by clicking "Stop Adding".


11.7.2 – 2 Uploading Waypoints to the GH-561 device 

¾


1

st

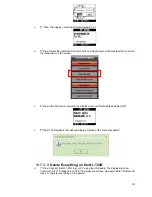
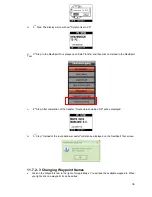
 Step: Connect the NL-125O to your PC using the USB cable.  The display will show "Connect TO 

PC". Please select "YES" and press the OK key.  
 

Содержание NL-125O

Страница 1: ...5 ...

Страница 2: ...to your destination 1 2 Safety Information Important Health and Safety Information When using this product you should take the following safety precautions in order to avoid possible damage and legal consequences Please comply carefully with all safety and operation instructions and keep it safely Please pay attention to all warnings in this user manual and on the product In order to avoid injury ...

Страница 3: ...circumstances disconnect the product from the power supply also remove the storage battery and contact an authorized maintenance specialist or the dealer A liquid has seeped into or an object has penetrated the device The product has been exposed to rain or dampness The product has fallen to the ground or was damaged There are visible signs of overheating The product does not work properly when us...

Страница 4: ...ination off 50mA GPS 3D Fix illumination on 19 hours Battery life GPS 3D Fix illumination off 30 hours PC connection mode USB interface Charging time Mini USB 350mA 3 hours to full charge Electronic compass YAMAHA YAS52P 3 Axis GPS parameters GPS chip set SiRF Star III LPx Frequency L1 1575 42 MHz C A code 1 023 MHz chip rate Channels 20 Antenna type Built in patch antenna Position 10 meters 2D RM...

Страница 5: ... 1 Equipment Please confirm that all these parts are included in the package before you start to use the device and contact your specialized dealer in case anything should be damaged or missing NL 125O Strap USB cable CD ROM ...

Страница 6: ...t ESC z Mark points and leave the selected page 3 Find Waypoint z Go to the waypoint 4 Back to Start z Follow the travel route 5 Scrolling z Scroll key 6 OK z Enter Confirm 3 3 Position of the Antenna The GPS antenna is located in the lower part of the housing This part should always have an unobstructed view of the sky ...

Страница 7: ...SB slot on a PC vehicle or plug charging adapter 2 It takes approximately 5 6 hours to fully charge the storage battery Important Charge the storage battery fully before using the NL 125O for the first time 4 Startup 4 1 Startup of the NL 125O Press the ON OFF button for 2 seconds You will then see the startup screen with the welcome message The NL 125O will immediately begin to get a satellite fi...

Страница 8: ...d confirm it with OK 3 You can now add remove or change route waypoints If you do not want to perform any of these actions press the key repeatedly until the marker reaches FOLLOW Then press OK and choose if you want to run towards the destination Forwards or from the destination back to the originally planned starting point Backwards 4 The electronic compass shows the direction to be run and the ...

Страница 9: ...his will be indicated by a compass with no needle 6 Waypoints 6 1 Saving of Waypoints z In order to save a point of interest POI or the place you have parked your vehicle for example proceed as follows 1 Press the button to select a waypoint icon If you do not like the one displayed choose NO You can switch between YES and NO with the key 2 By using the key you can switch from Confirm to the desig...

Страница 10: ... compass shows the direction to be run and the remaining time to the destination based on the current speed 4 By pressing the OK key again a kind of map of your planned route will be shown In this respect the scale you have chosen is important The small arrow on the route shows you the direction to the next route waypoint The arrow on the right hand side shows the direction to the destination poin...

Страница 11: ...libration of the Electronic Compass z Recalibrate the electronic compass if you think its data is incorrect or if the compass indicator on the display blinks 1 If it is necessary to calibrate the compass press the and buttons at the same time 2 Follow the instructions on the screen First put the NL 125O flat on the table and turn it slowly until the screen displays changes 3 Then place the NL 125O...

Страница 12: ... The NL 125O uses magnetic north Geographical true north and magnetic north are not exactly the same In order to display the exact point of the compass you need to set the deviation between the geographical and the magnetic north the default setting is 0 The respective declination values can be seen in a map with lines of equal magnetic declination isogonic map Because the Earth s magnetic field i...

Страница 13: ...utton to return to the settings menu 9 3 Display Settings z BACKLIGHT You can choose between permanently switched on and automatic switch off after xx seconds Please note that if you choose permanent illumination at the touch of a button this will shorten the working time between battery charges as it uses much more power z CONTRAST Use the or buttons to set the desired contrast value The display ...

Страница 14: ...tance This item is used to set the distance indicator for response to the route waypoints you have set For example over a distance of 1000m with four waypoints the setting must be adjusted to 200m to allow the device to correctly display the changes of direction Otherwise the NL 125O will only show the one at 1000m and you may run in the wrong direction Press the OK key in the settings selection a...

Страница 15: ...e settings menu 9 8 Reset Default In case your own settings do not achieve the desired results you can reset the NL 125O to the factory default settings When you do this all User Settings will be deleted Press the button to return to the settings menu 9 9 About The About screen displays the firmware date and product information Press to return to the settings menu ...

Страница 16: ... CD ROM drive of your PC 2 Press the button Driver and select Installation 3 Follow the instructions on the screen Step 1 The driver installation preparation screen will be displayed Step 2 Now connect the NL 125O to the PC using the USB cable supplied A New Hardware Found message will be displayed and the system will search for the driver Please cancel this process and click Next in the InstallSh...

Страница 17: ...r a few seconds It may happen that even after the driver has been installed New Hardware will again be displayed Allow the computer to search for it automatically The previously installed driver will be found and reinstalled 10 2 Installation of the NaviSport Tool 1 Before installation check to see that Microsoft NET Framework is already installed in your PC ...

Страница 18: ... a version of Microsoft NET Framework will already be installed in MS Windows XP SP2 SP3 or Vista If not please install it from the NL 125O product CD ROM in the NaviSport Tool folder Install the NaviSport Tool from the NL 125O product CD ROM Step 3 Click Next Step 4 Click Next ...

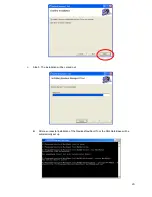
Страница 19: ...23 Step 5 The installation will be carried out z After a successful installation of the Navilock NaviSport Tool the SQL Data Base will be automatically set up ...

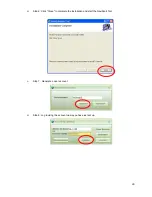
Страница 20: ...24 Step 6 Click Close to complete the installation and start the NaviSport Tool Step 7 Generate a user account Step 8 Log in using the account name you have just set up ...

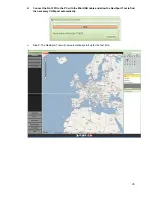
Страница 21: ... Connect the NL 125O to the PC with the Mini USB cable and allow the NaviSport Tool to find the necessary COM port automatically Step 9 The NaviSport Tool will now automatically start up for the first time ...

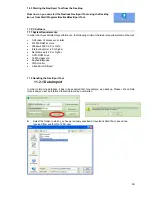
Страница 22: ... or later 512 Mb RAM or more Windows 2000 XP or Vista Internet Explorer 6 0 or higher Net Framework 2 0 or higher A CD ROM drive 16 Mb videocard Keyboard Mouse VGA monitor A free Mini USB port 11 2 Handling the NaviSport Tool 11 2 1 Data Import In order to import a database it has to be exported first for example as a backup Please click on Data Import and you will be informed that all data will b...

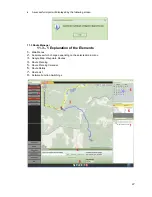
Страница 23: ...en 11 3 Route Manager 11 3 1 Explanation of the Elements 1 Main Menus 2 Submenus which change depending on the selected main menu 3 Google Map Waypoints Routes 4 Route Planning 5 Route Planning Calendar 6 Route Details 7 Route List 8 Sofware Function Switchings ...

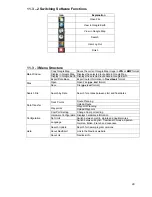
Страница 24: ...elbook format Open Open File gpx kml format Files Save File gpx kml format Search File Search by Date Search for entries between start and final dates Route Planning Track Points Upload Route Waypoint Planning Data Transfer Waypoints Upload Waypoint Com Port Setting Change Com port setting Hardware Configuration Displays hardware information Set Units Switch between metric statute and nautical mil...

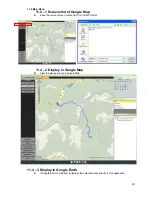
Страница 25: ...Map z Save the current screen content in JPG or BMP format 11 4 2 Display in Google Map z View the planned route in Google Map 11 4 3 Display in Google Earth z If Google Earth is installed it displays the selected route directly in this application ...

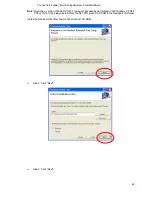
Страница 26: ...pen File 1st Step Select the file you want to open in the NaviSport Tool This is possible with kml and gpx files You will be asked if you want to save the data in the data base Confirm this with YES 2nd Step A progress bar will be displayed while the data is being opened and processed 3rd Step The successful open file will be displayed ...

Страница 27: ... search for data and activate it by using the Calendar function 11 7 1 Data Transfer 11 7 1 1 Route Planning Click on Data Transfer and Route Planning in the NaviSport Tool Now select the map area where you want to plan a route Zoom to a scale that will allow you to plan comfortably and click on Start Route Choose where you wish to start using the red needle and then input your route by clicking p...

Страница 28: ...ave clicked on the destination point you will be asked to assign a name to the route 11 7 1 2 Uploading a Route to the NL 125O 1st Step Connect the NL 125O to your PC with the USB cable The display will show Connect TO PC Please select YES and press the OK key ...

Страница 29: ...r transfer is complete the display will show Route data download OK 5th Step The NaviSport Tool will now display Upload of the route successful 11 7 1 3 Delete Everything on the NL 125O 1st Step Connect the NL 125O to your PC using the USB cable The display will show Connect TO PC Please select YES and press the OK key Now open Data Transfer and click on Delete everything on the device ...

Страница 30: ...ything on the device Confirm this with YES 3rd Step The successful deletion will be confirmed 4th Step The route view in the NL 125O will now display no entries 11 7 1 4 To Change Route Names 1st Step Select the route in the route list with the right mouse button and click on Edit Route Name ...

Страница 31: ...he menu item Data Transfer you will find the choice Add Waypoint Click on Add Waypoint and then click on the position you wish to add as a waypoint on Google Map End the addition of waypoints by clicking Stop Adding 11 7 2 2 Uploading Waypoints to the GH 561 device 1st Step Connect the NL 125O to your PC using the USB cable The display will show Connect TO PC Please select YES and press the OK key...

Страница 32: ...ol 4th Step After completion of the transfer Route data download OK will be displayed 5th Step Upload of the route data successful will also be displayed on the NaviSport Tool screen 11 7 2 3 Changing Waypoint Names Click on the Waypoints tab to the right of Google Maps You will see the available waypoints When you right click on a waypoint it can be edited ...

Страница 33: ...e COM port name manually 11 8 2 System InformationShows device specifications for the NL 125O 11 8 3 Setting Units The possible settings are Metric km statute miles or nautical miles nm 11 8 4 Language The NaviSport Tool Language may be set as English Traditional Chinese Spanish German Italian French or Japanese 11 9 Help Menu ...

Страница 34: ...Your NL 125O does not find a FIX or it takes too long to do so An unobstructed view of the sky is needed for the reception of the GPS signals However today s highly sensitive chip sets make it possible to get signals even without a satisfactory view of the sky However this is only possible when the signals are sufficiently strong Sometimes even with clear blue skies the satellite signals can be di...

Страница 35: ...Support team support navilock de www navilock com You can also find up to date product information on our homepage www navilock com Please send products to be repaired always by prepaid postage to Tragant Handels und Beteiligungs GmbH Navilock Repair Center Beeskowdamm 13 15 D 14167 Berlin Zehlendorf Enclose proof of your purchase and a detailed description of the malfunction Does not work or defe...

Страница 36: ...ld waste You are responsible for delivering all used electrical and electronic equipment to the authorized collection points The separate collection and sensible reprocessing of your waste electrical and electronic equipment supports more careful use of natural resources Moreover the reprocessing of the waste electrical and electronic equipment is a contribution to preserve the natural environment...

Отзывы: