Falcon II RJ-8000 Operation Instructions
52
AP-75080, Rev. 1.1, 04/12/02
4.3. REPLACING THE CUTTING BLADE.
Follow the steps below to replace the cutting blade.
Step 1 :
If the printer is turned on, make sure that:
•
Printing or other operations are not performed.
•
The display on the operation panel shows the normal status.
•
The MEDIA SET light on the operation panel goes off.
Step 2 :
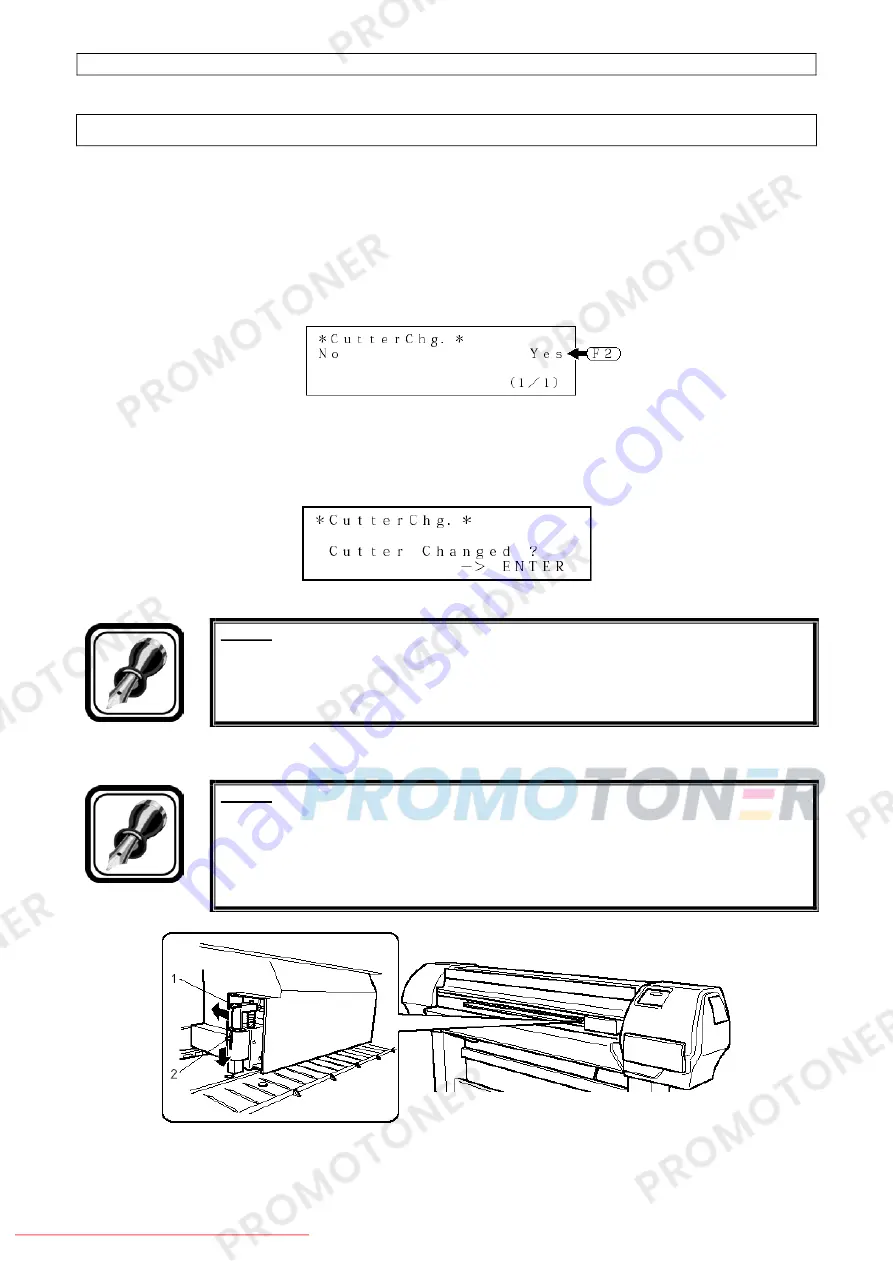
In the Menu Setup on the operation panel, display the cutting blade replacement menu.
Step 3 :
Select “Yes” and press the [F2] key on the operation panel.
•
The printer prepares for cutting blade replacement.
•
The carriage moves to the cutting blade replacement position.
•
The following message is displayed on the operation panel.
Step 4 :
Open the front cover.
Notes :
Replace the cutting blade in as quick as possible. If you leave the carriage at the
cutting blade replacement position, the head may clog with ink.
Step 5 :
While pressing the cutting blade holder tab, rotate the cutting blade holder lever in the direction
shown in the diagram.
Notes :
Do not strongly push the cutting blade holder tab strongly or release it suddenly.
Doing so may cause the spring incorporated in the cutting blade holder to fly off.
Do not push in the cutting blade holder. Doing so may cause the cutting blade to
damage the inside of the printer.
1 = Cutting blade holder lever / 2 = Cutting blade holder
Downloaded From ManualsPrinter.com Manuals


