10
11
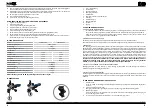
1.
lower knife guide
2.
cutting knife
3.
upper knife guide
4.
fastening screws
5.
piston sleeve
6.
piston fastening screw
7.
housing
8.
additional handles
9.
vents
10.
switch
11.
guide
V. PRINCIPLES OF OPERATION
1. BEFORE FIRST USE.
•
Make sure that the supply voltage is conform with the voltage indicated on the device’s name plate
•
Before each connection of the power supply to the device check the switch position; the switch must always be in
“off” (“0”) position. If the switch is in “on” (“I”) position, the device will start unintentionally upon energising which
may lead to an accident!
•
Check the condition of the power cord and plug. If the power cord or plug need replacement, seek assistance from
a qualified service organisation.
2. SWITCHING ON AND OFF
Switching on - slide the switch (10) towards the working end of the device, keep sliding until the switch locks.
Switching off - press the rear end of the switch to release the lock - the switch will return to off position.
3. OPERATION
Attach two handles to the device. Properly fix the material to be cut. Hold the device with both hands when using it.
Switch the device on. Never slide the device onto the material before it is switched on. When cutting keep the device
perpendicularly to the material being cut (do not tilt the device sideways, tilting may reduce efficiency of the device and
may damage the cutting knife). Never exert too much pressure when cutting curved areas. To improve the service life of the
cutting knife and the die, use cutting oils which must be properly selected according to the processed material. Lubricate the
cutting knife and the die with machine oil. Make sure the knife is always sharp to achieve good cutting quality. Blunt / worn
out knifes should be replaced with new ones. Never sharpen worn out knives.
Never turn the device off before
finishing the work - the cutting head must be removed from the material while the device is still
on. The device may be turned off when the cutting head is removed from the processed material.
4. REPLACING UPPER AND LOWER KNIFE GUIDES
Loosen the fastening screws (4) of the upper (1) and lower (3) guides, then remove the guides. Clean surfaces. Fasten new
guides
.
5. REPLACING CUTTING KNIFE
Use the key provided to loosen the screw fastening the piston sleeve (6). Remove the piston sleeve (5), disassemble worn
out knife and assemble a new one. Lubricate the knife and piston connection point with grease.
VII. MAINTENANCE AND INSPECTION
1.
Inspecting the tool
Since use of a dull tool will cause motor malfunctioning, it should be replaced with a new one without delay when
abrasion is noticed.
2.
Inspecting the mounting screws
Regularly inspect all mounting screws and ensure that they are properly tightened. Should any of the screws be loo
-
se, retighten them immediately. Failure to do so could result in serious hazards.
3.
Maintenance of the motor
The rotor of the motor is the very “heart” of the power tool. Exercise due care to ensure the rotor does not be
-
come damaged and/or wet with oil or water.
4.
Always de-energise the device before inspection or servicing
5.
Keep the device clean, pay particular attention to making sure that the vents are not clogged. Clean vents after every
operation of the device.
6.
Service
When servicing, use only identical replacement parts. In such case please contact our service centre. Use of any other
part may create a hazard or cause product damage.
Do not attempt to modify tools or create accessories not recommended. Any such alteration or modification is
misuse and could result in a hazardous condition leading to possible serious injury. It will also void the warranty.
VIII. REGULAR CONTROL OF THE DEVICE
Regularly control that the device doesn´t present any damage. If there is any damage, please stop using the device. Please
contact your customer service to solve the problem.
What to do in case of a problem?
Please contact your customer service and prepare following information:
•
Invoice number and serial number (the latter is to be found on the technical plate on the device).
•
If relevant, a picture of the damaged, broken or defective part.
•
It will be easier for your customer service clerk to determine the source of the problem if you give a detailed and
precise description of the matter. The more detailed your information, the better the customer service will be able to
solve your problem rapidly and efficiently!
CAUTION:
Never open the device without the authorization of your customer service. This can lead to a loss of warranty!
Rev. VIII 2017
Rev. VIII 2017


