Chapter 2: Setting Up the Instrument
0112-0174 C
19
Installing the Filters
If you intend to run wavelength-dependent assays, perform the following steps to install
filters in the instrument.
Required tools:
M2 hex wrench
Slotted screwdriver
Powder-free latex or nitrile gloves
To install the filters:
1. Power off the instrument.
2. Loosen the captive screws on the front of the instrument and then raise the top
cover up and over the instrument.
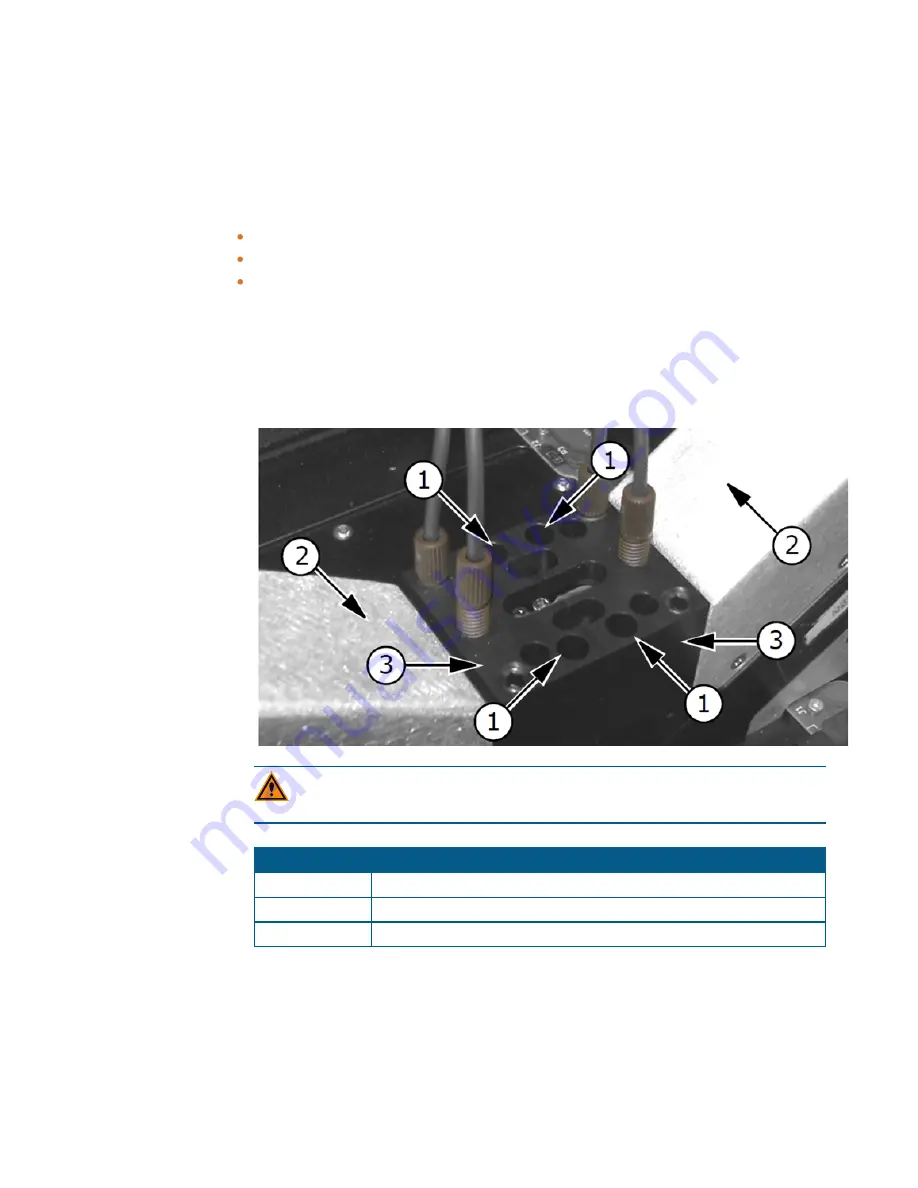
3. Remove the two hex screws that secure each detector to the instrument chassis. The
screws are located inside the access holes in the detector adapter.
CAUTION!
You must keep the PMT away from any direct light source. Light
can damage the PMT and cause temporarily high background reads.
Item
Name
1
Access holes for screws
2
Detector
3
Detector adapter
Detector Attached to Instrument Chassis
4. Pull the detector away from the instrument chassis and then place it on a clean
surface away from any direct source of light.


