


Maintenance and
Disassembly
Page 49
MOBA01-09HFN1-BT0W
Procedure
Illustration
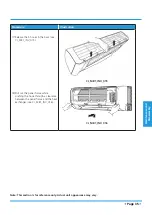
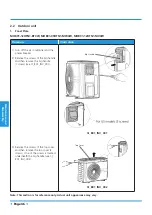
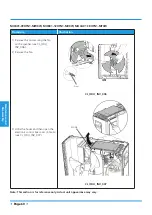
1) Turn off the air conditioner and the
power breaker.
2) Remove the screws of the big handle
and then remove the big handle
(1 screw) (see CJ_BA01_INV_001).
3) Remove the screws of the top cover
and then remove the top cover (3
screws). One of the screws is located
underneath the big handle (see CJ_
BA01_INV_002).
CJ_BA01_INV_001
CJ_BA01_INV_002
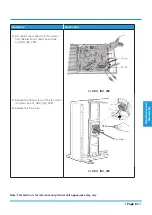
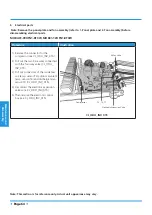
Note: This section is for reference only. Actual unit appearance may vary.
Содержание MISSION2 3D INVERTER Series
Страница 1: ...MISSION2 3D INVERTER SERIES SM_MISSION2 GA _60R410A_3D INVERTER_US_NA_171121 2017 SERVICE MANUAL...
Страница 2: ......
Страница 4: ......
Страница 11: ...Specifications Page 7 MOB01 09HFN1 MW0W MOB01 12HFN1 MV0W MOCA01 18HFN1 MT0W...
Страница 12: ...Specifications Page 8 MOD01 23HFN1 MT0W...
Страница 15: ...Specifications Page 11 PCB board of MOD01 23HFN1 MT0W...
Страница 16: ...Specifications Page 12 IPM board of MOD01 23HFN1 MT0W...
Страница 101: ...Troubleshooting Page 97 Remark Measure the DC voltage between P and N port The normal value should be around 310V...


