Page 23
Assembly
optoNCDT 1900 / Profinet
5.1.2.6
Surface Roughness
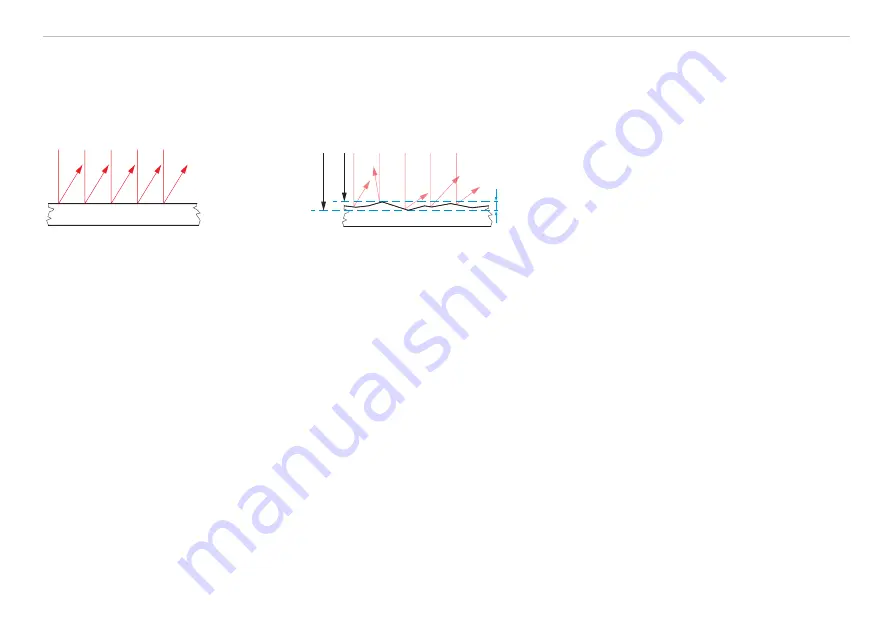
Laser-optical sensors detect the surface using an extremely small laser spot. They also track slight surface unevenness. In contrast, a
tactile, mechanical measurement, e.g. using a caliper, detects a much larger area of the measuring object. In case of traversing mea-
surements, surface roughnesses of 5 µm and more lead to an apparent distance change.
A suitable averaging number may improve the comparability of optical and mechanical measurements.
h > 5 µm
Max.
Min.
Ceramic reference surface
Structured surface
Recommendation for parameter choice:
- The averaging number should be selected in such a way that a surface area the size of which is comparable to those with mechani-
cal measurements is averaged.


