17.3.2005
Rev. 2.0
Installation
17
5.
Installation
5.1
Preparing the installation
Check that all loose parts are delivered with mixer such as bowl, tools, grease gun and
rubber feet.
5.2
Installation
The mixer is placed directly on the floor. Spacers can be inserted under mixer’s feet if the
floor is not completely even.
The mixer must be mounted with rubber feet, which neutralize both shaking and rusting.
5.3
Electrical connections
The electrical connections can only be carried out by a qualified electrician having the
necessary competence for the installation and service of electrical appliances.
Check before the mixer is connected to power that the voltage and frequency printed on
the machine rating plate is correct in relation to the place of installation. The rating plate
is placed on the top right side of the mixer.
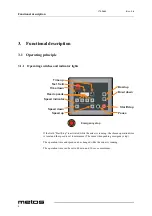
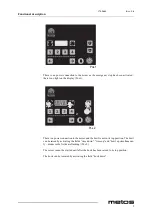
Before taking the mixer into use, the movement of the bowl must be checked: Activate
the field “bowl down” and check that the bowl is moving downwards and not up. If the
bowl is moving upwards, stop immediately the activation of the field as otherwise damage
might occur to the bowl lift system. If the lifting direction is wrong, 2 of the phase wires
of the connecting cable must be interchanged.
The mixer is to be connected to power via a plug. The plug must be dimensioned for min.
16A, 230/400V~, IP44
When connecting:
•
1 phase with 0+earth, use 3 pole plug
•
2 earth, use 3 pole plug
•
3 earth, use 4 pole plug
•
3 earth, use 5 pole plug
The electrical connections must be in compliance with local regulations.
Содержание AE40 Series
Страница 1: ...MIXER VL3 TYPE AE40 Installation and Operation Manual S N Rev 2 0...
Страница 2: ......
Страница 4: ...17 3 2005 Rev 2 0 2...
Страница 34: ...17 3 2005 Rev 2 0 Troubleshooting 28...
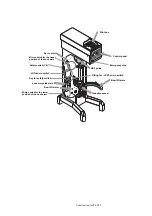
Страница 37: ...AE40 VL3 Installation drawing...
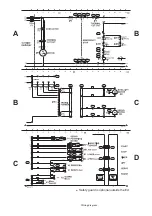
Страница 38: ...Wiring diagram 6DIHW JXDUG LV RSWLRQDO RXWVLGH WKH 8...

