17.3.2005
Rev. 2.0
Adjustment instructions
24
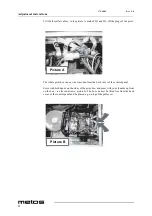
Lift the three flat cables - in the picture A marked I,II and III - off the plugs of the print.
The whole print box can now be loosened from the back cover of the control panel.
Seize with both hands on the sides of the print box, and press with your thumbs up front
on the box - see the red arrows, picture B. The box can now be lifted free from the back
cover of the control panel and be placed e.g. on top of the pulley set.
3LFWXUH$
3LFWXUH%
Содержание AE40 Series
Страница 1: ...MIXER VL3 TYPE AE40 Installation and Operation Manual S N Rev 2 0...
Страница 2: ......
Страница 4: ...17 3 2005 Rev 2 0 2...
Страница 34: ...17 3 2005 Rev 2 0 Troubleshooting 28...
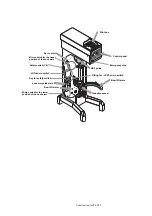
Страница 37: ...AE40 VL3 Installation drawing...
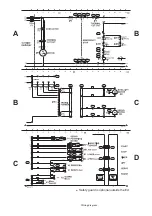
Страница 38: ...Wiring diagram 6DIHW JXDUG LV RSWLRQDO RXWVLGH WKH 8...


