NOTE
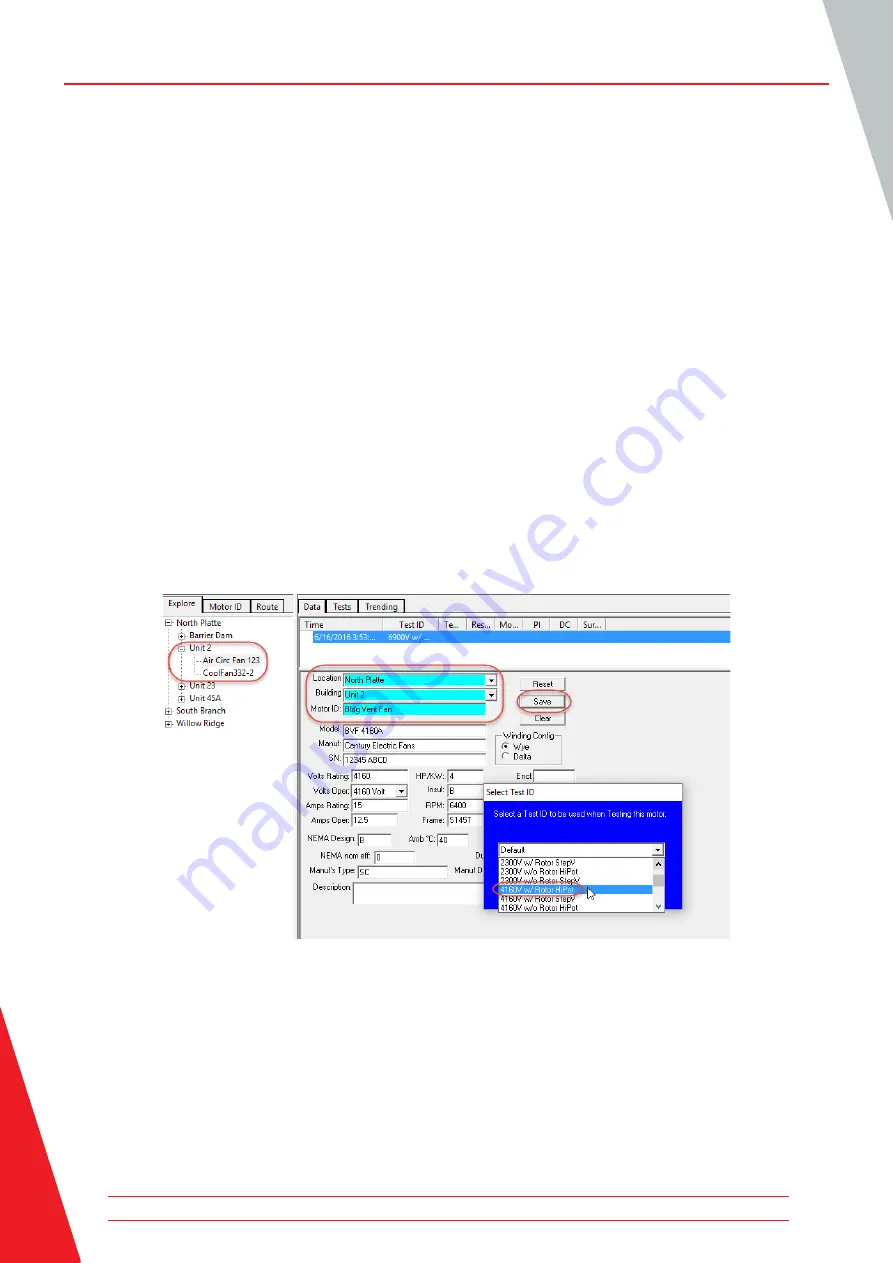
The labels for the
Location
and
Building
fields can be changed as desired
by using the
Options
>
Changeable Labels
items in the
View
tab.
4. Best practices suggest adding all information pertinent to the motor to facilitate testing. This
information can be useful during the testing and troubleshooting processes.
5. Click on the
Save
button to add the motor information to the database.
6. The Select Test ID dialog box will appear so you can assign the most appropriate Test ID to the
motor. Test IDs contain the testing parameters (for example, tests performed, voltages, and pass/
fail criteria) along with a basic motor description.
For example, a Test ID named 480Vw/Rotor>100HP StepV includes tests for a 480-volt motor
that has the rotor installed during testing, is less than 100 horsepower and will feature step
voltage testing.
7. Click
OK
after selecting the best available Test ID for the motor you will be testing.
Figure 6. New motor added to Motor Tree. Information entry and Test ID selection.
Preparing For Testing
8. The new motor will appear in the motor tree on the left side of screen.
9. You can then view the tests selected for the motor along with the test parameters then make
adjustments if needed to better suit your testing objectives.
Baker AWA -IV Static Motor Analyzer
www.megger.com
6


