background image

 IM 422-4 / Page 7 (Rev. 5/99)

Heat Section Installation

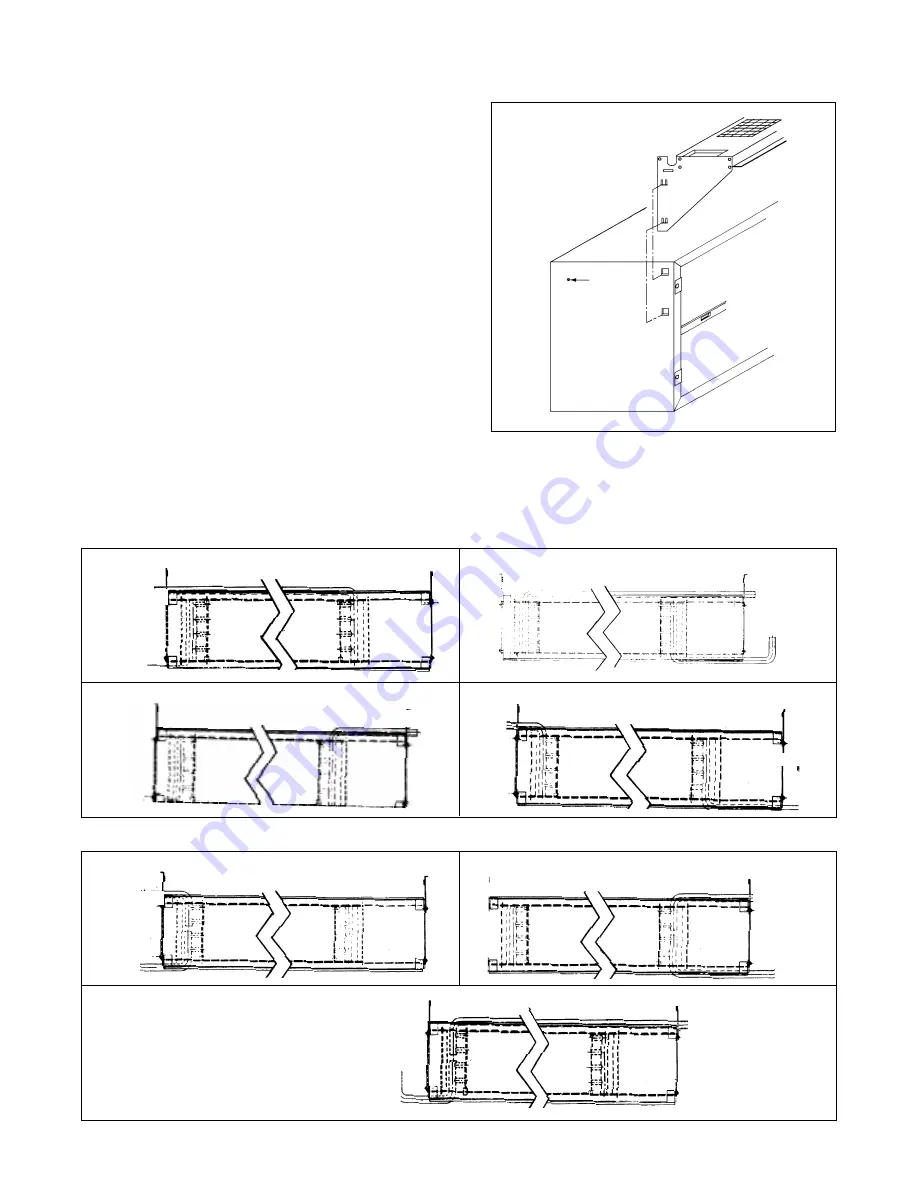
The heat section is designed to be “snapped” into the top of the
wall sleeve (see Figure 6). There are four square holes provided
in the wall sleeve, two on each side, for coil attachment. Assem-
bly the heat section to the wall sleeve as follows:
1. Unpack the heat section and inspect for any shipping

damage. Report any damage found to the carrier.

2. Check the heat section against the plans to make certain the

coil supplied has the connections match the specifications.

3. Firmly attach the heat section to the wall sleeve by lining up

the heat section hooks with the square holes supplied in the
wall sleeve. Snap the heat section in place by exerting pres-
sure downward.

4. The valve is always connected to the supply side of the coil.

There are seven possible coil arrangements available. Each
is shown below. Select the illustration below that matches the
coil supplied and pipe it according to the illustration. Install
valve and other accessories including air vents, steam traps,
stop balance valves, etc., as specified by the design engIneer.

5. For valve installed on right side of the unit, make electrical

connection to matching cap extending from the control box.
For left side valve, make electrical connection to cap mounted
to left side of chassis.

Note: When the heating medium is steam, the supply connec-
tion should be attached to the uppermost tube and the return to
the lower tube. The coil is pitched in the casing to allow drainage
of condensate.

When the heating medium is hot water, the supply connec-

tion should be made to the lowermost tube and the return to the
uppermost tube. Hot water coils should be “flooded” to minimize
air entrapment.

Factory
Supplied
Holes (2)

Wall Sleeve

Hydronic
Heat
Section

Hot Water Coils

Hot Water Coils

Hot Water Coils

Hot Water Coils

Hot Water Coils

Steam Coils

Steam Coils

Steam Coils

Steam Coils

Steam Coils

SUPPLY

RETURN

RETURN

SUPPLY

RETURN

SUPPLY

SUPPLY

RETURN

RETURN

SUPPLY

SUPPLY

RETURN

RETURN OR SUPPLY

RETURN OR SUPPLY

Содержание 106018561

Страница 1: ...McQuay Incorporated Incremental Comfort Conditioners Suite II With Top Mounted Hydronic Heat Section Installation Maintenance Data Group PTAC Part No 106018561 Date May 1999 IM 422 4 Page 1 Rev 5 99...

Страница 2: ...installer exercise caution This equipment is to be installed only by an experienced installation company which employs trained personnel Inspection When the equipment is received all items should be c...

Страница 3: ...Piping Rough in Typ R H L H 3 76mm Min 3 76mm Kickplate Removable Front 7 8 22mm Wall Thickness C A 11 4 32mm 27 8 67mm 16 406mm B 91 8 232mm 51 2 140mm 7 8 22mm 15 8 41mm 15 16 33mm 3 76mm Min Kickp...

Страница 4: ...uctions For panel wall and thin wall construction it is recommended that the optional top angle be used and the wall sleeve be supplied with a turned down flange see Figure 3 The recommended procedure...

Страница 5: ...nd the finished wall surface This is to accommodate the heat section and room cabinet The center of gravity is 103 4 273mm from the rear face of the standard wall sleeve If no subbase is being employe...

Страница 6: ...the brickstop contacts the exterior bricks as illustrated below If a brickstop is not used slide the wall sleeve in the wall so that it extends into the room a minimum of 11 8 29mm beyond the finishe...

Страница 7: ...supplied and pipe it according to the illustration Install valve and other accessories including air vents steam traps stop balance valves etc as specified by the design engIneer 5 For valve installed...

Страница 8: ...the condenser coil cover 8 If louver has not been previously installed connect to wall sleeve as described above 9 If louver is supplied by others as illustrated in Figure 4 page 5 be sure to install...

Страница 9: ...the hold down screw 4 Screw the cabinet to the wall using the screws provided There are two 2 screw holes provided on each side located on the inner flanges of the room cabinet 5 Loosen the four 4 win...

Страница 10: ...ld provide uninterrupted service for many years Scheduled maintenance of this equipment as described below is the key to the equipment s longevity 1 Air filters must be cleaned at regular intervals Tw...

Страница 11: ...0 Units Cooling Chassis 1 Compressor Overload Device 1 Compressor Running Capacitor 1 Evaporator Fan Motor 1 Condenser Fan Motor 1 Pushbutton Switch 2 Damper Switch 2 Thermostat 2 Knob for Thermostat...

Страница 12: ...nly TROUBLE CAUSE CURE 1 Blowers won t operate on COOL 2 Blowers operate on COOL but compressor doesn t start 3 Blowers run on COOL and compressor starts but stops after a short interval 4 Blowers run...

Страница 13: ...or c Align blower assembly and tighten nuts d Noise will disappear after equipment runs awhile e Make necessary adjustments to components f Check for proper adjustment Apply silicone oil or grease to...

Страница 14: ...IM 422 4 Page 14 Rev 5 99 Wiring Diagram Standard Manual Changeover Control Hydronic Heat With Normally Open Valve...

Страница 15: ...IM 422 4 Page 15 Rev 5 99 Wiring Diagram Standard Manual Changeover Control Hydronic Heat With Normally Closed Valve...

Страница 16: ...of the product is other than that published by the Company One Year Refrigeration Circuit Warranty Hermetically sealed motor compressor assemblies and all components of refrigeration circuits not read...

Отзывы: