


15
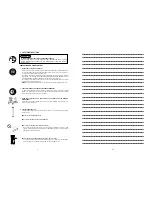
WARNING:
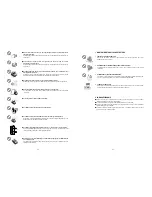
HOW TO CHARGE
●
Charge the Battery at the specified voltage.
Be sure to charge from a 100-240 V AC (for household use) plug socket. Use of the non-
specified voltage not only causes a trouble, but also is dangerous.
●
Handle the power cord with care.
Do not use the Charger whose power cord is damaged.
●
Use a proper plug socket.
Use of the rickety or slack plug socket causes an accident due to overheat. If this is the case,
use another proper one.
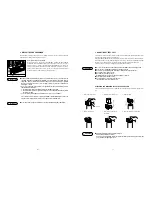
q
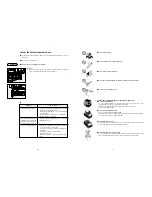
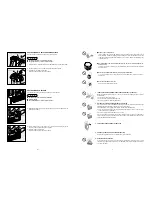
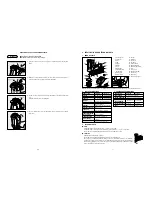
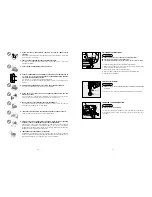
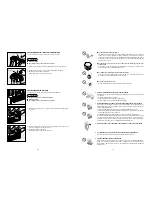
If the Battery is used up, remove it from the tool.
Firmly holding the tool body, press the latches on both side of the Battery with your
fingers to remove.
Battery
w
Insert the AC adapter’s jack into the Charger and plug the power plug into a
plug socket.
The green LED is turned on to inform you of the power-on status.
Green LED
Charger
100-240 V
AC Power Adapter
Latch
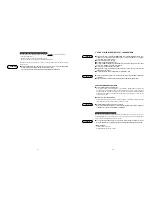
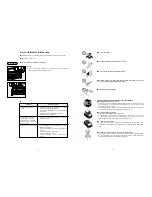
102
DEL verde
DEL roja
Estado
Descripción
1.
2.
3.
4.
5.
6.
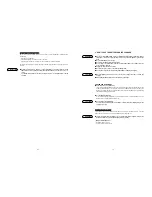
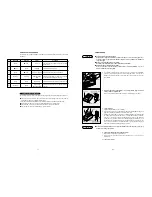
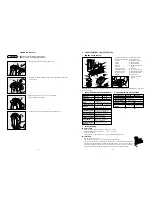
CÓMO UTILIZAR EL CARGABATERÍA
El cargabatería de aplicación especial JC610M presenta las DEL (verde y roja) que indican el estado
del cargabatería y la batería.
Los casos siguientes representan problemas. Sustituir al cargabatería y la batería por nuevas partes.
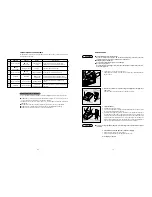
●
La DEL verde no se ilumina si la toma de alimentación del cargador se conecta a una toma de c.d.
de 100~240 V (para uso doméstico) (con la batería no ajustada).
※
Comprobar con otro aparato eléctrico para ver si la electricidad está presente a la toma de
alimentación.
●
Ni la DEL verde, ni la roja se iluminan o parpadean si la batería se coloca en el cargabatería.
●
La DEL verde no se ilumina 150 minutos después de que se haya iluminado la DEL roja.
●
La DEL roja no se ilumina si la batería se coloca en el cargabatería.
Problemas del cargabatería y la batería
○
ON (conectado)
●
OFF
(desconectado)
Alimentación en
contacto
Se ha conectato el cargador. (Estado de la
alimentación en contacto: batería no ajustada)
●
OFF
(desconectado)
○
ON (conectado)
Carga
La batería está en fase de carga.
○
ON (conectado)
●
OFF
(desconectado)
Carga completada
Se ha cargado correctamente la batería.
Parpadea
Parpadea
Alarma de alta
temperatura
La batería es caliente. (Retirarla del cargabatería y dejarla
enfriarse por un determinado período de tiempo antes de cargar).
○
ON (conectado)
○
ON (conectado)
Alarma de batería
La batería es defectuosa. (Sustituirla por una
nueva).
Parpadea
○
ON (conectado)
Alarma de alta
temperatura de la batería
La batería es defectuosa y caliente. (Sustituirla por
una nueva).
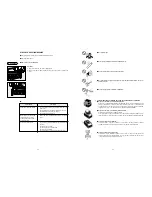
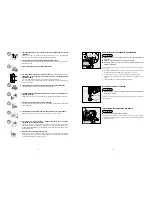
CAUTION:
●
Do not try to charge the Battery which has been fully charged. The life of the Battery could be
shortened.
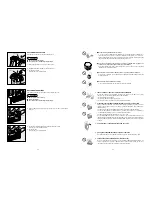
e
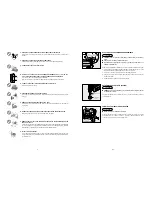
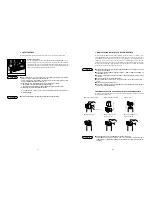
Charge the Battery.
1. Set the Battery firmly in the charger.
2. Once it is set in the charger, charging will start automatically. The red LED is turned
on to inform you that charging is under way.
3. The maximum charging time is approx. 150 minutes. The charging time depends on
the temperature, supply voltage or remaining battery capacity. Once charging is fully
completed, the green LED will be illuminated to inform you that charging has been
completed. If the fully charged Battery is set in the charger again, the red LED will be
turned on again, indicating that it is being charged. This is not an abnormality. After a
while, the green LED will be turned on to indicate completion of charging.
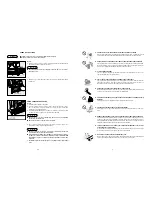
r
The Illuminated Green LED Indicates completion of charging.
1. Holding down the charger, remove the Battery.
2. Disconnect the AC adapter’s power plug from the plug socket.
Now Charging is complete.
Battery
Red LED
Charger
100-240 V
AC Power Plug