Q u i c k S t a r t G u i d e
35
copy, or paste operation. There is only one level
of Undo. Pressing UNDO a second time re-
stores the original cut, copy, or paste operation
(you can undo an undo!).
Master Fader/Shortcuts Section
SELECT
CONTROL
WRITE
ALT
MASTER L/R
SHORTCUTS
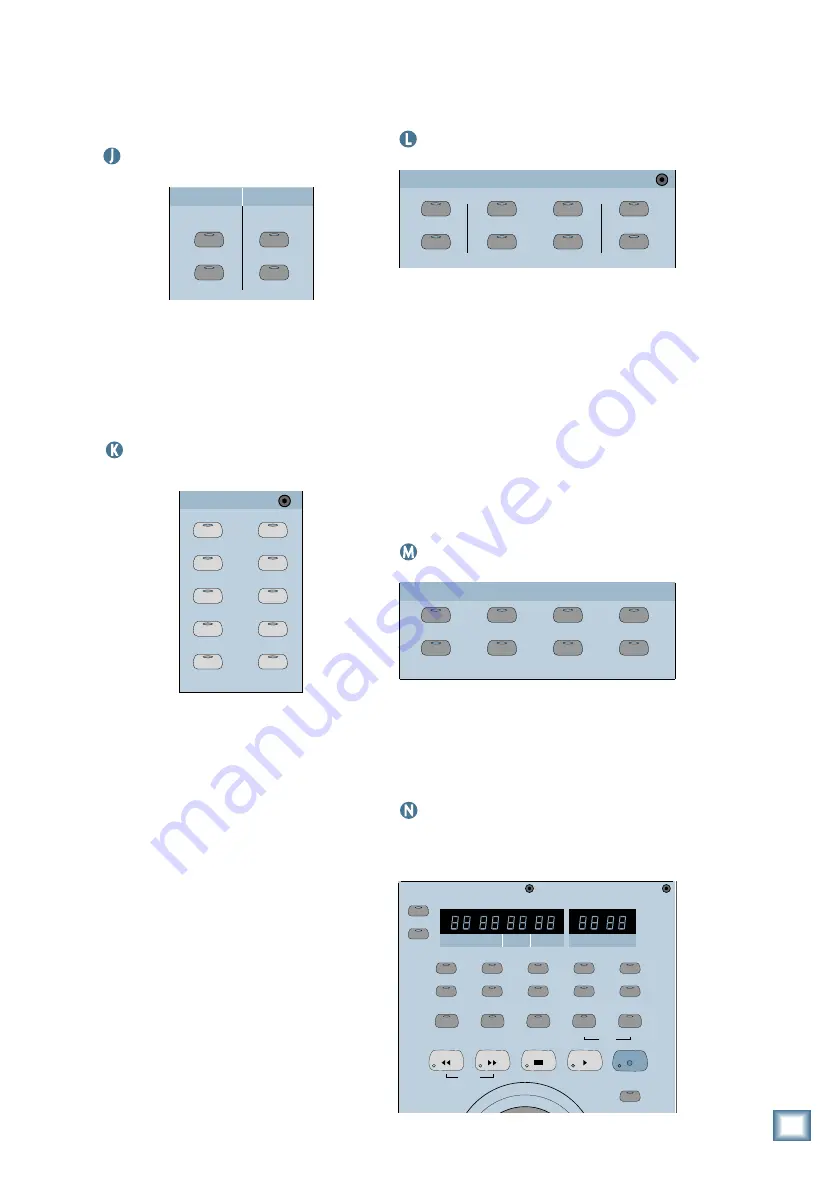
These buttons are used to select the Master
Fader and to put it into write mode for auto-
mation. The Shortcuts buttons act as modifier
keys, used in combination with other buttons
to perform certain operations quickly. The
CONTROL and ALT buttons are equivalent to
the Ctrl and Alt keys on a computer keyboard.
Bus Assignment Section
BUS 1
BUS 2
BUS 3
BUS 4
BUS 5
BUS 7
BUS 6
BUS 8
L-R
ROUTE TO
TAPE
ASSIGNMENT
ASSIGN
ASSIGN
ASSIGN
ASSIGN
ASSIGN
ASSIGN
ASSIGN
ASSIGN
ASSIGN
ASSIGN
Use this section to assign channels to any of
ten different buses (Bus 1–8 and L-R Main),
and also to the direct TAPE OUTs. When a Bus
1–8 button is selected, press a channel’s AS-
SIGN button to route the channel’s post-fader
signal to the selected bus. Since the ASSIGN
button lights, you can quickly see what chan-
nels have been assigned to the bus.
When the MASTER L-R button is selected,
press the channel ASSIGN buttons to route the
channels’ post-fader signal to the L-R bus. The
Effects Returns and the Bus 1–8 Surround
Masters can also be assigned to the L-R bus.
Since the ASSIGN button lights, you can
quickly see what channels have been assigned
to the L-R bus.
The ROUTE TO TAPE button activates the
Digital 8•Bus’ built-in patch bay. Use it to as-
sign a selected channel to one of the 24 Tape
Outputs. The Effects Returns and the Bus 1–8
Surround Masters can also be assigned to the
Tape Outputs. When ROUTE TO TAPE is se-
lected, press the SELECT button on the
channel you want to assign, then press the AS-
SIGN button for the tape out you want to
assign the selected channel to.
Automation Section
BYPASS
FADERS
MUTES
AUTO TOUCH
FADER MOTORS
OFF
PAN
ALL
TRIM LEVELS
AUTOMATION
Use this section to create automated mixes.
The BYPASS button turns automation playback
on and off.
The FADER MOTORS OFF button disen-
gages the fader motors and prevents any
automated fader motion during automation
playback. This does not affect fader level
changes that have been recorded into automa-
tion. The level changes still play back, only the
faders don’t move.The FADERS, MUTES, PAN,
and ALL buttons determine
what
is recorded to
automation, and the AUTO TOUCH and TRIM
LEVELS buttons determine
how
moves are re-
corded to automation.
Session Setup Section
GROUP
GENERAL
PLUG INS
DIGITAL I/O
SAVE
SAVE AS...
NEW
LOAD
SETUP
Buttons in this section are used for file main-
tenance and for setting up system functions
such as Virtual Groups, Digital I/O, meter as-
signment, and MIDI parameters. For more
information, see “General Setup” in Chapter 3 of
the Digital 8•Bus Owner’s Manual.
Transport Section
This section provides control for external re-
corder transports, time display, snapshots,
locates, and loops.
SMPTE VIEW
SET TIME
MINUTES
HOURS
SECONDS
FRAMES
BARS
BEATS
LOOP
TICKS
POSITION
RANGE
MODE
FROM
TO
2
3
4
5
7
1
6
8
9
0
ENTER
STORE
LOCATOR
LOOP
SNAPSHOT
JOG & SHUTTLE
SHUTTLE
REWIND
FAST FWD
STOP
PLAY
RECORD
Digital 8•Bus Overview


