


Application Note #480
6
www.lutron.com
Using Sensor Dimmer Programming Mode
Programming mode consists of multiple menus of operation with which the user can interact. The main menu allows the
user to select which feature they would like to modify. The selection menu allows the user to change the setting of the
feature they selected in the main menu.
Note:
Once a feature is modified, the setting is immediately saved.
There are step-by-step examples on pages 6-8.
Entering Programming Mode (refer to dimmer picture on page 1)
1.
Pull
the FASS
TM
(air gap) toward you into the “Off” position.
2.
Press and hold
the Tap button of the product you are programming.
3.
Push
the FASS
TM
away from you into the “On” position
while continuing to hold
the Tap button for
approximately 5 seconds.
LED 1 will blink quickly to indicate that you have entered programming mode.
Note:
If there is no activity for 1 minute, the dimmer will exit programming mode automatically.
Entering Selection
1.
Press
the raise/lower rocker to change the LED position
to indicate which feature you would like to modify (refer to
picture at right):
•
LED #7 – Advanced Programming Mode (see pages 8-16);
•
LED #4 – Occupied Level
•
LED #3 – Auto-On (occupancy version only)
•
LED #2 – Sensitivity
•
LED #1 – Timeout
2.
Press
the Tap button
one time
and the feature will be
selected for modification.
3. Go to the appropriate section on pages 6-8 to continue its programming.
Selecting a Timeout Duration
Once you've selected "Timeout" from the main sensor programming
menu (above), proceed with the following steps.
In the Timeout Menu
1.
Press
the raise/lower rocker to move the blinking LED to desired
timeout duration.
2.
Press
the Tap button
one time
to set the duration and return to
the Main Sensor Menu.
Note:
The default setting is 5 minutes.
To exit programming mode,
press and hold
the Tap button for 5
seconds. Alternatively wait 1 minute or pull the FASS
TM
out and the
dimmer will exit from programming mode.
*
Test Mode
is a temporary, short timeout (less than 15-seconds) that can be used to test the sensor’s coverage. After
entering test mode, the device will exit test mode automatically after 5 minutes, or when any button is pressed. If no
motion is detected, the light will turn off. If motion is detected, the light will turn on and continue to stay on for as long
as motion is detected. The lens will flash periodically, indicating that motion has been detected.
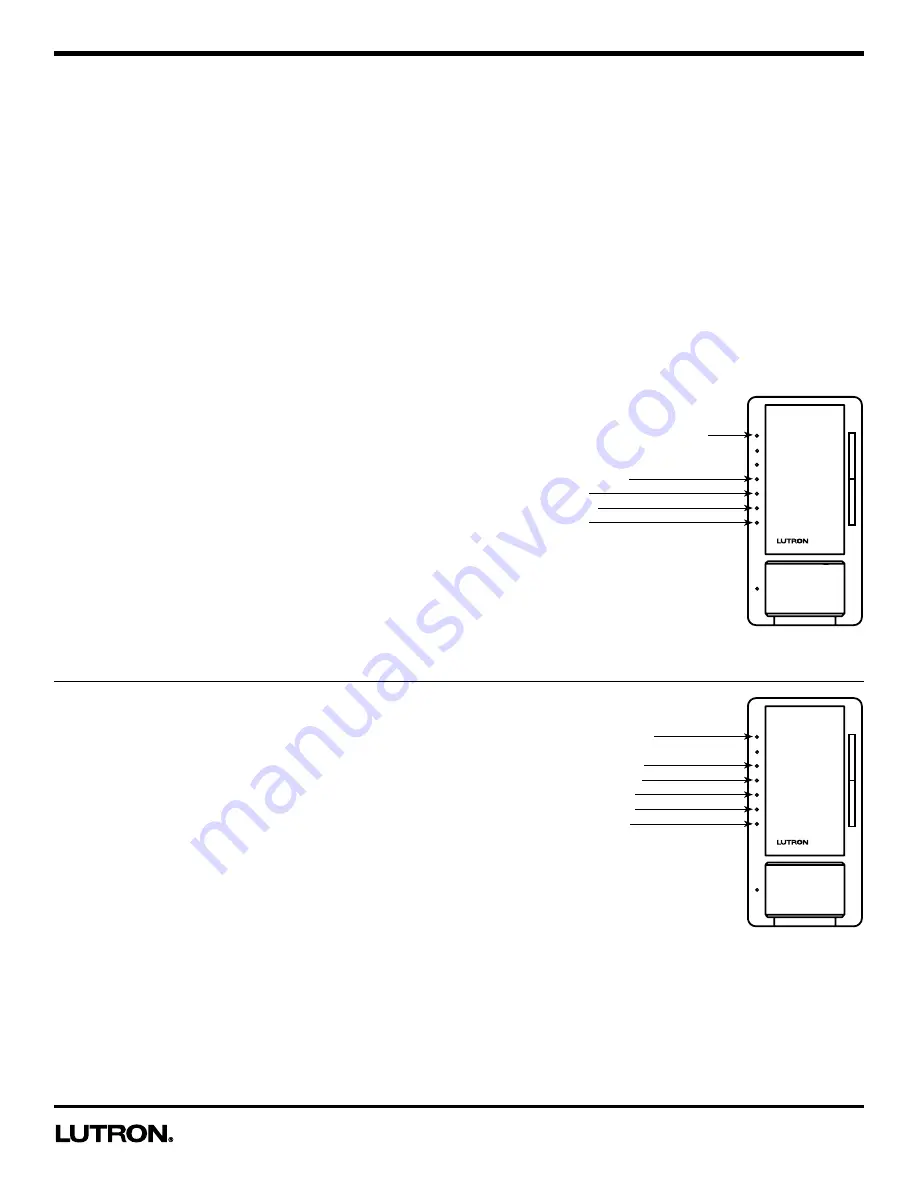
Main Sensor Menu
IL7: Advanced Programming Mode
IL4: Occupied Level
IL3: Auto-On
IL2: Sensitivity
IL1: Timeout
Timeout Menu
LED 7: Test mode
*
LED 5: 30 minutes
LED 4: 15 minutes
LED 3: 5 minutes
LED 2: 3 minutes
LED 1: 1 minute


