


84
Connecting to Your NVR Over the Internet on PC or Mac
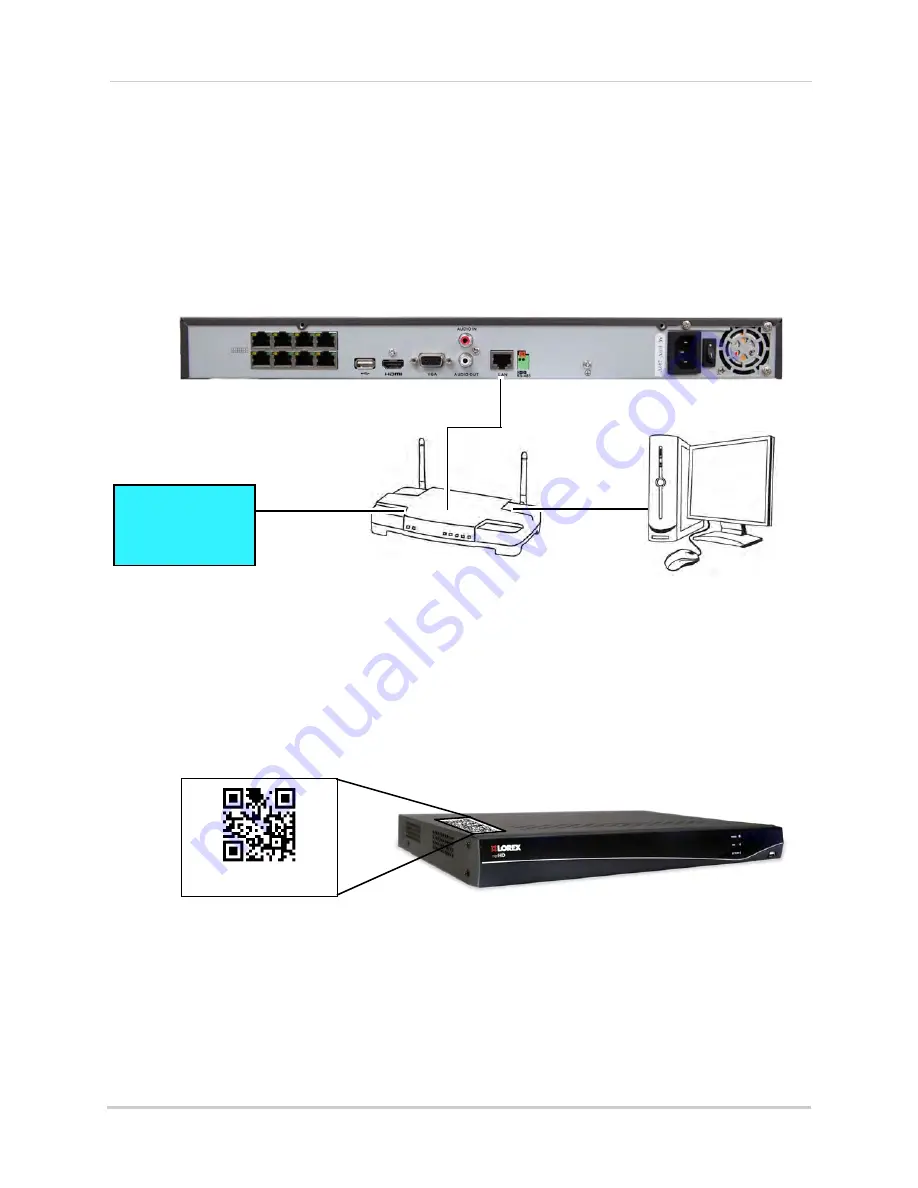
Step 1 of 3 Connect your NVR to your Router
1
Power off your NVR by turning the power switch to
.
2
Connect an Ethernet cable (included) to the
LAN
port on the rear panel of the NVR. Connect
the other end of the Ethernet cable to an empty LAN port (usually numbered 1~4) on your
router.
3
Turn the power switch to
I
to power the NVR back on.
ROUTER
(Not Included)
COMPUTER
(Not Included)
(not required for
local viewing)
INTERNET
Ethernet Cable (included)
8-channel model shown
Step 2 of 3: Obtain the NVR’s Device ID
The Device ID is a unique code that allows your system to handshake with the Lorex servers
for connection over the Internet.
To find the Device ID:
1
Locate the QR code label on the top of the NVR.
Device ID: xxxxxxxxx
2
Write down the
Device ID
.
Step 3 of 3: Connect to the NVR over the Internet
Follow the steps below to connect to your NVR over the Internet on PC or Mac.
NOTE:
Make sure to upgrade your NVR firmware and client software to the latest version.
You
must have the latest NVR firmware and client software to connect to the NVR over the
Internet.
Содержание LNR340
Страница 17: ...xv Web Browser Remote Playback 174 Troubleshooting 176...
Страница 18: ...xvi...


