36
Using the Main Menu
3
When the DVR restarts, click
Yes
to
confirm the default resolution.
NOTE:
If your system resolution is already
in 1024 x 768, pressing and holding
the Stop button will not restart the
system.
Adjusting Menu Transparency
You can increase or decrease the
transparency of the on-screen menus.
To adjust the transparency of
on-screen menus:
1
Click the
Output
tab.
2
Drag the
Transparency
slider to adjust
transparency.
3
Click
Apply
to save your settings.
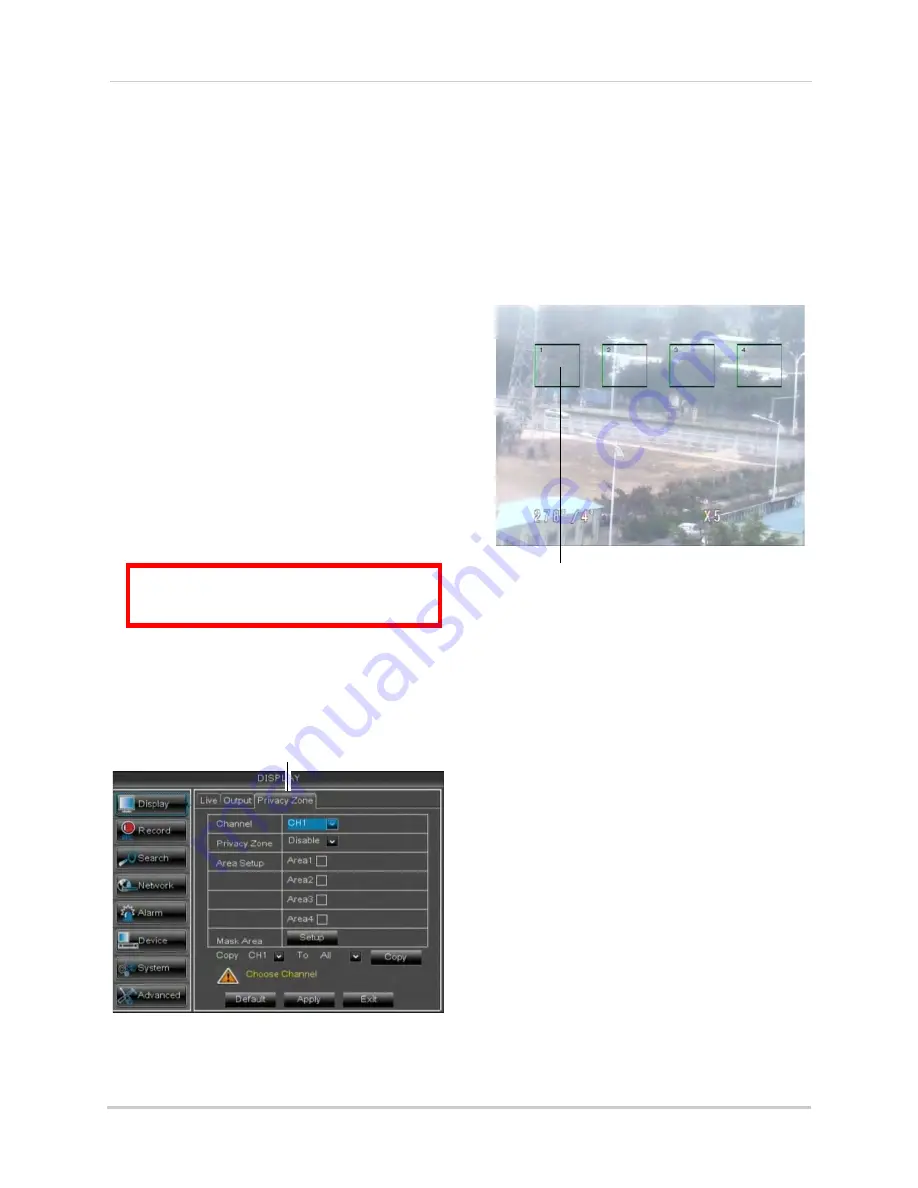
Adding Privacy Zones
A privacy zone allows you to block out
up to 4 portions of each channel with a
black square.
ATTENTION
: Areas covered by privacy
zones are not visible in recordings.
To configure a privacy zone:
1
Click the
Privacy Zone
tab.
2
In the
Channel
drop-down menu, select
the channel you wish to configure.
Privacy Zone
3
Configure the following:
•
Channel
: Select the channel you wish to
configure.
•
Privacy Zone
: Select
ON
to enable privacy
zones or
OFF
to disable privacy zones.
•
Area Setup
: Select the
Area1~4
checkboxes to enable up to 4 privacy
zones.
4
Click the
Setup
button next to Mask Area.
The Privacy Area setup screen opens.
Click and drag to move privacy zones
Click Inside the edge and drag to resize
• Click on a privacy area and drag to change
its location.
• Click on the edge of a privacy area and
drag to resize a privacy area.
• Right-click when you are finished to exit.
5
(Optional) Use the drop-downs next to
Copy
to copy privacy areas to another
channel or all channels. Click the
Copy
button to copy privacy areas.
6
Click
Apply
to save your settings.
Creating a Custom Split-screen
Display
You can create a custom split-screen
display and re-arrange where channels
are placed.
To re-arrange the split-screen display:
1
Select the
Output
tab.
Содержание LHD200
Страница 16: ...xiv ...


