


–
To find the WPA/WPA2 preshared key or passphrase for the wireless network, see the documentation that
came with the access point, see the Embedded Web Server associated with the access point, or consult your
system support person.
Installing the printer on a wireless network (Windows)
Before installing the printer on a wireless network, make sure:
•
Your wireless network is set up and is working properly.
•
The computer you are using is connected to the same wireless network where you want to set up the printer.
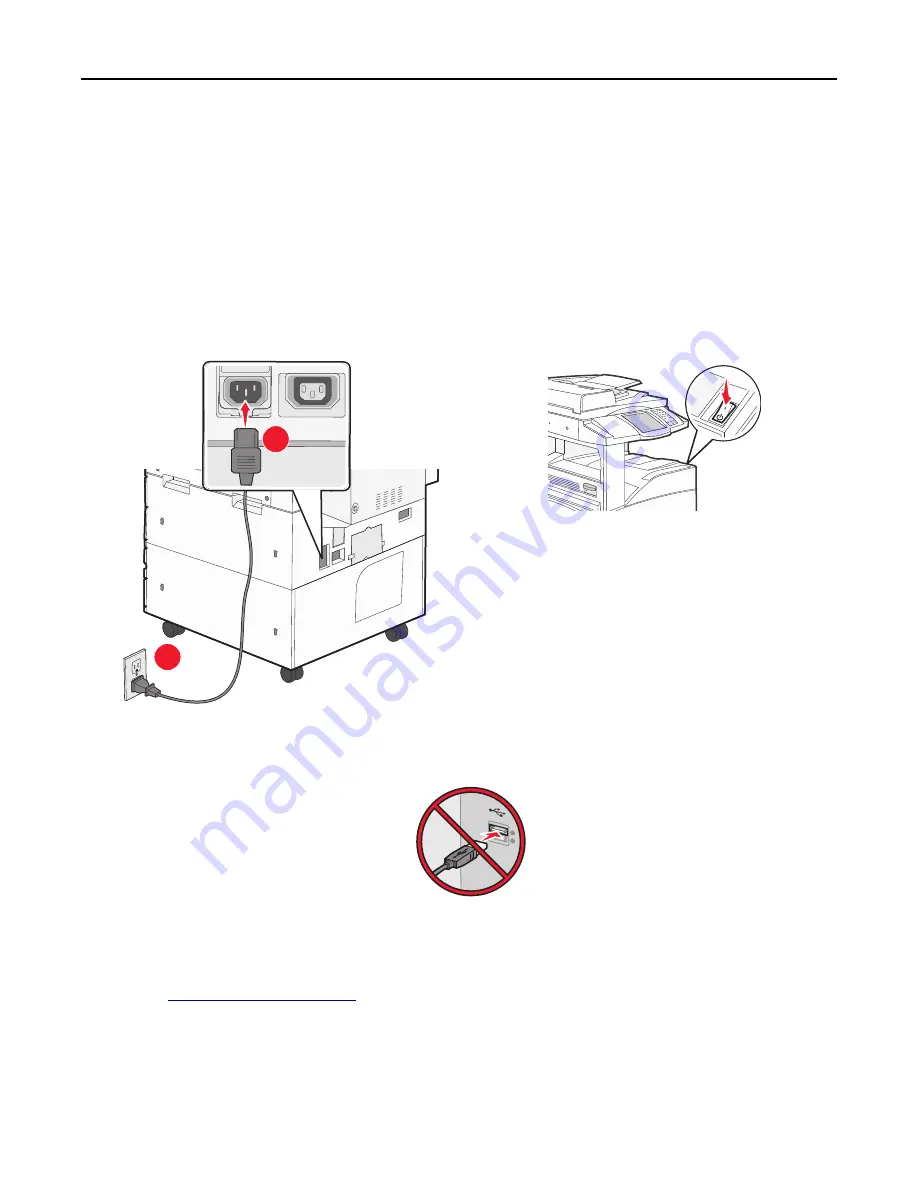
1
Connect the power cord to the printer, then to a properly grounded electrical outlet, and then turn on the printer.
2
1
Note:
Make sure the printer and the computer are fully on and ready.
Warning—Potential Damage:
Do not connect the USB cable until instructed to do so on the computer screen.
2
Obtain a copy of the software installer package.
•
From the
Software and Documentation
CD that came with your printer.
•
From our Web site:
Go to
http://support.lexmark.com
, and then navigate to:
SUPPORT & DOWNLOAD
> select your printer > select your operating system
3
Double
‑
click the software installer package.
Wait for the installation dialog to appear.
Additional printer setup
41
Содержание X860de
Страница 6: ...Edition notice 287 Power consumption 291 Index 304 Contents 6 ...
Страница 211: ...3 Place the tray into the printer 4 Remove the cable cover Maintaining the printer 211 ...
Страница 239: ...3 Pull the jam up 4 Close Door E 5 Close Door A 230 paper jam 1 Open Door D Troubleshooting 239 ...
Страница 242: ...231 paper jam 1 Open Door D 2 Remove the jam D D 3 Close Door D Troubleshooting 242 ...
Страница 250: ...282 paper jam 1 Open Door F 2 Remove the jam 3 Close Door F Troubleshooting 250 ...
Страница 254: ...28x paper jam 284 paper jam 1 Open Door F 2 Remove the jam 3 Close Door F Troubleshooting 254 ...
Страница 255: ...4 Open Door G 5 Remove the jam 6 Close Door G 7 Lift Door H 8 Remove the jam 9 Close Door H Troubleshooting 255 ...
Страница 256: ...285 286 paper jams 1 Lift Door H 2 Remove the jam 3 Close Door H 287 288 paper jams 1 Open Door F Troubleshooting 256 ...


