


Menu item
Description
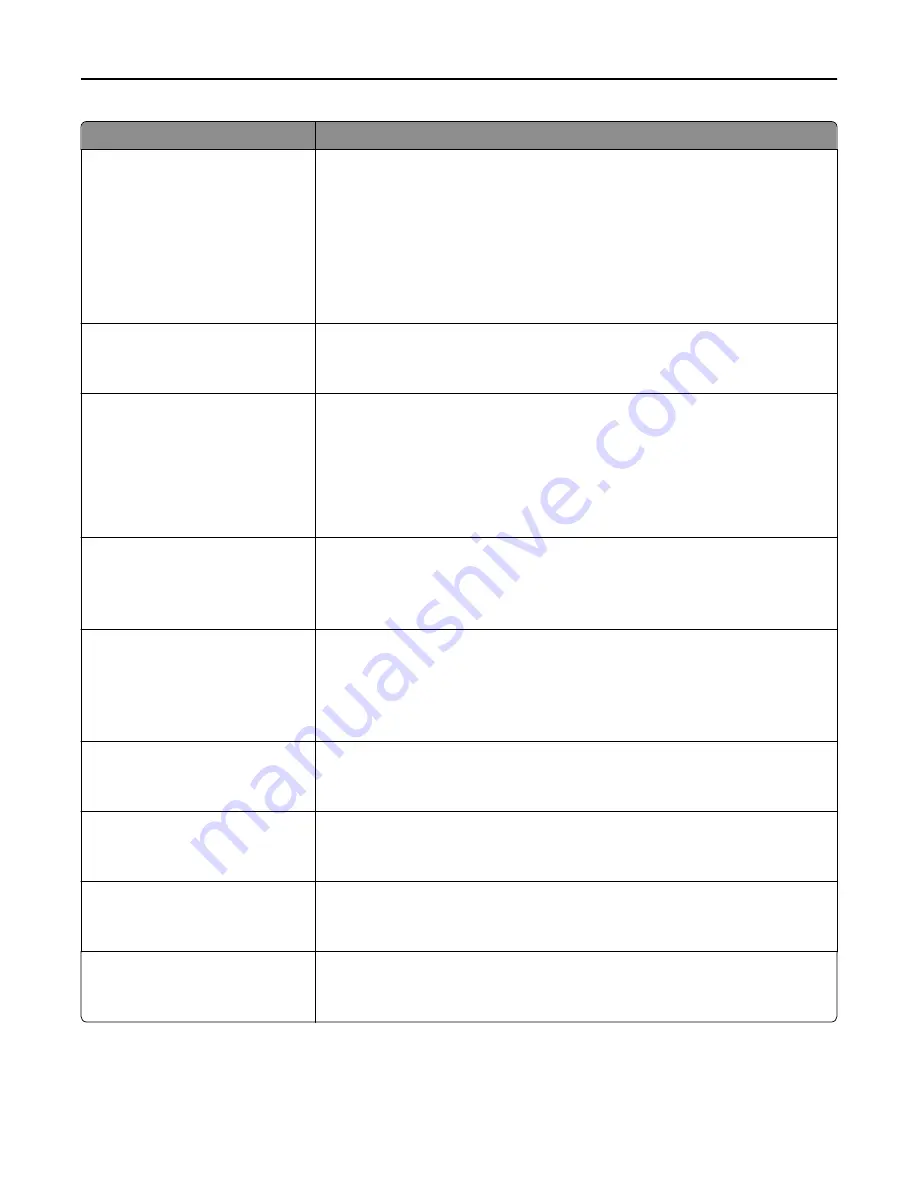
JPEG Quality
Best for content
5–90
Sets the quality of a JPEG photo image in relation to file size and the quality of the
image
Notes:
•
“Best for content” is the factory default setting.
•
5 reduces the file size, but the quality of the image is lessened.
•
90 provides the best image quality, but the file size is very large.
•
This menu item applies to all scan functions.
E
‑
mail images sent as
Attachment
Web Link
Specifies how the images will be sent
Note:
Attachment is the factory default setting.
Use Multi
‑
Page TIFF
On
Off
Provides a choice between single-page TIFF files and multiple
‑
page TIFF files. For a
multiple-page scan to e-mail job, either one TIFF file is created containing all the
pages, or multiple TIFF files are created with one file for each page of the job.
Notes:
•
On is the factory default setting.
•
This menu item applies to all scan functions.
Transmission Log
Print log
Do not print log
Print only for error
Specifies whether the transmission log prints
Note:
“Print log” is the factory default setting.
Log Paper Source
Tray <x>
Manual Feeder
Manual Env
MP Feeder
Specifies a paper source for printing e-mail logs
Note:
Tray 1 is the factory default setting.
Log Output Bin
Standard Bin
Bin <x>
Specifies an output bin for the printed e
‑
mail log
E
‑
mail Bit Depth
8 bit
1 bit
Enables the Text/Photo mode to have smaller file sizes by using 1
‑
bit images when
Color is set to Off.
Note:
8 bit is the factory default setting.
Custom Job scanning
On
Off
Lets you copy a document that contains mixed paper sizes into a single job
Scan Preview
On
Off
Specifies whether a preview will appear on the display for scan jobs
Note:
Off is the factory default setting.
Understanding printer menus
174
Содержание X860de
Страница 6: ...Edition notice 287 Power consumption 291 Index 304 Contents 6 ...
Страница 211: ...3 Place the tray into the printer 4 Remove the cable cover Maintaining the printer 211 ...
Страница 239: ...3 Pull the jam up 4 Close Door E 5 Close Door A 230 paper jam 1 Open Door D Troubleshooting 239 ...
Страница 242: ...231 paper jam 1 Open Door D 2 Remove the jam D D 3 Close Door D Troubleshooting 242 ...
Страница 250: ...282 paper jam 1 Open Door F 2 Remove the jam 3 Close Door F Troubleshooting 250 ...
Страница 254: ...28x paper jam 284 paper jam 1 Open Door F 2 Remove the jam 3 Close Door F Troubleshooting 254 ...
Страница 255: ...4 Open Door G 5 Remove the jam 6 Close Door G 7 Lift Door H 8 Remove the jam 9 Close Door H Troubleshooting 255 ...
Страница 256: ...285 286 paper jams 1 Lift Door H 2 Remove the jam 3 Close Door H 287 288 paper jams 1 Open Door F Troubleshooting 256 ...


