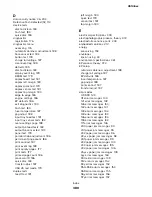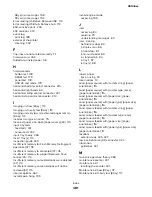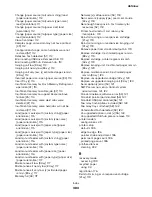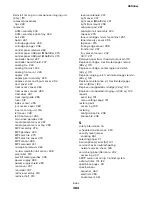
Change [paper source] to [custom string] load
[paper orientation] 112
Change [paper source] to [custom type name]
load [orientation] 111
Change [paper source] to [paper size] load
Change [paper source] to [paper type] [paper size]
load [orientation] 112
Close front door 112
Complex page, some data may not have printed
Configuration change, some held jobs were not
restored [57] 112
Defective flash detected [51] 113
Error reading USB drive. Remove USB. 113
Error reading USB hub. Remove hub. 113
Imaging unit low [84.xy] 113
Imaging unit nearly low [84.xy] 113
Imaging unit very low, [x] estimated pages remain
Incorrect paper size, open [paper source] [34] 114
Insert Tray [x] 114
Insufficient memory for Flash Memory Defragment
Insufficient memory to collate job [37] 114
Insufficient memory to support Resource Save
Insufficient memory, some Held Jobs were
Insufficient memory, some held jobs will not be
restored [37] 115
Load [paper source] with [custom string] [paper
Load [paper source] with [custom type name]
[paper orientation] 115
Load [paper source] with [paper size] [paper
Load [paper source] with [paper type] [paper size]
[paper orientation] 116
Load manual feeder with [custom string] [paper
Load manual feeder with [custom type name]
[paper orientation] 116
Load manual feeder with [paper size] [paper
Load manual feeder with [paper type] [paper size]
[paper orientation] 117
Maintenance kit low [80.xy] 117
Maintenance kit nearly low [80.xy] 117
Maintenance kit very low, [x] estimated pages
remain [80.xy] 117
Memory full [38] 117
Network [x] software error [54] 118
Non
‑
Lexmark [supply type], see User’s Guide
Not enough free space in flash memory for
resources [52] 118
Printer had to restart. Last job may be
incomplete. 119
Reinstall missing or unresponsive cartridge
Reinstall missing or unresponsive imaging unit
Remove paper from standard output bin 119
Replace cartridge, 0 estimated pages remain
[88.xy] 119
Replace cartridge, printer region mismatch
Replace imaging unit, 0 estimated pages remain
Replace maintenance kit, 0 estimated pages
remain [80.xy] 120
Replace unsupported cartridge [32.xy] 120
Replace unsupported imaging unit [32.xy] 120
Serial option [x] error [54] 121
SMTP server not set up. Contact system
administrator. 121, 122
Standard network software error [54] 121
Standard parallel port disabled [56] 121
Standard USB port disabled [56] 121
Too many flash options installed [58] 122
Too many trays attached [58] 122
Unformatted flash detected [53] 122
Unsupported option in slot [x] [55] 122
Unsupported USB hub, please remove 113
printer models
configurations 29
printer setup
defaults 185
edge to edge 186
parallel strobe adjustment 186
permanent page count 186
printed page count 186
printhead lenses
cleaning 332
R
recovery mode
accessing 199
recycled paper
using 32
registration 176
Reinstall missing or unresponsive cartridge
[31.xy] 119
4514-6xx
Index
383
Содержание M3150
Страница 12: ...Part name index 393 4514 6xx Table of contents 12 ...
Страница 20: ...4514 6xx 20 ...
Страница 38: ...4514 6xx 38 ...
Страница 172: ...4514 6xx 172 ...
Страница 233: ...c Insert the cable into the hole B d Route the cable using the new path 4514 6xx Parts removal 233 ...
Страница 246: ...3 Remove two screws A and then remove the cooling fan mount A 4514 6xx Parts removal 246 ...
Страница 256: ...5 Remove the four screws B and then remove the right front mount B 4514 6xx Parts removal 256 ...
Страница 258: ...Cartridge plunger removal 1 Open the front door 2 Tilt the cartridge plunger 4514 6xx Parts removal 258 ...
Страница 260: ...b Set the spring over the plunger 4514 6xx Parts removal 260 ...
Страница 262: ...Bezel removal MS610dn 1 Open the front door 2 Push the latches A and then remove the bezel A 4514 6xx Parts removal 262 ...
Страница 277: ...3 Squeeze the latches B to release the left and right links B 4514 6xx Parts removal 277 ...
Страница 300: ...3 Place the printer on its rear side 4 Release the sensor flag A 4514 6xx Parts removal 300 ...
Страница 301: ...5 Remove the screw B 6 Remove the sensor flag bracket C 4514 6xx Parts removal 301 ...
Страница 306: ...8 Remove the three screws A A 9 Disconnect the cable from the pick lift motor gearbox 4514 6xx Parts removal 306 ...
Страница 323: ...3 Swing the right cover backward to remove 4 Remove the screw D 4514 6xx Parts removal 323 ...
Страница 333: ...4514 6xx 333 ...
Страница 335: ...Assembly 1 Covers 4514 6xx Parts catalog 335 ...
Страница 338: ...4514 6xx Parts catalog 338 ...
Страница 339: ...Assembly 2 Electronics 1 1 2 3 4 5 7 9 10 11 6 8 12 4514 6xx Parts catalog 339 ...
Страница 342: ...4514 6xx Parts catalog 342 ...
Страница 343: ...Assembly 3 Electronics 2 4 3 2 1 5 6 8 9 7 4514 6xx Parts catalog 343 ...
Страница 345: ...4514 6xx Parts catalog 345 ...
Страница 346: ...Assembly 4 Frame 10 11 12 13 14 9 1 5 6 7 8 4 4 2 3 4514 6xx Parts catalog 346 ...
Страница 349: ...Assembly 5 Option trays 3 4 5 6 1 2 4514 6xx Parts catalog 349 ...
Страница 354: ...4514 6xx Parts catalog 354 ...
Страница 356: ...4514 6xx Parts catalog 356 ...
Страница 364: ...4514 6xx 364 ...
Страница 376: ...4514 6xx 376 ...
Страница 386: ...4514 6xx Index 386 ...
Страница 392: ...4514 6xx Part number index 392 ...
Страница 398: ...4514 6xx Part name index 398 ...


