140
3.
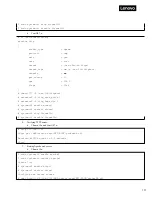
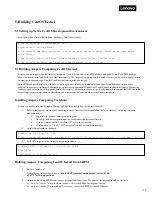
Extract kernel source package:
4.
Install the SRPM.
5.
Build the kernel source.
6.
Refer to the generic CentOS documentation and RPMBUILD manual on how rpmbuild should work.
Building Ampere Computing CentOS Kernel using Ampere Computing CentOS Patches
1.
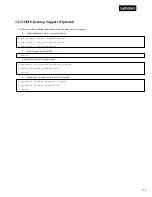
Clone ampere-centos-kernel
2.
Checkout Ampere CentOS 7.5
3.
Build Ampere CentOS RPM files
When the above steps are completed, the Ampere CentOS RPM files would be located at:
./amp_sw_centos_7.5-yymmdd.tar.xz ./amp_sw_centos_7.5-yymmdd.ilp32.tar.xz
Where yy is the last two digits of the year, mm is the digit of the month, and dd is the digit of the day. The
amp_sw_centos_7.5-yymmdd.tar.xz is the non-optimized version of the Ampere CentOS kernel. The
amp_sw_centos_7.5-yymmdd.ilp32.tar.xz is the optimized version of the Ampere CentOS kernel.
Building Applications SRPMs
Application builds need to use the CentOS native compiler instead of Ampere Computing native compiler.
Remove the Ampere Computing toolchain’s path from PATH and execute rpmbuild for the applications RPM package in the normal
manner.
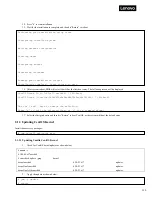
$ cd SRPMS/
$ rpm
–
ivh kernel-aarch64-4.14.0-49.el7.amp.src.rpm
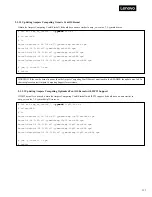
$ cd ampere-centos-kernel
$ git checkout amp-centos-7.5-kernel
$ cd ../ampere-centos-build
$ git checkout amp-centos-7.5-build
$ tar xf amp_sw_centos_7.5-yymmdd.src.tar.xz
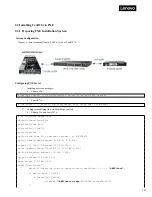
$ cd ~/rpmbuild
$ ls
SOURCES/
SPECS/
$ rpmbuild --define "%_topdir `pwd`"
–
bb --without debuginfo --without perf --without tools
SPECS/kernel-xgene.spec
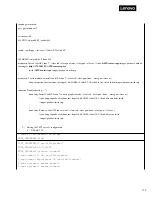
# To build ILP32 kernel, use the ilp32-src package and kernel-xgene-optimized.spec
$ rpmbuild --define "%_topdir `pwd`"
–
bb --without debuginfo --without perf --without tools
SPECS/kernel-xgene-optimized.spec
$ mkdir ampere-centos
$ cd ampere-centos
$ git clone https://github.com/AmpereComputing/ampere-centos-kernel
$ git clone https://github.com/AmpereComputing/ampere-centos-build
$ ./ampere-centos-build.sh
Содержание ThinkSystem HR350A
Страница 37: ...37 ...
Страница 55: ...55 3 4 7 2 PCI Express GEN 2 Settings ...
Страница 59: ...59 ...
Страница 62: ...62 ...
Страница 66: ...66 Entering this menu item will allow users to configure the device parameters ...
Страница 71: ...71 Patrol Scrub Enable disable Patrol Scrub for DDR controller ...
Страница 85: ...85 3 9 3 View FRU Information ...
Страница 89: ...89 ...
Страница 90: ...90 3 9 6 BMC User Settings This section allows users to Add Delete and Set Privilege levels for BMC users ...
Страница 97: ...97 Figure 2 Configuring IE ESC step 2 Figure 3 Configuring IE ESC step 3 ...
Страница 107: ...107 4 9 3 Event Log 4 9 4 Images Redirection This page is used to configure the images into BMC for redirection ...
Страница 115: ...115 4 9 19 Virtual Media 4 9 20 IPMI Configuration 4 10 Remote Control This page is used to launch KVM ...
Страница 118: ...118 3 Select Restore Configuration and upload the downloaded backup files ...
Страница 120: ...120 ...
Страница 123: ...123 Select OK to continue ...

