Group 7
Data entry/Programming
Page 111
JET2 neo
Release R1.12 en
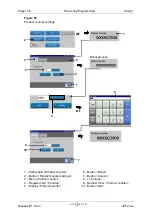
Confirm the input by pressing the button
<Set>
(9) or cancel the process with the button
<Cancel>
(10).
The set print stop value is now displayed in the status field
<Product counter>
(11) of
the basic menu. For better visualization that a pre-defined print stop has been defined,
the field is displayed with a red frame.
7.2.2.5 Macro generator
With the macro generator, pre-defined functions can be assigned to the two freely
assignable buttons in the menu bar of the basic menu.
Proceeding:
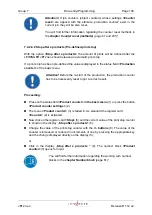
(Example: The button <Macro 1> should be
assigned the function “StartExplorer”.)
Press the button
<Macro generator>
(1).
The menu
<Macro generator>
(2) is faded in. As standard the register card
<Macro
1>
(3) is activated.
Press on the arrow button of the pop-up window
<Shortcut on …>
(4). The op-up will
be opened for selection.
Now select the desired function link (5), in this case „Explorer“.
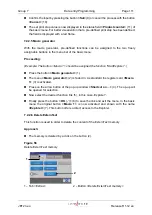
Finally press the button
<OK
(
)
>
(6) to save the link and exit the menu. In the basic
menu the original button
<Macro 1>
is now activated and shown with the name
<Explorer>
(7). This button offers a direct access to the Explorer.
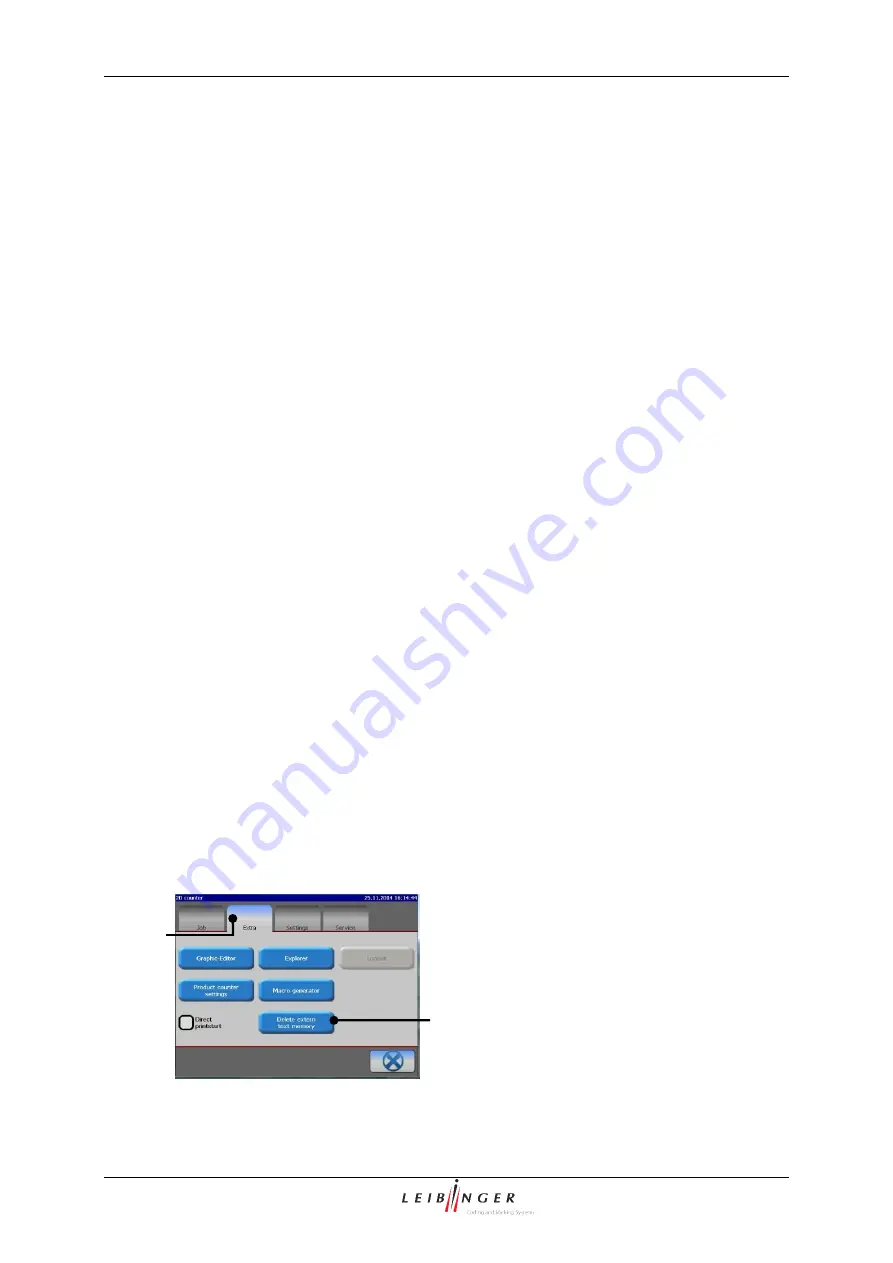
7.2.2.6 Delete ExternText
This function is used in order to delete the content of the ExternText memory.
Approach:
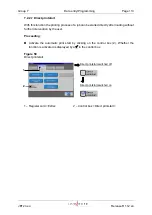
The memory is deleted by a click on the button (2).
Figure 56
Delete ExternText memory
1
– Tab <Extras>
2
– Button <Delete ExternText memory>
1
2
Содержание JET2 neo
Страница 1: ...Manual LEIBINGER JET2NEO Release 1 12en ...
Страница 2: ......
Страница 11: ...Group 1 Table of contents Page 9 JET2 neo Release R1 12 en ...
Страница 12: ......
Страница 21: ...Group 2 Safety Page 19 JET2 neo Release R1 12 en 2 4 Safety sticker Figure 1 Safety sticker ...
Страница 276: ...Page 274 Appendix Group 12 Release R1 12 en JET2 neo Interface X4 Inputs Interface X3 Outputs ...


