17
17
INSTALLER MANUAL
10. When de-aeration has been completed turn the motor protection
switch QM1 off and also manual control function off.
11. Open shut-off valve (1) at the back of the group of fill valves.
12. Close both ball valves (3) and (4).
13. Remove the fill hoses.
14. Fasten the expansion vessel back in its place in the foremost ball
valve (3) in the group of fill valves.
15. Remove the safety valve on the expansion vessel.
16. Fill ¾ of the expansion vessel with water/ethanol or water/glycol
mixture.
17. Fasten the safety valve to the expansion vessel.
18. Open the foremost shut-off valve (3) in the group of fill valves.
19. Remove and clean the net strainer (5) on the mud separator,
repeat this several times, if necessary. The red-handled valves (1)
and (2), as well as the valve under the fill container (3) must be
closed in order to prevent fluids from running out.
Filling and de-aeration have now been completed.
4.2.3. Heating and domestic
hot water connections
Remove the crown panel from the
geothermal heat pump’s upper part
for the duration of installation works
by undoing the two screws shown in
the picture. Pull the crown panel directly forward and lift it off the heat
pump. Make the heat distribution and domestic water connections as
shown in the picture below.
1
2
3
4
5 6
7
8
10
9
11
12
13
1. Lämmönjako 1, meno
Heating flow 1
22 mm
2. Lämmönjako 1, paluu Heating return 1
22 mm
3. Lämmönjako 2, meno
Heating flow 2
22 mm
4. Lämmönjako 2, paluu Heating return 2
22 mm
5. Kylmä vesi
Cold water
22 mm
6. Lämmin vesi
DHW flow
22 mm
7. Paisunta
Expansion
¾”
8. Maapiiri, meno
Collector circuit, flow
1”
9. Maapiiri, paluu
Collector circuit, return
1”
10. Jäähdytys, meno
Cooling, flow
1”
11. Jäähdytys, paluu
Cooling, return
1”
12. Aurinkoyhde, meno
Solar connection, flow
¾”
13. Aurinkoyhde, paluu
Solar connection, return ¾”
14. Kv-kierto
Hot water circulation
½”
Varaajan täytön yhteydessä varaajassa olevan ilman on päästävä vapaasti
poistumaan. Huom! Ei ilmaventtiilin tai varoventtiilin kautta.
While filling the storage tank outgoing air has to be freely deflated.
NB! Not via air valve or safety valve.
14
Heating connection
Heat distribution circuit surface sensors located on top of the storage tank
must be installed to the distance of approx. 0.5 m from the three-way or
four-way valve. Circuit HD1 is always the main heating circuit (rooms, for
example); it is used for higher temperature (radiator heating, for example). In
case of compressor malfunction, the electric heating element heats the cir
-
cuit HD1 more efficiently. Circuit HD2 is used in radiator-heated buildings for
the possible floor heating share or for other purposes (e.g., humid rooms).
Speed controlling of the heat circulation pumps
Grundfos UPM3 AUTO heat circulation pump which is used in a HD cir
-
cuit can be set in three different controlling modes: proportional pressure
mode, constant pressure mode, constant curve mode.
Factory setting is
proportional pressure mode 3.
In radiator network constant pressure
mode 1 or 2 can be used if sound of the flow water is disturbingly high.
Proportional pressure mode
LED1
green
LED2
yellow
LED3
yellow
LED4
yellow
LED5
yellow
Proportional pressure mode 1
Proportional pressure mode 2
Proportional pressure mode 3
Auto
Adapt
Constant pressure mode
LED1
green
LED2
yellow
LED3
yellow
LED4
yellow
LED5
yellow
Constant pressure mode 1
Constant pressure mode 2
Constant pressure mode 3
Auto
Adapt
Constant curve mode
LED1
green
LED2
yellow
LED3
yellow
LED4
yellow
LED5
yellow
Constant curve mode 1
Constant curve mode 2
Constant curve mode 3
Constant curve mode 4
Содержание VMI 6-17
Страница 1: ...L MP SS Vmi 6 17 L MP SS 3 2016 INSTRUCTIONS FOR USE INSTALLATION AND MAINTENANCE...
Страница 31: ...XL 2015 811 2013 A A A B C D E F G A A A B C D E F G Vmi 6 38 dB 00 dB 8 kW 8 kW 8 kW...
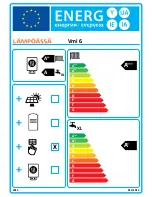
Страница 32: ...A A A A A A A A B C D E F G A A A A B C D E F G XL 2015 811 2013 XL X Vmi 6...
Страница 35: ...XL 2015 811 2013 A A A B C D E F G A A A B C D E F G Vmi 9 41 dB 00 dB 10 kW 10 kW 10 kW...
Страница 36: ...A A A A A A A A B C D E F G A A A A B C D E F G XL 2015 811 2013 XL X Vmi 9...
Страница 39: ...XL 2015 811 2013 A A A B C D E F G A A A B C D E F G Vmi 11 36 dB 00 dB 11 kW 11 kW 11 kW...
Страница 40: ...A A A A A A A A B C D E F G A A A A B C D E F G XL 2015 811 2013 XL X Vmi 11...
Страница 43: ...XL 2015 811 2013 A A A B C D E F G A A A B C D E F G Vmi 11 1x230V 41 dB 00 dB 11 kW 11 kW 11 kW...
Страница 44: ...A A A A A A A A B C D E F G A A A A B C D E F G XL 2015 811 2013 XL X Vmi 11 1x230V...
Страница 47: ...XL 2015 811 2013 A A A B C D E F G A A A B C D E F G Vmi 14 38 dB 00 dB 14 kW 14 kW 14 kW...
Страница 48: ...A A A A A A A A B C D E F G A A A A B C D E F G XL 2015 811 2013 XL X Vmi 14...
Страница 51: ...XL 2015 811 2013 A A A B C D E F G A A A B C D E F G Vmi 14 1x230V 43 dB 00 dB 14 kW 14 kW 14 kW...
Страница 52: ...A A A A A A A A B C D E F G A A A A B C D E F G XL 2015 811 2013 XL X Vmi 14 1x230V...
Страница 55: ...XL 2015 811 2013 A A A B C D E F G A A A B C D E F G Vmi 17 42 dB 00 dB 17 kW 17 kW 17 kW...
Страница 56: ...A A A A A A A A B C D E F G A A A A B C D E F G XL 2015 811 2013 XL X Vmi 17...
Страница 60: ......
Страница 61: ......
Страница 62: ......
Страница 63: ......
Страница 64: ......
Страница 65: ......
Страница 66: ......
Страница 67: ......
Страница 68: ......
Страница 69: ......
Страница 70: ......
Страница 71: ......
Страница 72: ......
Страница 73: ......
Страница 74: ......
Страница 75: ......
Страница 76: ......
Страница 77: ......
Страница 78: ......
Страница 79: ......
Страница 80: ......
Страница 81: ......
Страница 82: ......
Страница 83: ......
Страница 84: ......
Страница 85: ......
Страница 86: ......
Страница 87: ......
Страница 88: ......
Страница 89: ......
Страница 90: ......
Страница 91: ......
Страница 92: ......


