background image

Item

Description

Receive Conditions

Specifies whether to receive or reject faxes from the programmed Special
Senders.

• Special Sender

Receive faxes from the Special Senders and reject faxes from all other
senders.

• Other Than Special Sender

Reject faxes from the Special Senders and receive faxes from all other
senders.

• For details about the priority tray settings, see p.313 "Specifying the Priority Tray".
• For details about the administrator e-mail address and password, see p.338 "Configuring the

Administrator Password and E-mail Address".

• For details about programming Special Senders, see p.237 "Registering the Special Senders".

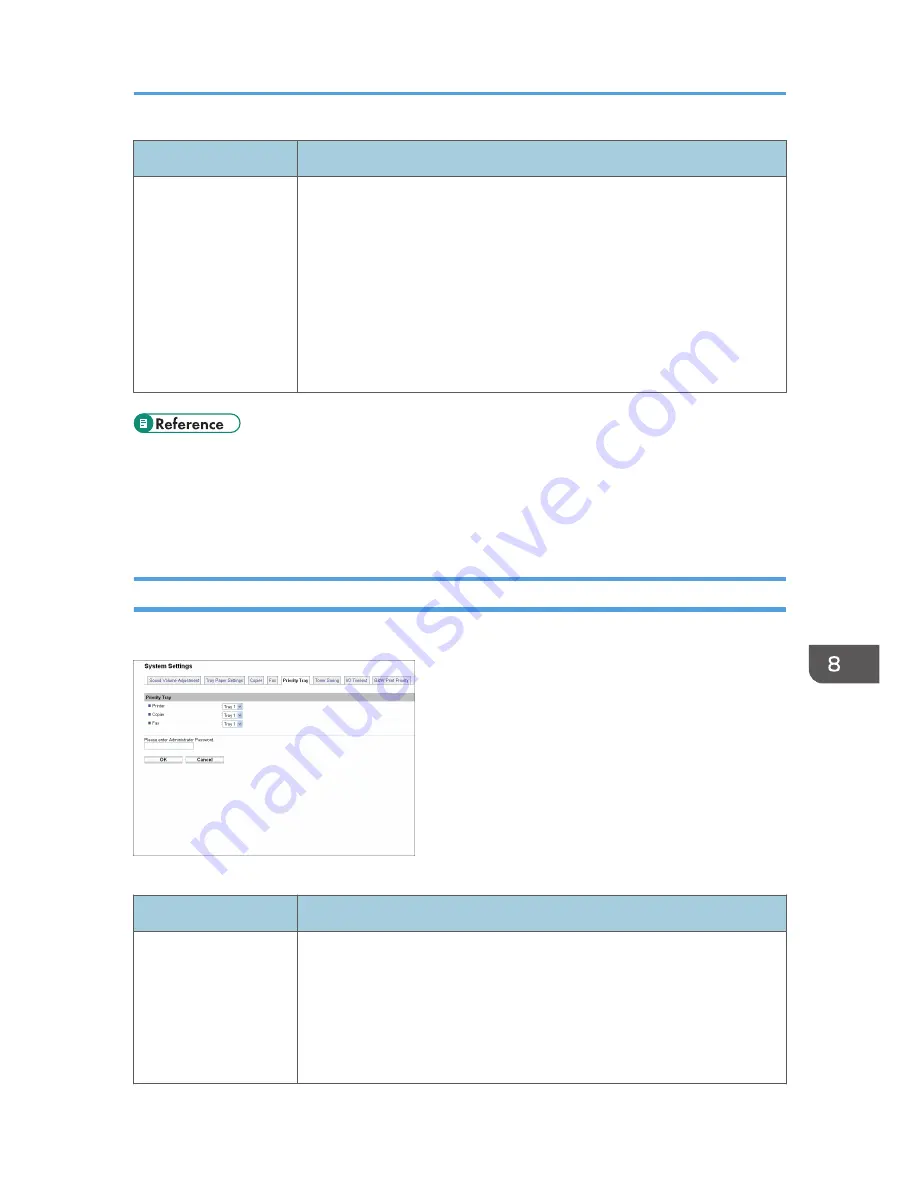
Specifying the Priority Tray

Click the [Priority Tray] tab on the system settings page to specify the priority tray.

Priority Tray

Item

Description

Printer

Select the tray that the machine uses first for printer jobs from tray 1 or tray
2.
If automatic tray selection is specified for the print job and both tray 1 and
tray 2 contain paper that matches the print job, the machine starts to print
from the specified tray. If that tray runs out of paper, the machine
automatically switches to the other tray to continue printing.

Configuring the System Settings

313

Содержание FS-C1020MFP+

Страница 1: ...FS C1020MFP OPERATION GUIDE ...

Страница 2: ...he Machine as a Copier 20 Using the Machine as a Scanner 23 Using the Machine as a Fax Machine 27 Guide to Components 30 Exterior Front View 30 Exterior Rear View 31 Interior 33 Control Panel 34 2 Getting Started Installing the Machine 39 Where to Put the Machine 39 Unpacking 42 Turning the Power on 52 Initial Setup 54 Changing Operation Modes 55 Saving Energy 57 Multi access 57 Connecting the Mac...

Страница 3: ...Paper 91 Paper Storage Precautions 92 Printable Area 92 Loading Paper 94 Loading Paper in Tray 1 94 Loading Paper in Tray 2 103 Loading Paper in the Bypass Tray 106 Loading Envelopes 108 Specifying Paper Type and Paper Size 113 Placing Originals 117 About Originals 117 Placing Originals 119 Entering Characters 122 Restricting Machine Functions According to User 124 Enabling the User Restriction Se...

Страница 4: ...ctions 145 Print Output Functions 146 4 Using the Copier Function The Screen in Copier Mode 149 Basic Operation in Copier Mode 151 Canceling a Copy 152 Making Enlarged or Reduced Copies 154 Combining Multiple Pages 156 Copying Two or Four Pages onto One Sheet 156 Copying Both Sides of an ID Card onto One Side of Paper 158 Making 2 sided Copies 161 Specifying Scan Settings 164 Adjusting Image Densi...

Страница 5: ...ing a Fax 203 Specifying the Fax Destination 206 Useful Sending Functions 210 Specifying the Scan Settings 212 Using the Fax Function from a Computer LAN Fax 215 Configuring the LAN Fax Address Book 215 Basic Operation for Sending Faxes from a Computer 222 Editing a Fax Cover Sheet 224 Configuring Transmission Settings 226 Receiving a Fax 229 Selecting Reception Mode 229 Receiving an Internet Fax ...

Страница 6: ...dress Book Parameters 264 System Settings 266 Changing System Settings 266 System Setting Parameters 266 Network Settings 275 Changing Network Settings 275 Network Setting Parameters 275 Printing Lists Reports 279 Printing the Configuration Page 279 Types of Report 279 Reading the Configuration Page 280 Reading the Fax Journal 283 Reading the TX RX Standby File List 284 Reading the Scanner Journal...

Страница 7: ...ing Setting 314 Configuring the I O Timeout Settings 315 Configuring the Black and White Print Priority Settings 315 Registering Destinations 317 Registering Fax Special Senders 318 Restricting Machine Functions According to User 319 Configuring the Network Settings 320 Checking the Network Status 320 Configuring the IPv6 Settings 321 Configuring the Network Application Settings 322 Configuring th...

Страница 8: ...ing Scanning Jams 356 Print Quality Problems 361 Checking the Condition of the Machine 361 Printer Problems 362 Changing the Printer Driver Settings 364 Printed Colors Do Not Match Displayed Colors 365 Print Positions Do Not Match Display Positions 365 Copier Problems 366 Scanner Problems 368 Fax Problems 369 Error and Status Messages on the Screen 375 Replacing Print Cartridges 385 Replacing the ...

Страница 9: ...ons 417 Transmission Using IPsec 419 Encryption and Authentication by IPsec 419 Security Association 420 Encryption Key Exchange Settings Configuration Flow 421 Specifying Encryption Key Exchange Settings 421 Specifying IPsec Settings on the Computer 422 Enabling and Disabling IPsec Using the Control Panel 424 Specifications of the Machine 425 General Function Specifications 425 Printer Function S...

Страница 10: ...INDEX 435 9 ...

Страница 11: ...10 ...

Страница 12: ... trademark of Hewlett Packard Company Apple Bonjour Macintosh Mac OS TrueType and Safari are trademarks of Apple Inc registered in the U S and other countries Firefox is a registered trademark of the Mozilla Foundation LINUX is the registered trademark of Linus Torvalds in the U S and other countries RED HAT is a registered trademark of Red Hat Inc Solaris is a trademark or registered trademark of...

Страница 13: ...rver 2003 R2 Standard Edition Microsoft Windows Server 2003 R2 Enterprise Edition Microsoft Windows Server 2003 R2 Datacenter Edition The product names of Windows Server 2008 are as follows Microsoft Windows Server 2008 Foundation Microsoft Windows Server 2008 Standard Microsoft Windows Server 2008 Enterprise Microsoft Windows Server 2008 Datacenter Microsoft Windows Server 2008 for Itanium based ...

Страница 14: ... 3 Emulation Disclaimer In no event will the company be liable for direct indirect special incidental or consequential damages as a result of handling or operating the machine This manual may not be reproduced in whole or in part modified quoted or reprinted without permission Introduction 13 ...

Страница 15: ...for Scanner and Fax Provides installation and operation procedures for the machine s scanner and fax functions Details about these functions that are not included in this manual are provided in User Guide This manual is stored in the DVD supplied with the machine User Guide Provides information about general operation and covers the topics listed below Installing options Suitable paper types Proce...

Страница 16: ... the information under the symbol that corresponds to the region of your machine mainly Europe and Asia If the label contains the following your machine is a region A model CODE XXXX 22 27 220 240V mainly North America If the label contains the following your machine is a region B model CODE XXXX 17 120 V Dimensions in this manual are given in two units of measure metric and inch If your machine i...

Страница 17: ... of option for this machine and how it is referred to as in this manual Option List Referred to as Paper Feed Unit paper feed unit For details about the specifications of this option see p 432 Specifications of Options 1 Guide to the Machine 16 ...

Страница 18: ...on resolving user errors This symbol is located at the end of sections It indicates where you can find further relevant information Indicates the names of keys on the machine s display or control panels Notes Contents of this manual are subject to change without prior notice Some illustrations in this manual might be slightly different from the machine About IP Address In this manual IP address co...

Страница 19: ...ction Connecting via USB You can connect this machine directly to a computer using a USB cable CES131 Preparation for printing via USB To use this machine as a printer via USB connection 1 Connect the machine to a computer using a USB cable and install the printer driver on the computer For details see p 62 Connecting with a Computer Using a USB Cable and Driver Installation Guide Connecting via a...

Страница 20: ...r driver on a computer For details see Driver Installation Guide Printing confidential documents If you use the Locked Print function you can password protect your print job This means that your job is printed only after you enter the password using the machine s control panel This function prevents unauthorized users seeing sensitive documents at the printer This function is only available when u...

Страница 21: ...t easy to convert documents between different standard sizes CES103 Preparation for making enlarged or reduced copies To always enlarge or reduce copies 1 Configure the machine s default Reduce Enlarge setting For details see p 245 Copy Settings To use this function for the current job only 1 Configure the setting using the Reduce Enlarge key before starting the current job For details see p 154 M...

Страница 22: ...nfigure the setting using the Reduce Enlarge key before starting the current job For details see p 156 Copying Two or Four Pages onto One Sheet Copying both sides of an ID card onto one side of paper You can copy the front and back sides of an ID card or other small document onto one side of a sheet of paper This function is only available when the original is set on the exposure glass not when it...

Страница 23: ...cuments onto the front and back sides of the paper This function is only available when the original is set in the ADF not when it is set on the exposure glass CES124 Change the machine s default setting to apply 2 sided copying Preparation for making 2 sided copies 1 Configure the 2 Sided Copy setting under copy settings For details see p 161 Making 2 sided Copies Sorting the output paper When ma...

Страница 24: ... via e mail Scan to E mail to an FTP server Scan to FTP or to the shared folder of a computer on a network Scan to Folder or to a USB flash disk Scan to USB The Scan to E mail Scan to FTP and Scan to Folder functions are available only through a network connection No network connection is required for the Scan to USB function you can send scanned files directly to a USB flash disk inserted into th...

Страница 25: ...reparation for scanning from a computer with network connection 1 Connect the machine to the network For details see p 63 Connecting with a Network Cable 2 Specify the network settings such as the machine s IP address For details see p 69 Configuring the Machine 3 Install the scanner driver on the computer For details see Driver Installation Guide 4 If a TWAIN compliant application is not installe...

Страница 26: ...3 Configuring the DNS Settings and p 327 Configuring the SMTP Settings 4 Register the destinations to the Address Book using COMMAND CENTER For details see p 169 Registering Scan Destinations Sending scanned files to an FTP server You can send scanned files to an FTP server using the control panel CES187 Preparation for sending scanned files to an FTP server 1 Connect the machine to the network Fo...

Страница 27: ...ine to the network For details see p 63 Connecting with a Network Cable 2 Specify the network settings such as the machine s IP address For details see p 69 Configuring the Machine 3 Create a destination folder on the computer s hard disk drive and configure it as a shared folder For details see your operating system s documentation 4 Register the destinations to the Address Book using COMMAND CEN...

Страница 28: ...to a Telephone Line 2 Configure the telephone network settings For details see p 74 Configuring Telephone Network Settings 3 Configure the time and date For details see p 193 Setting the Date and Time 4 Register the destinations to the Address Book using the control panel or COMMAND CENTER For details see p 195 Registering Fax Destinations Make sure to register the user fax number and user name du...

Страница 29: ... another fax machine without printing the document This function is supported by Windows XP Vista 7 and Windows Server 2003 2003 R2 2008 2008 R2 Mac OS X does not support this function CES191 Preparation for sending faxes from a computer connected via USB 1 Connect the machine to a computer using a USB cable For details see p 62 Connecting with a Computer Using a USB Cable 2 Install the LAN Fax dr...

Страница 30: ...see p 63 Connecting with a Network Cable 2 Specify the network settings such as the machine s IP address For details see p 69 Configuring the Machine 3 Install the LAN Fax driver on the computer For details see Driver Installation Guide 4 Register LAN Fax destinations in the LAN Fax Address Book For details see p 215 Configuring the LAN Fax Address Book Feature Highlights 29 ...

Страница 31: ... 35 sheets of plain paper 3 Output Tray for the ADF Originals scanned with the ADF are output here 4 Extender for the ADF Trays Extend these when placing paper longer than A4 in the input tray for ADF 5 Output Tray Top Cover Printed paper is output here Up to 150 sheets of plain paper can be stacked here Open here to replace the print cartridges 6 Front Cover Open this cover to replace the waste t...

Страница 32: ...n this cover to place originals on the exposure glass Exterior Rear View CES105 LINE TEL 1 Button for Sliding the ADF Press to slide the ADF towards the rear of the machine and hold it in that position if paper output to the output tray is difficult to retrieve 2 Power Switch Use this switch to turn the power on or off 3 Power Socket For connecting the power cord to the machine 4 Rear Cover Remove...

Страница 33: ...0 Stop Fences Pull up this fence to prevent paper falling off when printing a large amount of paper at a time The fence can be adjusted at the A4 Letter or Legal size position Slide the ADF as shown below Slide the ADF only when the ADF is closed Be careful not to trap your fingers when sliding CES099 Pull up the fence as shown below to prevent A4 or Letter size prints from falling off CES117 Pull...

Страница 34: ... prepared 2 Waste Toner Bottle Collects excess toner during printing Messages appear on the screen when the waste toner bottle needs to be replaced or a new one needs to be prepared 3 Transfer Unit Remove this unit when replacing the waste toner bottle For details about the messages that appear on the screen when consumables need to be replaced see p 375 Error and Status Messages on the Screen Gui...

Страница 35: ...ES167 1 Fax Received indicator Lights up when received faxes that have not been printed out exist in the machine s memory Flashes when the machine is unable to print out the faxes due to machine errors such as an empty paper tray or a paper jam 2 Pause Redial key Pause Press to insert a pause in a fax number The pause is indicated by P Redial Press to display the last used scan or fax destination ...

Страница 36: ...e is processing a job press to cancel the current job While configuring the machine press to cancel the current setting and return to standby mode While in standby mode press to cancel temporary settings such as image density or resolution 13 B W Start key Press to scan or copy in black and white or start sending a fax 14 Color Start key Press to scan or copy in color 15 OK key Press to confirm se...

Страница 37: ...essages on the Screen 24 Power indicator Remains lit while the power is on It is unlit when the power is off 25 One Touch buttons Press to select a scan or fax Quick Dial destination The backlight of the screen is turned off when the machine is in Energy Saver mode When the machine is processing a job you cannot display the menu for configuring the machine You can confirm the machine s status by c...

Страница 38: ...the Alert indicator is flashing or lit see p 375 Error and Status Messages on the Screen For details about what to do when the Fax Received indicator is flashing or lit see p 235 Printing Out Faxes Stored in Memory Guide to Components 37 ...

Страница 39: ...1 Guide to the Machine 38 ...

Страница 40: ...cinity of this machine Doing so could result in fire or electric shock Do not place vases plant pots cups toiletries medicines small metal objects or containers holding water or any other liquids on or close to this machine Fire or electric shock could result from spillage or if such objects or substances fall inside this machine Keep the machine away from humidity and dust Otherwise a fire or an ...

Страница 41: ...spacious Good ventilation is especially important when the machine is used heavily Do not obstruct the machine s vents Doing so risks fire caused by overheated internal components Machine is not suitable for desk work environments so place the machine in another room Keep the machine away from salt bearing air and corrosive gases Also do not install the machine in places where chemical reactions a...

Страница 42: ... exposed to radiant heat from heaters Locations near air conditioners heaters or humidifiers Locations near other electronic equipment Locations subject to frequent strong vibration Ventilation When you use this machine in a confined space without good ventilation for a long time or print large quantities you might detect an odd smell This might cause the output paper to also have an odd smell Whe...

Страница 43: ...it behaves unusually you must turn off its power immediately After turning off the power be sure to disconnect the power cord plug from the wall outlet Then contact your service representative and report the problem Do not use the machine Doing so could result in fire or electric shock If metal objects or water or other fluids fall inside this machine you must turn off its power immediately After ...

Страница 44: ... new or used toner containers and components that have been in contact with toner out of reach of children If toner or used toner is inhaled gargle with plenty of water and move into a fresh air environment Consult a doctor if necessary If toner or used toner gets into your eyes flush immediately with large amounts of water Consult a doctor if necessary If toner or used toner is swallowed dilute b...

Страница 45: ...tective materials in place while moving the machine Lower the machine slowly and carefully to prevent trapping your hands Do not grip on the tray area when lifting the machine Do not allow paper clips staples or other small objects to fall inside the machine Keep uncovered print cartridges away from direct sunlight Do not touch the print cartridge s photo conductor unit CER088 Do not touch the ID ...

Страница 46: ...tached on the machine s exterior Do not remove tapes going into the inside of the machine CES155 The actual machine may come with protective materials attached in different positions Make sure to check the machine s exterior for all protective materials and remove them completely 4 Open the ADF cover CES048 Installing the Machine 45 ...

Страница 47: ...r slightly to the machine rear and then pull it up to unlock the paper feed roller CES039 6 Lift the paper feed roller slightly to remove it CES050 7 Pull the protective sheet to remove it CES047 2 Getting Started 46 ...

Страница 48: ...ng downwards insert the tip of the paper feed roller into the opening of the ADF CES042 9 Return the paper feed roller to its original position CES051 10 Lower the lever until it clicks into place CES116 Installing the Machine 47 ...

Страница 49: ...F cover CES049 12 Pull the opening lever on the front cover and then carefully lower the front cover CES147 13 Pull the tapes gently upward and remove them from the machine at the same time CES162 2 Getting Started 48 ...

Страница 50: ...evers CES258 15 Using both hands carefully push up the front cover until it closes CES260 16 Pull up the top cover open lever and then open the top cover carefully Make sure that the ADF is closed CES261 Installing the Machine 49 ...

Страница 51: ...omes with a protection sheet that you must remove before shaking Carefully lift out the print cartridge vertically holding its center CES158 Place the black print cartridge on a flat surface and remove the protection sheet before shaking CES031 Shake each print cartridge from side to side five or six times 2 Getting Started 50 ...

Страница 52: ...corresponding location and then carefully insert the print cartridge vertically CES159 20 Using both hands hold the center of the top cover and close the cover carefully Be careful not to trap your fingers CES140 Installing the Machine 51 ...

Страница 53: ...ons shown Doing so could result in fire or electric shock Do not use multi socket adaptors Doing so could result in fire or electric shock Do not use extension cords Doing so could result in fire or electric shock Do not use power cords that are damaged broken or modified Also do not use power cords that have been trapped under heavy objects pulled hard or bent severely Doing so could result in fi...

Страница 54: ...f this machine is not going to be used for several days or longer at a time disconnect its power cord from the wall outlet When performing maintenance on the machine always disconnect the power cord from the wall outlet Make sure that the power cord is plugged securely into the wall outlet before turning the power on Make sure that the power is off when plugging or unplugging the power cord Do not...

Страница 55: ...alfunction To turn off the power turn the power switch to Off CES063 For details about Function Priority see p 287 Administrator Settings Initial Setup When you turn on the machine for the first time a menu for configuring the settings described below will appear on the display This section describes how to complete the Initial Setup The fax number code is required by international law You cannot ...

Страница 56: ...age and then press the OK key 2 Press the keys to select Number and then enter the user fax number up to 20 digits 3 Press the keys to select Name enter the user name up to 20 characters and then press the OK key 4 Press the keys to select the required country code and then press the OK key You can change the settings configured during the Initial Setup later under Admin Tools In addition you can ...

Страница 57: ...de the Copy key lights up CES174 Scanner mode Press the Scanner key to activate scanner mode While in scanner mode the Scanner key lights up CES175 Fax mode Press the Facsimile key to activate fax mode While in fax mode the Facsimile key lights up CES176 2 Getting Started 56 ...

Страница 58: ...machine is in Energy Saver mode 1 Energy Saver Mode 1 appears on the screen It takes less time to recover from Energy Saver mode 1 than from power off state or Energy Saver mode 2 but power consumption is higher in Energy Saver mode 1 than in Energy Saver mode 2 Energy Saver mode 2 If EnergySaverMode 2 under Admin Tools is enabled the machine enters Energy Saver mode 2 after the period of time spe...

Страница 59: ... Scanning Printing 1 Fax memory transmission Fax memory reception Fax immediate printing Printing a fax received in the machine s memory Internet Fax reception Receiving a LAN Fax job from a computer except when TWAIN scanning LAN Fax transmission except when TWAIN scanning Printing Scanning 2 Fax memory reception Fax memory transmission 3 Fax immediate transmission 3 Scanning a fax into the machi...

Страница 60: ...net Fax reception Internet Fax transmission Receiving a LAN Fax job from a computer Scanning a fax into the machine s memory before transmission Printing Printing a fax received in the machine s memory Internet Fax reception Fax immediate transmission scanning an original and sending it simultaneously Printing 4 Printing a fax received in the machine s memory Internet Fax reception Printing a fax ...

Страница 61: ...transmission Fax immediate transmission Printing a fax received in the machine s memory except when printing out the received Internet Fax Fax immediate printing except when printing out the received Internet Fax Scanning a fax into the machine s memory before transmission Internet Fax transmission 6 Receiving a LAN Fax job from a computer LAN Fax transmission Internet Fax transmission Printing 4 ...

Страница 62: ...printer driver or when printing from the PostScript 3 printer driver 3 Fax transmission is not possible if Gradation is set to Fine PCL printer driver or when printing from the PostScript 3 printer driver 4 Printing may be canceled if Gradation is set to Standard or Fine PCL printer driver or when printing from the PostScript 3 printer driver 5 Fax printing may take longer than normal if you scan ...

Страница 63: ...upplied Obtain a USB cable that is correct for the computer you are using USB connection with a Macintosh is only possible via the computer s standard USB port 1 Remove the cable cover CES068 2 Connect the square shaped connector of the USB 2 0 cable to the USB port CES096 3 Connect the opposite end s flat connector to your computer s USB interface or USB hub 2 Getting Started 62 ...

Страница 64: ...ore connecting the 10BASE T or 100BASE TX cable to the machine s Ethernet port Do not connect the Ethernet port of the machine to a network that may supply excess voltage such as a telephone line Doing so may result in fire or electric shock Use shielded Ethernet cable Unshielded cables create electromagnetic interference that could cause malfunctions The Ethernet cable is not supplied with this m...

Страница 65: ...nect the other end of the cable to the network e g a network hub 4 Attach the cable cover CES094 For details about network environment settings see p 69 Configuring the Machine For details about installing printer drivers for network connection see Driver Installation Guide 2 Getting Started 64 ...

Страница 66: ...connect an external telephone to use the same telephone line for voice calls To reduce the risk of fire use only No 26 AWG or larger telecommunication line cord Pour réduire le risque d incendie utiliser uniquement des conducteurs de télécommunications 26 AWG ou de section supérieure By law in the United States you must program your phone number identification your fax number into your machine bef...

Страница 67: ...1 Remove the cable cover CES068 2 Connect a telephone line cord to LINE CES041 3 If using an external telephone connect the telephone to TEL CES040 2 Getting Started 66 ...

Страница 68: ...ting the machine to the telephone line configure the telephone network settings and fax reception mode If your telephone has functions that are not compatible with this machine those functions will not be usable Confirm that you have registered user fax number and user name during Initial Setup You can check the registered information in Program Fax Information under Admin Tools Connecting the Mac...

Страница 69: ...For details about configuring the telephone network settings see p 74 Configuring Telephone Network Settings For details about configuring fax reception mode see p 229 Selecting Reception Mode For details about Program Fax Information see p 287 Administrator Settings 2 Getting Started 68 ...

Страница 70: ...e User Tools key CES184 2 Press the keys to select Network Settings and then press the OK key 3 If you are requested to enter a password enter the password using the number keys and then press the OK key 4 Press the keys to select IPv4 Configuration and then press the OK key 5 Press the keys to select DHCP and then press the OK key 6 Press the keys to select Active and then press the OK key 7 Pres...

Страница 71: ...ails about Admin Tools Lock see p 287 Administrator Settings For details about Set Ethernet Speed see p 275 Network Settings Assigning the machine s IPv4 address manually The IPv4 address assigned to the machine must not be used by any other device on the same network 1 Press the User Tools key CES184 2 Press the keys to select Network Settings and then press the OK key 3 If you are requested to e...

Страница 72: ...ill appear under TCP IP on the configuration page You can press the Escape key to exit to the previous level of the menu tree A password for accessing the Network Settings menu can be specified in Admin Tools Lock If your network environment requires a specific transmission speed that is not automatically detected set the transmission speed in Set Ethernet Speed under Network Settings When DHCP is...

Страница 73: ...User Tools key to return to the initial screen 8 If you are requested to reboot the machine turn off the machine and then turn it back on 9 Print the configuration page to confirm the setting The IPv6 address setting will appear under IPv6 Configuration on the configuration page You can press the Escape key to exit to the previous level of the menu tree A password for accessing the Network Setting...

Страница 74: ...ys and then press the OK key 9 Press the keys to select Prefix Length and then press the OK key 10 Enter the prefix length using the number keys and then press the OK key 11 Press the keys to select Gateway Address and then press the OK key 12 Enter the gateway address using the number keys and then press the OK key 13 Press the User Tools key to return to the initial screen 14 If you are requeste...

Страница 75: ...r Tools key CES184 2 Press the keys to select Admin Tools and then press the OK key 3 If you are requested to enter a password enter the password using the number keys and then press the OK key 4 Press the keys to select Dial Push Phone and then press the OK key 5 Press the keys to select the telephone line type appropriate for your telephone service and then press the OK key 6 Press the User Tool...

Страница 76: ...the keys to select PSTN or PBX and then press the OK key 6 Press the User Tools key to return to the initial screen You can press the Escape key to exit to the previous level of the menu tree A password for accessing the Admin Tools menu can be specified in Admin Tools Lock For details about Admin Tools Lock see p 287 Administrator Settings Setting the outside line access number If the machine is ...

Страница 77: ...PBX Access Number and then press the OK key 5 Enter the outside line access number using the number keys and then press the OK key 6 Press the User Tools key to return to the initial screen You can press the Escape key to exit to the previous level of the menu tree A password for accessing the Admin Tools menu can be specified in Admin Tools Lock For details about Admin Tools Lock see p 287 Admini...

Страница 78: ...r operating system the procedure might vary slightly 1 On the Start menu click Printers and Faxes 2 Click the icon of the printer you want to use 3 On the File menu click Properties 4 On the Sharing tab click Share this printer 5 To share the printer with users using a different version of Windows click Additional Drivers Omit this step if you have installed an alternative driver by selecting Shar...

Страница 79: ...these precautions could result in burns The machine weighs approximately 30 0 kg 66 2 lb When moving the machine use the inset grips on both sides and lift slowly in pairs The machine will break or cause injury if dropped Lifting the paper feed unit carelessly or dropping may cause injury Before moving the machine unplug the power cord from the wall outlet If the cord is unplugged abruptly it coul...

Страница 80: ...nit CER004 2 Turn off the power and then unplug the machine s power cord from the wall outlet 3 Remove the adhesive tape from the optional paper feed unit CER023 4 Lift using the inset grips on both sides of the machine CES052 Installing Option 79 ...

Страница 81: ...the configuration page After installing the optional paper feed unit select tray 2 in the printer driver For details see the printer driver Help If the optional paper feed unit is not installed properly reinstall it following this procedure If you cannot install it properly even after attempting reinstallation contact your service representative For details about printing configuration page see p ...

Страница 82: ...ils of each paper type and the printable area All paper must be set vertically regardless of the paper size Supported Paper for Each Tray This section describes the type size and weight of paper that can be loaded in each tray The capacity of each paper tray is also provided Paper and Other Media 81 ...

Страница 83: ...4 B5 JIS A5 B6 JIS A6 Legal 81 2 14 Letter 81 2 11 Half Letter 51 2 81 2 Executive 71 4 101 2 8 13 81 2 13 Folio 81 4 13 16K 195 267 mm Com 10 41 8 91 2 Monarch 37 8 71 2 C5 Env 162 229 mm C6 Env 114 162 mm DL Env 110 220 mm Custom size 90 to 216 mm in width 148 to 356 mm in length 3 54 to 8 50 inches in width 5 83 to 14 0 inches in length 60 to 160 g m2 16 to 43 lb 250 80 g m2 20 lb 2 Getting Sta...

Страница 84: ...ght Capacity Thin paper Plain paper Middle thick paper Thick paper 1 Recycled paper Color paper Preprinted paper Prepunched paper Letterhead A4 Letter 81 2 11 60 to 105 g m2 16 to 28 lb 500 80 g m2 20 lb Paper and Other Media 83 ...

Страница 85: ...Folio 81 4 13 16K 195 mm 267 mm Com 10 41 8 91 2 Monarch 37 8 71 2 C5 Env 162 229 mm C6 Env 114 162 mm DL Env 110 220 mm Custom size 90 to 216 mm in width 148 to 356 mm in length 3 54 to 8 50 inches in width 5 83 to 14 0 inches in length 60 to 160 g m2 16 to 43 lb 1 You cannot print on Legal size paper in the following cases PCL printer driver When Gradation in Print Quality is set to Fine PostScr...

Страница 86: ...aper tray Any input tray can be used Duplex supported size A4 B5 JIS Legal 81 2 14 Letter 81 2 11 Executive 71 4 101 2 8 13 81 2 13 Folio 81 4 13 16K 195 mm 267 mm Thick paper 1 Item Description Paper thickness 91 to 105 g m2 24 to 28 lb Supported paper tray Any input tray can be used Duplex supported size None Notes The number of sheets that can be printed in one minute is approximately half that...

Страница 87: ...l 81 2 14 Letter 81 2 11 Executive 71 4 101 2 8 13 81 2 13 Folio 81 4 13 16K 195 mm 267 mm Recycled paper Item Description Paper thickness 75 to 90 g m2 20 to 24 lb Supported paper tray Any input tray can be used Duplex supported size A4 B5 JIS Legal 81 2 14 Letter 81 2 11 Executive 71 4 101 2 8 13 81 2 13 Folio 81 4 13 16K 195 mm 267 mm Notes If the paper thickness is outside the specified range ...

Страница 88: ...2 13 Folio 81 4 13 16K 195 mm 267 mm Notes If the paper thickness is outside the specified range select Thin Paper Plain Paper Thick Paper 1 or Thick Paper 2 Prepunched paper Item Description Paper thickness 75 to 90 g m2 20 to 24 lb Supported paper tray Any input tray can be used Duplex supported size A4 B5 JIS Legal 81 2 14 Letter 81 2 11 Executive 71 4 101 2 8 13 81 2 13 Folio 81 4 13 16K 195 m...

Страница 89: ...f sheets that can be printed in one minute is approximately half that of middle thick paper If the paper thickness is outside the specified range select Thick Paper 1 Cardstock Item Description Paper thickness 106 to 160 g m2 28 to 43 lb Supported paper tray Tray 1 and bypass tray Duplex supported size None Notes The number of sheets that can be printed in one minute is approximately half that of ...

Страница 90: ...he two paper limit marks of the tray If printed envelopes come out badly creased load the envelopes in the opposite direction Also configure the printer driver to rotate the print object 180 degrees For details about changing the loading orientation see the printer driver Help Environmental factors can degrade the print quality on both recommended and non recommended envelopes If envelopes are sev...

Страница 91: ... When fanning envelopes make sure the envelope flaps are not stuck together If they are stuck together separate them Before loading envelopes flatten them out so that their curl does not exceed that shown in the illustration below CER109 If the curl is severe flatten out the envelopes using your fingers as shown in the illustration below CER110 2 Getting Started 90 ...

Страница 92: ...ons are especially likely when using paper printed on by other than a laser printer e g monochrome and color copiers ink jet printers etc Special paper such as thermal paper aluminum foil carbon paper and conductive paper Paper that is heavier or lighter than the specified limitations Paper with windows holes perforations cutouts or embossing Adhesive label paper on which the adhesive under layer ...

Страница 93: ...r dry Avoid exposing paper to direct sunlight Store on a flat surface Keep paper in its original packaging Printable Area The following diagrams show the areas of paper that the machine can print onto Be sure to set the print margins correctly using the settings of the application in which it was created Paper CER001 1 2 4 3 3 4 1 Print area 2 Feed direction 3 Approximately 4 2 mm 0 17 inches 4 Ap...

Страница 94: ...ches 4 Approximately 15 mm 0 59 inches The print area may vary depending on the paper size printer language and printer driver settings For better envelope printing we recommend you set the right left top and bottom print margins to at least 15 mm 0 59 inches each Paper and Other Media 93 ...

Страница 95: ...rinting on paper other than envelopes Make sure paper is not stacked above the limit mark inside the tray Misfeeds might occur After loading paper in the tray specify the paper type and size using the control panel to avoid printing problems This machine does not detect the paper size automatically Do not mix different types of paper in the same paper tray Do not move the side paper guides forcefu...

Страница 96: ... down until it clicks into place to lock CER031 3 Pinch the clip on the side paper guide and slide it to match the standard size CER032 CER082 When loading custom size paper position the paper guide slightly wider than the actual paper size Loading Paper 95 ...

Страница 97: ...htly wider than the actual paper size 5 Load the new paper stack print side up Make sure paper is not stacked higher than the upper limit upper line marked inside the tray CER033 Slide the guides inward until they are flush against the paper s sides Make sure the paper is not stacked higher than the projection on the side paper guides 2 Getting Started 96 ...

Страница 98: ...between the paper and the paper guides both side and front end paper guides CER076 If there is a gap between the paper and the front end paper guide as in the example below the paper might not feed in correctly CER077 Loading Paper 97 ...

Страница 99: ...m into the machine Before printing on paper other than envelopes make sure that the fusing unit levers inside the front cover are pulled up Leaving the levers lowered can cause print quality problems when printing on paper other than envelopes Make sure paper is not stacked above the limit mark inside the tray Misfeeds might occur After loading paper in the tray specify the paper type and size usi...

Страница 100: ...ve the rear cover using a coin CES123 2 Pull out tray 1 carefully with both hands CES059 Place the tray on a flat surface 3 Push the metal plate down until it clicks into place to lock CER031 Loading Paper 99 ...

Страница 101: ...ll out the extender until it stops you will hear a click CER084 After extension make sure the arrows on the extender and tray are aligned CER085 5 Pinch the clip on the side paper guide and then slide it to match the paper size CER102 2 Getting Started 100 ...

Страница 102: ...d paper guide and slide it inward to match the Legal paper size CER104 CER235 7 Load the new paper stack print side up Make sure paper is not stacked higher than the upper limit upper line marked inside the tray Loading Paper 101 ...

Страница 103: ...igher than the projection on the side paper guides CER083 8 Check there are no gaps between the paper and the paper guides both side and front end paper guides CER105 If there is a gap between the paper and the front end paper guide as in the example below the paper might not feed in correctly 2 Getting Started 102 ...

Страница 104: ...k paper Check the label inside the tray to confirm the upper limit The remaining paper indicator on the right front side of the paper tray shows approximately how much paper is remaining For details about paper types supported by the machine see p 81 Paper and Other Media For details about the paper settings see p 113 Specifying Paper Type and Paper Size Loading Paper in Tray 2 The following examp...

Страница 105: ...control panel to avoid printing problems This machine does not detect the paper size automatically Do not mix different types of paper in the same paper tray Do not move the side paper guides forcefully Doing so can damage the tray Do not move the end paper guide forcefully Doing so can damage the tray When inserting the tray make sure it is not slanted Inserting it at a slant can damage the machi...

Страница 106: ...to the paper size CER072 4 Pinch the clip on the end paper guide and align the arrow with the paper size CER086 5 Load the new paper stack print side up Make sure paper is not stacked higher than the upper limit upper line marked inside the tray CER073 Loading Paper 105 ...

Страница 107: ...sing unit levers inside the front cover are pulled up Leaving the levers lowered can cause print quality problems when printing on paper other than envelopes Set the size of the loaded paper using the control panel or the printer driver Make sure the settings do not conflict Otherwise the paper may jam or the print quality may be affected Load paper with the print side down and in the short edge f...

Страница 108: ...of the paper into the machine CES134 2 Adjust the paper guides to the paper size CES135 3 Support the paper with both hands and insert it carefully until it stops CES136 After the paper is inserted until it stops the paper will be automatically fed into the machine a little After loading paper in the tray specify the paper type and size using the control panel or the printer driver Loading Paper 1...

Страница 109: ...e sure to lower the fusing unit levers inside the front cover to avoid envelopes coming out creased Also pull up the levers back to their original positions after printing Leaving the levers lowered can cause print quality problems when printing on paper other than envelopes Since the temperature around the guide is high wait for it to cool before touching the fusing unit levers Lowering the fusin...

Страница 110: ...ze and type of envelope at a time Before loading envelopes flatten their leading edges the edge going into the machine by running a pencil or ruler across them Some kinds of envelope might cause misfeeds wrinkles or print poorly Print quality on envelopes may be uneven if parts of an envelope have different thicknesses Print one or two envelopes to check print quality In a hot and humid environmen...

Страница 111: ... 2 Take out paper from Tray 1 3 Push the metal plate down until it clicks into place to lock CER031 4 Pinch the clip on the side paper guide and then adjust the guides to the envelope CER032 5 Pinch the clip on the front end paper guide to match the envelope size 2 Getting Started 110 ...

Страница 112: ...chine CER051 To avoid paper jams make sure the tray is securely inserted Be sure to load envelopes so that their flaps are on the right If you do not the envelopes will become creased If printed envelopes come out badly creased load the envelopes in the opposite direction and then rotate the print object by 180 degrees using the printer driver before printing For details see the printer driver Hel...

Страница 113: ...size and type of envelope at a time Before loading envelopes flatten their leading edges the edge going into the machine by running a pencil or ruler across them Some kinds of envelope might cause misfeeds wrinkles or print poorly Print quality on envelopes may be uneven if parts of an envelope have different thicknesses Print one or two envelopes to check print quality In a hot and humid environm...

Страница 114: ...ecome creased If printed envelopes come out badly creased load the envelopes in the opposite direction and then rotate the print object by 180 degrees using the printer driver before printing For details see the printer driver Help For details about paper types supported by the machine see p 81 Paper and Other Media For details about the paper settings see p 113 Specifying Paper Type and Paper Siz...

Страница 115: ...ds For details about Bypass Tray Priority see p 266 System Settings For details about Auto Continue see p 266 System Settings Specifying the paper type This section describes how to specify the paper type 1 Press the User Tools key CES184 2 Press the keys to select System Settings and then press the OK key 3 Press the keys to select Tray Paper Settings and then press the OK key 4 Press the keys to...

Страница 116: ...r size and then press the OK key 6 Press the User Tools key to return to the initial screen You can press the Escape key to exit to the previous level of the menu tree Specifying a custom paper size This section describes how to specify a custom paper size Custom size paper cannot be loaded in tray 2 When you perform printing make sure that the paper size specified with the printer driver matches ...

Страница 117: ... then press the OK key 6 Press the keys to select mm or inch and then press the OK key 7 Enter the width using number keys and then press the OK key To enter a decimal point press 8 Enter the length using number keys and then press the OK key To enter a decimal point press 9 Press the User Tools key to return to the initial screen You can press the Escape key to exit to the previous level of the m...

Страница 118: ...ginal can be placed on the exposure glass at a time Up to 35 sheets of an original can be placed in the ADF at once when using paper weighing 80 g m2 20 lb Types of originals not supported by the Auto Document Feeder If placed in the ADF the following types of original might be damaged or become jammed or result in gray or black lines appearing on prints Originals larger or heavier than recommende...

Страница 119: ...Even if you correctly place originals in the ADF or on the exposure glass margins of a few millimeters on all four sides of the original might not be scanned CES107 Margins when using exposure glass In copier mode In scanner mode In fax mode Top 3 mm 0 mm 1 mm Right 3 mm 0 mm 1 mm Left 3 mm 0 mm 1 mm Bottom 3 mm 0 mm 2 mm Margins when using ADF In copier mode In scanner mode In fax mode Top 3 mm 0...

Страница 120: ...precedence over the original on the exposure glass if you place originals both in the ADF and on the exposure glass Because colors made by marker or highlighter pen on originals are difficult to reproduce they might not appear on copies or might appear as different colors Placing originals on the exposure glass The exposure glass enables you to scan and send documents that cannot be fed into the A...

Страница 121: ...y Placing originals in the Auto Document Feeder By using the ADF you can scan multiple pages at once Do not place different size originals in the ADF at once Straighten curls in the originals before placing them in the ADF To prevent multiple sheets from being fed at once fan the pages of your original before placing them in the ADF Place the original squarely 1 Adjust the guides according to the ...

Страница 122: ...2 Place the aligned originals face up in the ADF The last page should be on the bottom CES200 When placing originals longer than A4 pull out the ADF tray s extenders Placing Originals 121 ...

Страница 123: ... number To enter a number Use the number keys To enter characters other than digits Press Press Pause Press the Pause Redial key P appears on the screen Space Press the key To enter a name Letters numbers and symbols can be entered using the number keys To enter two characters that use the same number key successively wait briefly after entering the first character CES164 Characters you can enter ...

Страница 124: ... entered is too large or too small for the setting it will not be accepted If you press the OK key the machine will increase or decrease the number to the minimum or maximum value for the setting Entering Characters 123 ...

Страница 125: ...g faxes via LAN Fax To enable this setting you must first configure the machine via COMMAND CENTER Enabling the User Restriction Settings This section describes how to set the machine to permit only authorized users to use certain machine functions Using COMMAND CENTER enable user restriction for all or some of the functions listed below and then register users who can use those functions Copying ...

Страница 126: ...he functions you want to restrict and then click Apply Select Do not Restrict for the functions you do not want to restrict The user restriction setting is enabled for the selected function Proceed to the following steps to register users 6 Click Available Functions per User A list of currently registered user entries appears 7 Select a user entry and then click Change Restricting Machine Function...

Страница 127: ...bout using COMMAND CENTER see p 297 Using COMMAND CENTER Modifying user entries This section describes how to modify user entries 1 Start the Web browser and access the machine by entering its IP address 2 Click Restrict Available Functions 3 Enter the administrator password if required 4 Click Apply 5 Click Available Functions per User A list of currently registered user entries appears 6 Select ...

Страница 128: ...egistered user entries appears 6 Select the entry to delete and then click Delete 7 Confirm that the entry you have selected is the entry that you want to delete 8 Click Apply 9 Close the Web browser For details about using COMMAND CENTER see p 297 Using COMMAND CENTER Restricting Machine Functions According to User 127 ...

Страница 129: ... machine requests for a user code when a user presses the B W Start or Color Start key The user must enter a valid user code from the control panel Printing both color and black and white Color printing Sending faxes via LAN Fax The user must enter a valid user code in the printer or LAN Fax driver before executing a print command Authenticating through the control panel 1 When the machine request...

Страница 130: ...5 Execute a print command If an incorrect user code is entered the job will be canceled automatically there will be no error message When Machine Functions are Restricted 129 ...

Страница 131: ...2 Getting Started 130 ...

Страница 132: ...wing conditions must be met Operating system of the computer Windows XP Vista 7 and Windows Server 2003 2003 R2 2008 2008 R2 When connected via a network The machine is connected via a standard TCP IP port and the default port name must not be changed Enable bidirectional support in the Port tab of the printer properties is selected When connected via USB The machine is connected to the computer s...

Страница 133: ... Click the close button at the upper left corner to close the Printer List dialog box 9 From the System Preferences menu click Quit System Preferences Mac OS X 10 4 1 From the Apple menu select System Preferences 2 Under Hardware click Print Fax 3 Select the machine from Printer and then click Printer Setup 4 In the Printer Info dialog box select Installable Options from the list 5 Check the tray ...

Страница 134: ...6 From the System Preferences menu click Quit System Preferences Configuring Option and Paper Settings 133 ...

Страница 135: ...based on Windows XP as an example If you are using another operating system the procedure might vary slightly 1 On the Start menu click Printers and Faxes The Printers and Faxes window appears 2 Click the printer icon you want to use 3 On the File menu click Properties The printer properties dialog box appears The settings you configure here are used as the default settings for all applications Wh...

Страница 136: ...als provided with the application Any settings you configure in the procedure above are valid for the current application only General users can change the properties displayed in the Print dialog box of an application The settings configured here are used as defaults when printing from that application Mac OS X 1 Open the file you want to print 2 On the File menu click Print 3 In the Printer list...

Страница 137: ...tically After printing on envelopes make sure to pull up the fusing unit levers back to their original positions Leaving the levers lowered can cause print quality problems when printing on paper other than envelopes For details about accessing the printer properties see p 134 Accessing the Printer Properties from an Application For details about entering a user code see p 128 When Machine Functio...

Страница 138: ...s loaded If the paper is too small for the print job the printed image will be cropped Resetting the print job 1 When the error message is displayed press JobReset 2 Press Yes Printing is canceled Canceling a Print Job You can cancel print jobs using either the machine s control panel or your computer depending on the status of the job Canceling a print job before printing has started Cancel the p...

Страница 139: ...ser If you cancel a print job that has already been processed printing may continue for a few pages before being canceled In Windows Vista 7 and Windows Server 2008 2008 R2 click Cancel Printing on the Document menu You can also open the print job queue window by double clicking the printer icon in the Printers and Faxes window the Printers window under Vista 7 and Windows Server 2008 2008 R2 If y...

Страница 140: ... user ID containing 1 to 9 alphanumeric characters and then click OK The user code will be used to identify your Locked Print file on the machine s control panel 5 Execute a print command The print job is stored in the machine as a Locked Print file You can print the file by entering the password using the control panel The Locked Print file is automatically erased from the machine s memory when i...

Страница 141: ...s control panel display when the machine is in the copier mode Use the following procedure to unlock and print the Locked Print file 1 When the Locked Print message is displayed press the User Tools key CES184 2 Press the keys to select the file you want to print and then press the OK key Identify the Locked Print file by checking its time stamp and user ID 3 Press Print 3 Using the Printer Functi...

Страница 142: ...d Print file The machine beeps if you try to do so While entering a password using the control panel the machine cannot begin other print jobs The Locked Print file is automatically erased from the machine s memory when it is printed out or when the machine s power is turned off Deleting a Locked Print file When there is a Locked Print file stored in the machine Locked Print Job Press User Tools k...

Страница 143: ...itial screen You can press the Escape key to exit to the previous level of the menu tree To enter the menu for changing the machine s settings press the Scanner key or the Facsimile key and then press the User Tools key To delete a Locked Print file press the Copy key to return to the copier mode Checking which Locked Print File Jobs Have Been Canceled When a Locked Print job is canceled the machi...

Страница 144: ...he following steps 3 Press the OK key 4 Press Delete The log is deleted If there are Locked Print logs files remaining in the machine the display returns to the list of Locked Print logs files If there are none remaining the display returns to the initial screen You can press the Escape key to exit to the previous level of the menu tree To enter the menu for changing the machine s settings press t...

Страница 145: ...is canceled when the machine s log is already full the oldest log will be deleted automatically The message Locked Print Job Deleted Press User Tools key disappears when all log entries are cleared The log will be cleared when the machine is turned off 3 Using the Printer Function 144 ...

Страница 146: ...ou can select to print with priority on print quality or print speed When printing images the higher the resolution of images the longer the time required for printing Changing the dither pattern A dither pattern is a pattern of dots used to simulate a color or shade of an image If the pattern is changed the characteristics of the image will also change You can select a pattern suitable for the im...

Страница 147: ... describes some of the settings that you can specify Printing multiple sets of a document You can print multiple sets of the same document Collating the output in document batches You can print complete sets of a multiple page document one set at a time P1 P2 P1 P2 If this function is not used when printing multiple sets prints will be output in page batches P1 P1 P2 P2 This function is useful whe...

Страница 148: ...page to the print job You can select to leave the cover page blank or print the first page of the document on the cover page If a cover page is inserted into a duplex job you can print on its back side also Paper for the cover page can either be the same as or different from the remaining pages Printing on custom size paper You can print using non standard size paper by specifying the size of the ...

Страница 149: ...3 Using the Printer Function 148 ...

Страница 150: ...nel to switch to the copier screen CES174 Screen in standby mode CES250 1 4 1 3 2 1 Current status or messages Displays the current status or messages 2 Current settings Displays the current tray reproduction ratio and scan settings 3 Selection key items If function names appear on the bottom you can use them by pressing the corresponding selection keys 4 Copy quantity Displays the current copy qu...

Страница 151: ... For details about Function Priority see p 287 Administrator Settings 4 Using the Copier Function 150 ...

Страница 152: ...ary configure advanced photocopy settings 3 To make multiple copies enter the number of copies using the number keys 4 Press the B W Start key or Color Start key CES169 To make black and white photocopies press the B W Start key To make color photocopies press the Color Start key The maximum number of copies is 99 You can change the paper tray for the current job by pressing the keys If tray 2 is ...

Страница 153: ...ng from the jammed page To place the original see p 117 Placing Originals To make advanced photocopy settings see p 154 Making Enlarged or Reduced Copies p 156 Combining Multiple Pages p 161 Making 2 sided Copies and p 164 Specifying Scan Settings For details about Select Paper or Sort see p 245 Copy Settings For details about Paper Tray Priority see p 266 System Settings For details about how to ...

Страница 154: ...1 Press the Copy key CES174 2 Press the Clear Stop key CES173 3 Press Yes Basic Operation in Copier Mode 153 ...

Страница 155: ...e are two ways to set the scaling ratio using a preset ratio or manually specifying a customized ratio Preset ratio CES103 50 71 82 93 122 141 200 400 50 65 78 93 129 155 200 400 Custom ratio CES106 25 to 400 in 1 increments Use this procedure to specify the reduction or enlargement ratio for the current job 4 Using the Copier Function 154 ...

Страница 156: ...ke photocopies in the specified ratio Temporary job settings are cleared in the following cases When no input is received for the period of time specified in System Auto Reset Timer while the initial screen is displayed When the Clear Stop key is pressed while the initial screen is displayed When the machine s mode is changed When the power is turned off When the machine s default for the same set...

Страница 157: ...Pages onto One Sheet This section describes how to set 2 in 1 4 in 1 copy mode for the current job This function is only available when the original is set in the ADF not when it is set on the exposure glass To use this function the paper size used for printing copies must be set to A4 Letter or Legal 2 in 1 mode You can copy two pages of an original onto a single sheet of photocopied paper Depend...

Страница 158: ...format can be selected from the following Portrait L to R Left to Right CES035 Portrait T to B Top to Bottom CES036 Landscape L to R Left to Right CES037 Landscape T to B Top to Bottom CES038 Scaling is preset to 50 regardless of the printout paper size Use this procedure to set 2 in 1 4 in 1 copy mode for the current job Combining Multiple Pages 157 ...

Страница 159: ...2 in 1 or 4 in 1 mode Temporary job settings are cleared in the following cases When no input is received for the period of time specified in System Auto Reset Timer while the initial screen is displayed When the Clear Stop key is pressed while the initial screen is displayed When the machine s mode is changed When the power is turned off When the machine s default for the same setting is changed ...

Страница 160: ...is function the paper size used for printing copies must be set to A4 or Letter CES165 To use this function first switch to ID card copy mode for the current job and then perform ID card copy 1 Press the ID Card Copy key CES201 The machine is now in ID card copy mode Proceed to the following steps to perform the ID card copy 2 Place the original front side down and top to the machine rear on the e...

Страница 161: ...etting to always make photocopies in ID card copy mode Setting this function for the current job temporarily disables the 2 Sided Copy setting automatically However after the temporary job setting is cleared the 2 sided copy function will be enabled again automatically Temporary job settings are cleared in the following cases When no input is received for the period of time specified in System Aut...

Страница 162: ...exposure glass Paper must be fed from tray 1 or tray 2 not from the bypass tray The paper size must be A4 B5 Letter Legal Executive 8 x 13 81 2 x 13 Folio or 16K The paper type must be thin plain middle thick recycled color preprinted or prepunched You can select top to top or top to bottom binding in either portrait or landscape orientation Top to Top Top to Top CES125 Top to Top CES126 Top to Bo...

Страница 163: ...d and orientation and then press the OK key 5 Press the User Tools key to return to the initial screen 2 Sided Copy appears on the display indicating that the machine is now in 2 sided copy mode You can press the Escape key to exit to the previous level of the menu tree After this function is set all subsequent copies will be 2 sided unless you cancel the setting by selecting Off for 2 Sided Copy ...

Страница 164: ... Setting this function automatically disables the ID Card Copy setting Making 2 sided Copies 163 ...

Страница 165: ...rn to the initial screen You can change the machine s default Density setting to always make copies with a specific density level Temporary job settings are cleared in the following cases When no input is received for the period of time specified in System Auto Reset Timer while the initial screen is displayed When the Clear Stop key is pressed while the initial screen is displayed When the machin...

Страница 166: ... photographs or pictures 1 Press the Image Quality key CES179 2 Press the keys to select the desired document type and then press the OK key Press the Escape key to discard the current change and return to the initial screen You can change the machine s default Original Type setting to always make copies with a specific document type Temporary job settings are cleared in the following cases When n...

Страница 167: ... For details about Original Type see p 245 Copy Settings For details about System Auto Reset Timer see p 287 Administrator Settings 4 Using the Copier Function 166 ...

Страница 168: ...he display press the Scanner key on the control panel to switch to the scanner screen CES175 Screen in standby mode CES251 1 3 2 1 Current status or messages Displays the current status or messages 2 Current settings Displays the current scanning mode and scan settings When Specify Dest is displayed Scan to E mail Scan to FTP or Scan to Folder functions can be used When Save Scn Data to USB is dis...

Страница 169: ... machine s default mode at power on can be specified in the Function Priority setting under Admin Tools For details about Function Priority see p 287 Administrator Settings 5 Using the Scanner Function 168 ...

Страница 170: ...sword to be correctly entered in the destination information In such cases after registering destinations check that the user name and password are correctly entered by sending test documents to those destinations The Address Book can contain up to 100 entries including 20 Quick Dial entries Destinations registered as Quick Dial entries can be selected by pressing the corresponding One Touch butto...

Страница 171: ...ansmission Can contain up to 64 characters Subject Required Subject of the e mail Can contain up to 64 characters Sender s Name Optional Name of e mail sender The name specified here will be shown under From or a similar field of the recipient s email application Can contain up to 32 characters File Format Color Gray Scale Required File format of the scanned file when scanning in color PDF or JPEG...

Страница 172: ...i Density Optional Specify the image density by clicking the right or left buttons is the lightest and is the darkest Scan to FTP Settings Item Setting Description Quick Dial Number Optional Select when setting the destination as a Quick Dial entry Name Required Name of the destination The name specified here will be shown on the screen when selecting a scan destination Can contain up to 16 charac...

Страница 173: ... Can contain up to 32 characters Directory Optional Name of the FTP server directory where scanned files are stored Can contain up to 64 characters Notification E mail Address Optional E mail address to which a notification is sent after transmission Can contain up to 64 characters Scan Size Optional Select the scanning size for the original from A5 B5 A4 Executive Half Letter Letter Legal or cust...

Страница 174: ...red folder can contain up to 32 characters Domain Optional If the destination computer is a member of an Active Directory domain specify that domain name Can contain up to 15 characters Login User Name Optional User name for logging in to the destination computer Can contain up to 32 characters Login Password Optional Password for logging in to the destination computer Can contain up to 32 charact...

Страница 175: ...st be configured properly If you are using the Scan to E mail function select a time zone according to your geographic location to send email with correct transmission date and time To send files to an FTP server or computer the user name password and directory must be configured properly On a network that uses a DNS server specify a computer name in Service Name and the name of the domain to whic...

Страница 176: ...e Web browser You can unassign a Quick Dial entry from a One touch button from the Quick Dial Destination page To do this select the desired entry click Delete and then click Apply again on a confirmation page The machine will notify you if the destination you want to modify is set as a forwarding destination of received faxes For details about using COMMAND CENTER see p 297 Using COMMAND CENTER F...

Страница 177: ... you want to delete is set as a forwarding destination of received faxes If you delete the destination anyway reconfigure the fax forwarding setting For details about using COMMAND CENTER see p 297 Using COMMAND CENTER For details about fax forwarding settings see p 310 Configuring the Fax Settings 5 Using the Scanner Function 176 ...

Страница 178: ...l to an FTP server or to a computer The scanned file is sent via E mail to an FTP server or a computer depending on the specified destination The original in the ADF takes precedence over the original on the exposure glass if you place originals both in the ADF and on the exposure glass When using the Scan to E mail Scan to FTP or Scan to Folder function you must first register the destination in ...

Страница 179: ...color press the Color Start key Depending on the machine s settings you may see the following screen on the display when scanning from the exposure glass If you see this screen proceed to the next step 6 If you have more originals to scan place the next original on the exposure glass and then press Yes Repeat this step until all originals are scanned 7 When all originals have been scanned press No...

Страница 180: ...be put on hold To resume the current job remove the jammed paper and scan the originals again starting from the jammed page To place the original see p 117 Placing Originals To configure advanced scan settings see p 183 Specifying the Scan Settings For details about specifying the scan destination see p 179 Specifying the scan destination For details about File Type or Limitless Scan see p 251 Sca...

Страница 181: ...ctive for the first scan job after the machine is turned on To select destinations not registered as Quick Dial entries use the Address Book key For details about how to specify destinations using the Address Book key see p 177 Basic Operation for Scan to E mail FTP Folder Basic Operation for Scan to USB This section describes the basic operation for sending scanned files to a USB flash disk The o...

Страница 182: ...types of USB flash disks cannot be used 1 Insert your USB flash disk into the USB flash disk port CES199 2 Press the Scanner key CES175 Loading appears on the display Wait until the display changes to show Save Scn Data to USB the duration depends on your USB flash disk 3 Place the original on the exposure glass or in the ADF If necessary configure advanced scan settings Scanning Using the Control...

Страница 183: ...de 5 Press the appropriate selection key according to the desired file format Depending on the machine s settings you may see the following screen on the display when scanning from the exposure glass If you see this screen proceed to the next step If not proceed to step 8 6 If you have more originals to scan place the next original on the exposure glass and then press Yes Repeat this step until al...

Страница 184: ...ill be put on hold To resume the current job remove the jammed paper and scan the originals again starting from the jammed page To place the original see p 117 Placing Originals To configure advanced scan settings see p 183 Specifying the Scan Settings For details about B W Scanning Mode Limitless Scan or File Type see p 251 Scanner Settings For details about how to remove the paper jammed in the ...

Страница 185: ...erform the remaining steps of the procedure 3 Press the keys to select mm or inch and then press the OK key 4 Enter the width using the number keys and then press the OK key To enter a decimal point press 5 Enter the length using the number keys and then press the OK key To enter a decimal point press You can press the Escape key to exit to the previous level of the menu tree You can change the ma...

Страница 186: ...key to discard the current change and return to the initial screen You can change the machine s default Density setting to always scan with a specific density level Temporary job settings are cleared in the following cases When no input is received for the period of time specified in System Auto Reset Timer while the initial screen is displayed When the Clear Stop key is pressed while the initial ...

Страница 187: ...machine s default Resolution setting to always scan with a specific resolution level Temporary job settings are cleared in the following cases When no input is received for the period of time specified in System Auto Reset Timer while the initial screen is displayed When the Clear Stop key is pressed while the initial screen is displayed When the machine s mode is changed When the power is turned ...

Страница 188: ...plication The machine supports WIA scanning an additional method of scanning originals from your computer for USB connection WIA scanning is possible if your computer is running a WIA compatible application For more information see the manual for your application Settings You Can Configure in the TWAIN Dialog Box This section describes the settings you can configure in the TWAIN dialog box CES194 ...

Страница 189: ...n scan mode Custom Select this to configure your own scan settings You can save or delete your custom scan settings by clicking Save As or Delete respectively When using the ADF ADF Faster Select this to scan originals with many graphics originals with both text and graphics line art or color photographs in fast scan mode ADF Better Select this to scan originals with many graphics originals with b...

Страница 190: ... preview area You can select the unit of measure from cm inches or pixels 7 Scan task Displays a maximum of 10 previously used scan areas To remove a scan task select the number of the task and then click Remove When scanning from the exposure glass you can select AutoCrop to let the scanner automatically detect the size of your original If the scan data is larger than the memory capacity an error...

Страница 191: ...5 Using the Scanner Function 190 ...

Страница 192: ...ey on the control panel to switch to the fax screen CES176 Screen in standby mode CES252 4 1 3 2 1 Current status or messages Displays the current status or messages 2 Current settings Displays the current density and resolution settings 3 Selection key items Displays the functions you can use by pressing the corresponding selection keys 4 Current date and time Shows the current date and time The ...

Страница 193: ...date can be specified in Set Date Time under Admin Tools For details about Function Priority see p 287 Administrator Settings For details about setting the date and time see p 193 Setting the Date and Time 6 Using the Fax Function 192 ...

Страница 194: ...ime and then press the OK key 5 Press the keys to select Set Date and then press the OK key 6 Press the keys to select the desired date format and then press the OK key 7 Enter the current date using the number keys and then press the OK key You can press the keys to move between fields 8 Press the keys to select Set Time and then press the OK key 9 Press the keys to select the desired time format...

Страница 195: ...nu can be specified in Admin Tools Lock If an incorrect time or date is input the machine automatically corrects it to the nearest valid time or date For details about Admin Tools Lock see p 287 Administrator Settings 6 Using the Fax Function 194 ...

Страница 196: ...Dial entries can be selected by pressing the corresponding One Touch button Speed Dial entries Destinations registered as Speed Dial entries can be selected by pressing the Address Book key and then selecting the desired entry using the keys For details about creating backup files see p 339 Backing Up the Machine s Settings Registering Fax Destinations Using the Control Panel This section describe...

Страница 197: ...se Time setting under fax transmission settings To use tone services on a pulse dialing line insert in the fax number switches the dialing mode from pulse to tone temporarily If the machine is connected to the telephone network through a PBX make sure to enter the outside line access number specified in PBX Access Number before the fax number Use COMMAND CENTER to register an Internet Fax destinat...

Страница 198: ...appear 6 Press the keys to select Fax No and then modify the fax number up to 40 characters 7 Press the keys to select Name and then modify the fax name up to 20 characters 8 Confirm the setting and then press the OK key 9 Press the User Tools key to return to the initial screen You can press the Escape key to exit to the previous level of the menu tree A password for accessing the Address Book me...

Страница 199: ...tedly until the current number is deleted 7 Press the keys to select Name and then press the key repeatedly until the current name is deleted 8 Confirm the setting and then press the OK key 9 Press the User Tools key to return to the initial screen You can press the Escape key to exit to the previous level of the menu tree A password for accessing the Address Book menu can be specified in Admin To...

Страница 200: ... destination Name Optional Name of the destination The name specified here will be shown on the screen when selecting a fax destination Can contain up to 20 characters Fax Number Optional Fax number of the destination Can contain up to 40 characters If the machine is connected to the telephone network through a PBX make sure to enter the outside line access number specified in PBX Access Number be...

Страница 201: ...achine by entering its IP address 2 Click Quick Dial Destination or Fax Speed Dial Destination If you modify the Speed Dial entry proceed to step 4 3 Click Fax Quick Dial Destination 4 Select the entry to modify and then click Change 5 Modify settings as necessary 6 Enter the administrator password if required 7 Click Apply 8 Close the Web browser Deleting fax destinations This section describes h...

Страница 202: ...Transmission Memory Transmission In this mode the machine scans several originals into memory and sends them all at once This is convenient when you are in a hurry and want to take the document away from the machine In this mode you can send a fax to multiple destinations Immediate Transmission In this mode the machine scans the original and faxes it simultaneously without storing it in memory Thi...

Страница 203: ...d send them as attachments to e mail The level of security for Internet communications is low It is recommended that you use the telephone network for confidential communications Internet Fax delivery might be delayed due to network congestion Use a public telephone line if the fax needs to be delivered in a timely manner The Internet Fax function supported by this machine is compliant with ITU T ...

Страница 204: ...nce over the original on the exposure glass if you place originals both in the ADF and on the exposure glass 1 Press the Facsimile key CES176 2 Place the original on the exposure glass or in the ADF If necessary configure the advanced scan settings 3 Enter the fax number up to 40 characters using the number keys or specify a destination using the One Touch buttons or Speed Dial function If the mac...

Страница 205: ...0 to 9 pause and space If necessary insert a pause in a fax number The machine pauses briefly before it dials the digits following the pause You can specify the length of the pause time in the Pause Time setting under fax transmission settings To use tone services on a pulse dialing line insert in a fax number switches the dialing mode from pulse to tone temporarily You can also specify a destinat...

Страница 206: ...Administrator Settings For details about using the One Touch buttons Speed Dial function or Pause Redial key or broadcasting a fax see p 206 Specifying the Fax Destination For details about fax number confirmation see p 287 Administrator Settings For details about Auto Redial or Pause Time see p 254 Fax Transmission Settings For details about how to remove the paper jammed in the ADF see p 356 Rem...

Страница 207: ...e broadcasting function see p 209 Specifying the destination using the broadcast function Specifying the Fax Destination This section describes how to specify the destination when sending a fax Other than entering the destination fax number using the number keys you can specify destinations using the following functions Using the One Touch buttons Using Speed Dial Using the Broadcast function Usin...

Страница 208: ...ift key if you want to use Quick Dial entries Nos 11 to 20 before pressing a One Touch button CES183 You can check the registered names and fax numbers by printing a report For details about registering the Quick Dial entries see p 195 Registering Fax Destinations For details about printing the Quick Dial list see p 279 Printing Lists Reports Specifying the destination using Speed Dial This sectio...

Страница 209: ...he number keys Each time you enter a character the display changes to show the matching name 3 Press the keys to select the desired Speed Dial entry and then press the OK key The Address Book shows only the Speed Dial entries Use the One Touch buttons to specify Quick Dial destinations You can check the registered names and fax numbers by printing a report For details about registering the Speed D...

Страница 210: ...umber keys 3 Press the OK key Press List to see the list of destinations that have been added so far Go back to step 2 to add further destinations While specifying multiple destinations you can press the Clear Stop key to clear all destinations If you specify multiple destinations in Immediate Transmission mode the mode switches to Memory Transmission mode temporarily If the destinations contain b...

Страница 211: ...xtra telephone you can talk and send a fax in one call This function is available in Immediate Transmission mode only This function is not available with Internet Fax Sending a fax using On Hook Dial The On Hook Dial function allows you to check the destination s status while listening to the tone from the internal speaker This function is useful when you want to ensure that the fax will be receiv...

Страница 212: ... 201 Selecting Transmission Mode Sending a fax after a conversation An external telephone allows you to send a fax after finishing your conversation without having to disconnect and redial This function is useful when you want to ensure that the fax will be received 1 Place the original 2 Pick up the handset of the external telephone 3 Specify the destination using the external telephone 4 When th...

Страница 213: ...p 201 Selecting Transmission Mode Specifying the Scan Settings This section describes how to specify image density and resolution for the current scan job Adjusting image density This section describes how to adjust image density for the current job There are three image density levels The darker the density level the darker the printout 1 Press the Density key CES178 2 Press the keys to select th...

Страница 214: ...s default for the same setting is changed For details about Density see p 254 Fax Transmission Settings For details about System Auto Reset Timer see p 287 Administrator Settings Specifying the resolution This section describes how to specify the scan resolution for the current job There are three resolution settings Standard Select this when the original is a printed or typewritten document with ...

Страница 215: ...y job settings are cleared in the following cases When no input is received for the period of time specified in System Auto Reset Timer while the initial screen is displayed When the Clear Stop key is pressed while the initial screen is displayed When the machine s mode is changed When the power is turned off When the machine s default for the same setting is changed For details about Resolution s...

Страница 216: ...ook allows you to specify LAN Fax destinations quickly and easily The LAN Fax Address Book can contain up to 1000 entries including individual destinations and groups of destinations You can configure separate LAN Fax Address Books for each user account on your computer You can import and export the LAN Fax Address Book as required Opening the LAN Fax Address Book This section describes how to ope...

Страница 217: ... Displays groups only User Displays individual destinations only Registering destinations This section describes how to register destinations in the LAN Fax Address Book 1 Open the LAN Fax Address Book and then click Add User 2 Register the required information and click OK For details see the table below 6 Using the Fax Function 216 ...

Страница 218: ...s following the pause You can specify the length of the pause time in the Pause Time setting under fax transmission settings To use tone services on a pulse dialing line insert in a fax number switches the dialing mode from pulse to tone temporarily A message appears if the name you specified already exists in the LAN Fax Address Book To register the destination under a different name click No and...

Страница 219: ...e the dialog box without modifying the original destination click Cancel A message appears if the name you specified already exists in the LAN Fax Address Book To register the destination under a different name click No and enter a different name Clicking Yes allows you to register it under the same name Registering groups This section describes how to register groups of destinations A group can c...

Страница 220: ...groups 1 Open the LAN Fax Address Book select the group you want to modify from the User List and then click Edit 2 To add a destination to the group select the destination you want to add from User List and click Add 3 To delete a destination from the group select the destination you want to delete from List of Group Members and then click Delete from List 4 Click OK A message appears if the name...

Страница 221: ...cedure might vary slightly Exporting LAN Fax Address Book data LAN Fax Address Book data can be exported to a file in CSV Comma Separated Values format Follow this procedure to export LAN Fax Address Book data 1 Open the LAN Fax Address Book and then click Export 2 Navigate to the location to save the LAN Fax Address Book data specify a name for the file and then click Save Importing LAN Fax Addre...

Страница 222: ...verwrite Imports the destination overwriting the data in the LAN Fax Address Book Overwrite All Imports the current and subsequent destinations under the same names as existing destinations overwriting the data in the LAN Fax Address Book Cancel Cancels the import operation If a destination does not contain a name or invalid characters are used in the telephone number or fax number select one of t...

Страница 223: ...l be canceled If this happens lower the resolution or reduce the number of pages and try again The following procedure is based on Windows XP as an example If you are using another operating system the procedure might vary slightly 1 Open the file you want to send 2 On the File menu click Print 3 Select the LAN Fax driver as the printer and then click OK If necessary configure the transmission set...

Страница 224: ... a destination From the View list you can select the types of destinations to display All Displays all destinations Group Displays groups only User Displays individual destinations only If sending faxes via LAN Fax is restricted you must enter a user code in the LAN Fax driver s property before sending a fax For details about configuring the transmission settings see p 226 Configuring Transmission...

Страница 225: ... Fax Cover Sheet This section describes how to edit a fax cover sheet in the LAN Fax driver s properties 1 On the File menu click Print 2 Select the LAN Fax driver as the printer and then click OK 3 Click the Specify Destination tab and then click Edit Cover Sheet 4 Configure settings as necessary and then click OK For details about settings see p 225 Settings you can configure for the fax cover s...

Страница 226: ...ain up to 64 characters Department Enter your department name Can contain up to 64 characters Name Enter your name Can contain up to 64 characters Phone Enter your telephone number Can contain up to 64 characters FAX Enter your fax number Can contain up to 64 characters 3 Import Bitmap Specify a bitmap image you want to show on the cover sheet The image will be shown in the position as follows Lef...

Страница 227: ...r sheet Company Enter the destination company name Can contain up to 64 characters Department Enter the destination department name Can contain up to 64 characters Name Enter the destination name Can contain up to 64 characters Configuring Transmission Settings This section describes how to configure transmission settings in the LAN Fax driver s properties Properties are set separately for each ap...

Страница 228: ...re sending If a paper size is specified in the application that paper size will be used Otherwise the paper size specified here will be used Sending Size Displays the actual paper size of the fax that is sent The actual size of the fax will be A4 if the size of the document being faxed is A3 B4 or smaller than A4 A3 B4 documents will be reduced to sending size automatically 2 Orientation Specifies...

Страница 229: ...er Code If sending faxes via LAN Fax is restricted select this check box and enter a user code before sending a fax 5 About Displays the version of the LAN Fax driver 6 Restore Defaults Restores the settings to their factory defaults The settings configured here are applicable for the current application only 6 Using the Fax Function 228 ...

Страница 230: ...s a fax machine Select the following mode when no external telephone or telephone answering device is connected Fax Only mode auto reception In this mode the machine is used only as a fax machine and receives faxes automatically When using the machine with an external device Select one of the following modes when an external telephone or telephone answering device is connected FAX TEL Manual mode ...

Страница 231: ...ive faxes after the external telephone answering device rings the number of times specified in Overall Ringings w TAD under Fax Features Make sure to set the external telephone answering device to answer calls before the machine starts to receive faxes For details about Overall Ringings w TAD see p 257 Fax Feature Settings For details about receiving Internet Faxes see p 232 Receiving an Internet ...

Страница 232: ...t a fax calling tone for five seconds If a fax calling tone is detected the machine starts to receive the fax automatically 2 If a fax calling tone is not detected the machine starts to ring and continues to try to detect a fax calling tone for the period of time specified in RX Mode Auto Switch Time under Fax Features If a fax calling tone is detected or if you do not pick up the handset the mach...

Страница 233: ...rts The external telephone answering device records messages You can manually receive a fax during silence detection Silence detection does not terminate for 30 seconds even if the external telephone answering device goes on hook unless you press the Clear Stop key and disconnect the call For details about Overall Ringings w TAD see p 257 Fax Feature Settings For details about manually receiving a...

Страница 234: ...nabled an error notification e mail will be sent to the original sender If Error Notification E mail is disabled or the error notification e mail failed the machine will print out an error report For details about settings of COMMAND CENTER see p 328 Configuring the POP3 Settings and p 329 Configuring the Internet Fax Settings Forwarding or Storing Faxes in Memory To prevent unauthorized users fro...

Страница 235: ...not sent 5 Specify the forwarding destination in Forwarding Destination under fax settings using COMMAND CENTER The table below shows what happens after forwarding succeeds or fails depending on the machine s configuration Forwardi ng Print Forwarded File Print Received File Results Success Off Not applicable The machine deletes the fax from memory Success On On The machine prints out the fax and ...

Страница 236: ...rint for Reception File Setting under fax feature settings to store received faxes in memory for printing 2 Configure the print setting for faxes stored in memory in Print Received File under fax feature settings On Automatically print out the received faxes and delete from memory Off Store the received faxes in memory for later manual printing When the fax is successfully printed out it will be d...

Страница 237: ...electing On here will enable Print Received File under fax feature settings If you do not want to print out subsequent faxes automatically set it back to Off If tray 2 is installed you can select which tray to feed paper from in Select Paper Tray under fax feature settings If you set the machine to switch between tray 1 and 2 automatically in this setting you can also specify the tray the machine ...

Страница 238: ...accept or reject faxes from them This function is not available with Internet Fax Registering the Special Senders This section describes how to register Special Senders A maximum of 30 Special Senders can be registered 1 Start the Web browser and access the machine by entering its IP address 2 Click Special Sender 3 From the Destination Type list select Special Sender 4 Select the Special Sender n...

Страница 239: ...2 Click System Settings 3 Click the Fax tab 4 For Authorized Reception click Active 5 For Receive Conditions click Special Sender or Other Than Special Sender Special Sender Select this to receive faxes from the Special Senders and reject faxes from all other senders Other Than Special Sender Select this to reject faxes from the Special Senders and receive faxes from all other senders 6 Enter the ...

Страница 240: ...machine is turned off Basic Operation Using the Menu Screen This section describes the basic procedure for specifying and changing the machine s settings If you want to configure the machine s system settings press the User Tools key If you want to configure the settings of machine s current operation mode press the keys The procedure for changing the copy quality setting is provided as an example...

Страница 241: ...nt type of the original and then press the OK key 5 Press the User Tools key to return to the initial screen You can press the Escape key to exit to the previous level of the menu tree 7 Configuring the Machine Using the Control Panel 240 ...

Страница 242: ...tings key setting Select Paper Sort Original Type Density Reduce Enlarge Colour Adjustment 2 Sided Copy Scan Settings key setting Scan Size B W Scanning Mode Max E mail Size Density Resolution Compression Colour Limitless Scan File Type Fax Transmission Settings key setting Immediate TX Resolution Density Pause Time Menu Chart 241 ...

Страница 243: ...Address Book Settings User Tools key setting Quick Dial Dest Fax Speed Dial Dest System Settings User Tools key setting Adjust Sound Volume Tray Paper Settings I O Timeout Auto Continue Toner Saving Supplies Status Scanner Carriage Anti Humidity Level Colour Registration Auto Cleaning B W Print Priority Notify Toner Almost Empty 7 Configuring the Machine Using the Control Panel 242 ...

Страница 244: ...X Standby File List Quick Dial Dest List Fax Speed Dial Dest List Scanner Dest List Scanner Journal Maintenance Page Special Sender List Administrator Settings User Tools key setting Set Date Time Program Fax Information Dial Push Phone PSTN PBX PBX Access Number Function Priority System Auto Reset Timer Energy Saver Mode Language Country Reset Settings Menu Chart 243 ...

Страница 245: ...mation Printer Feature Settings User Tools key setting List Test Print System PCL Menu PS Menu For details about configuring the machine using COMMAND CENTER see p 297 Using COMMAND CENTER 7 Configuring the Machine Using the Control Panel 244 ...

Страница 246: ...provided as an example 1 Press the Copy key CES174 2 Press the keys CES168 3 Press the keys to select Sort and then press the OK key 4 Press the keys to select On or Off and then press the OK key 5 Press the User Tools key to return to the initial screen You can press the Escape key to exit to the previous level of the menu tree Copy Settings 245 ...

Страница 247: ...omatically switches to the other tray to continue printing If tray 2 is not installed only Tray 1 and Bypass Tray appear Default Tray 1 Tray 1 Tray 2 Bypass Tray A4 8 1 2 11 Sort Configures the machine to sort the output pages into sets when making multiple copies of a multi page document P1 P2 P1 P2 Default Off On Off Original Type Specifies the content of originals to optimize copy quality Defau...

Страница 248: ... Specifies a combined copy or the percentage by which copies are enlarged or reduced Default 100 50 65 model only 71 model only 78 model only 82 model only 93 100 Comb 2 on 1 Select this to photocopy two pages of an original onto a single sheet of paper When selecting this option also select the orientation Portrait CES033 Landscape CES034 Comb 4 on 1 Copy Settings 247 ...

Страница 249: ...electing this option also select the orientation and layout Portrait L to R CES035 Portrait T to B CES036 Landscape L to R CES037 Landscape T to B CES038 122 model only 129 model only 141 model only 155 model only 200 400 ID Card Copy 7 Configuring the Machine Using the Control Panel 248 ...

Страница 250: ...ce of red green and blue Default for all colors Red Darkest Lightest Green Darkest Lightest Blue Darkest Lightest 2 Sided Copy Sets the machine to make 2 sided copies by copying single sided documents onto the front and back sides of each sheet You can select top to top or top to bottom binding in either portrait or landscape orientation Note that enabling this setting automatically disables the I...

Страница 251: ...CES125 Top to Top CES126 Top to Bottom CES127 Top to Bottom CES128 7 Configuring the Machine Using the Control Panel 250 ...

Страница 252: ...as an example 1 Press the Scanner key CES175 2 Press the keys CES168 3 Press the keys to select File Type and then press the OK key 4 Press the keys to select Multi page or Single Page and then press the OK key 5 Press the User Tools key to return to the initial screen You can press the Escape key to exit to the previous level of the menu tree Scanner Settings 251 ...

Страница 253: ...g the control panel Default Halftone Halftone The machine creates 1 bit black and white images Images contain only black and white colors Grey Scale The machine creates 8 bit black and white images Images contain black and white and intermediate gray colors Max E mail Size Specifies the maximum size of a file that can be sent by e mail Default 1 MB 1 MB 2 MB 3 MB 4 MB 5 MB No Limit Density Specifi...

Страница 254: ... Medium Low Medium High Limitless Scan Sets the machine to request next originals when scanning with the exposure glass Default Off On Off File Type Specifies whether to create a multi page file containing all pages or separate single page files when scanning multiple pages Note that a scanned file can contain multiple pages only when the file format is PDF or TIFF If the file format is JPEG a sin...

Страница 255: ...vided as an example 1 Press the Facsimile key CES176 2 Press the keys CES168 3 Press the keys to select Resolution and then press the OK key 4 Press the keys to select the desired resolution and then press the OK key 5 Press the User Tools key to return to the initial screen You can press the Escape key to exit to the previous level of the menu tree 7 Configuring the Machine Using the Control Pane...

Страница 256: ...lable for Internet Faxes Faxes will be sent using Detail resolution if Photo resolution has been specified Default Standard Standard Select this when the original is a printed or typewritten document with normal sized characters Detail Select this when the original is a document with small print Photo Select this when the original contains images such as photographs or shaded drawings Density Spec...

Страница 257: ...f redial attempts is preset to two or three times depending on the Country setting under Admin Tools in five minute intervals Default On Off On Print Fax Header Sets the machine to add a header to every fax you send The header includes the current date and time user fax name and number job ID and page information Default On Off On 7 Configuring the Machine Using the Control Panel 256 ...

Страница 258: ...en press the OK key 4 Press the keys to select the desired tray and then press the OK key 5 Press the User Tools key to return to the initial screen You can press the Escape key to exit to the previous level of the menu tree Fax Feature Setting Parameters This section describes fax feature setting parameters Reception Settings Specifies the settings for receiving a fax Switch Reception Mode Specif...

Страница 259: ... fit the fax on a single sheet it will be printed on separate sheets without being reduced Default On Default may be Off depending on the Country setting under Admin Tools Off On Overall Ringings w TAD Specifies the number of times the external telephone answering device rings before the machine starts to receive faxes in FAX TAD mode Default 5 times 1 to 20 times in increments of 1 Number of Ring...

Страница 260: ...om the Special Senders and receive faxes from all other senders Reception File Setting Sets the machine to store received faxes into memory for printing or forward them to a preset destination Use COMMAND CENTER to specify the forwarding destination for details see p 310 Configuring the Fax Settings Default Print Print Forward Print Received File Sets the machine to automatically print the faxes r...

Страница 261: ...r printing faxes Make sure to select a tray that contains paper of the valid size If tray 2 is not installed only Tray 1 appears Default Auto Auto The machine uses tray 1 and tray 2 if they contain paper of the same size In this case the machine starts to print from the tray specified as the priority tray in Paper Tray Priority under system settings If that tray runs out of paper the machine autom...

Страница 262: ...reception This function is not available with Internet Fax reception Default On Off On Dial Tone Detect Sets the machine to detect a dial tone before the machine begins to dial the destination automatically Default Detect Detect Not Detect Transmission Speed Specifies the transmission speed for the fax modem Default 33 6 Kbps 33 6 Kbps 14 4 Kbps 9 6 Kbps 7 2 Kbps 4 8 Kbps 2 4 Kbps Reception Speed ...

Страница 263: ...roduced on the report even if Error Only Image Attached or Every TX Image Attached is selected The transmission report will be printed using the tray set for Facsimile under Paper Tray Priority in system settings on A4 or Letter size paper Default Every TX Image Attached Error Only Prints a report when a transmission error occurs Error Only Image Attached Prints a report with an image of the origi...

Страница 264: ...fax journal will be printed using the tray set for Facsimile under Paper Tray Priority in system settings on A4 or Letter size paper Default Auto Print Auto Print Do not Auto Print Fax Feature Settings 263 ...

Страница 265: ... Dial Dest Specifies the fax number and name for Quick Dial entries You can register up to 20 Quick Dial entries No Specifies the Quick Dial number Fax No Specifies the fax number for Quick Dial entries The fax number can contain up to 40 characters including 0 to 9 pause and space Name Specifies the name for Quick Dial entries The name can contain up to 20 characters Fax Speed Dial Dest Specifies...

Страница 266: ...Specifies the name for Speed Dial entries The name can contain up to 20 characters Fax Address Book Settings 265 ...

Страница 267: ...Key Sound and then press the OK key 5 Press the keys to change the volume and then press the OK key 6 Press the User Tools key to return to the initial screen You can press the Escape key to exit to the previous level of the menu tree System Setting Parameters This section describes the system setting parameters Adjust Sound Volume Specifies the volume of the sounds produced by the machine Default...

Страница 268: ...n hook mode Off Low Middle High Job End Tone Specifies the volume of the beep that sounds when a job is complete Off Low Middle High Job Error Tone Specifies the volume of the beep that sounds when a fax transmission error occurs Off Low Middle High Alarm Volume Specifies the volume of the alarm that sounds when an operation error occurs Off Low Middle High System Settings 267 ...

Страница 269: ...er Plain Paper Middle Thick Paper Thick Paper 1 Recycled Paper Colour Paper Letterhead Prepunched Paper Label Paper Bond Paper Cardstock Envelope Thick Paper 2 Paper Size Tray 1 Specifies the paper size for tray 1 Default A4 8 1 2 x 11 A4 B5 JIS A5 B6 JIS A6 8 1 2 x 14 8 1 2 x 11 5 1 2 x 8 1 2 7 1 4x10 1 2 8 x 13 8 1 2 x 13 8 1 4 x 13 16K 4 1 8 x 9 1 2 3 7 8 x 7 1 2 C5 Env C6 Env DL Env Custom Siz...

Страница 270: ... is too small for the print job the printed image will be cropped For standard size print jobs an error will occur if the paper size type settings of the machine and printer driver do not match Paper Tray Priority Specifies the tray that the machine uses first for print jobs printing out copies or printing out faxes from tray 1 or tray 2 If that tray runs out of paper the machine automatically swi...

Страница 271: ... from other ports increase the timeout period Default 60 seconds 15 sec 60 sec 300 sec Locked Print Specifies how many seconds the machine holds a new Locked Print file when the machine cannot store any more Locked Print files Within this time you can print or delete the new Locked Print file You can also print or delete an existing Locked Print file so that the new Locked Print file can be stored...

Страница 272: ...al will be recognized as a new device upon USB connection Auto Continue Sets the machine to ignore an error with paper size or type and continue printing The printing stops temporarily when an error is detected and restarts automatically after about ten seconds using the settings made on the control panel Default Off On Off Toner Saving Sets the machine to print using a reduced amount of toner for...

Страница 273: ...ner Carriage Returns the scanning unit inside the machine to its original position Before transporting the machine use this function to return the scanning unit to its original position Press Yes to return the scanning unit to its original position Press No to exit to the previous level of the menu tree without returning the scanning unit to its original position Anti Humidity Level Sets the machi...

Страница 274: ...ets the machine to execute periodic cleaning of the interior You may hear some noise while cleaning is being executed This noise does not indicate a malfunction Default On On Off B W Print Priority Sets the machine to suppress the consumption of color toner when printing black and white pages Also the amount of color toner consumed during warm up time for maintenance will also be lowered Note that...

Страница 275: ... Normal Low toner level notification will be made when the number of pages that can be printed with the remaining toner is approximately 200 Later Low toner level notification will be made when the number of pages that can be printed with the remaining toner is approximately 100 7 Configuring the Machine Using the Control Panel 274 ...

Страница 276: ...lect Ethernet and then press the OK key 5 Press the keys to select Set Ethernet Speed and then press the OK key 6 Press the keys to select the network speed and then press the OK key 7 Press the User Tools key to return to the initial screen A password for accessing the Network Settings menu can be specified in Admin Tools Lock You can press the Escape key to exit to the previous level of the menu...

Страница 277: ...t 100Mbps Full Duplex 100Mbps Half Duplex 10Mbps Full Duplex 10Mbps Half Duplex IPv4 Configuration DHCP Sets the machine to receive its IPv4 address subnet mask and default gateway address automatically from a DHCP server When DHCP is used you cannot specify the IPv4 address subnet mask or default gateway address manually Default Active Active Inactive IP Address Specifies the machine s IPv4 addre...

Страница 278: ...y X vary according to your network environment IP Address Method Displays the IP address acquisition method DHCP Auto IP Manual Config Default IP IPv6 Configuration IPv6 Select whether to enable or disable IPv6 Default Active Active Inactive DHCP Sets the machine to receive its IPv6 address from a DHCP server When DHCP is used you cannot specify the IPv6 address manually Default Inactive Active In...

Страница 279: ...ters Stateless Address Displays the IPv6 stateless addresses obtained from a Router Advertisement Stateless Address 1 Stateless Address 2 Stateless Address 3 Stateless Address 4 Link local Address Displays the IPv6 link local address Contact your network administrator for information about the network configuration 7 Configuring the Machine Using the Control Panel 278 ...

Страница 280: ...ey 4 Press Yes in the confirmation screen The configuration page is printed You can press the Escape key to exit to the previous level of the menu tree Types of Report Configuration Page Prints general information and the current configurations of the machine Fax Journal Prints a fax transmission and reception journal for the last 50 jobs TX RX Standby File List Prints a list of fax jobs remaining...

Страница 281: ...ax Special Senders Reports will be printed using the tray set for Facsimile under Paper Tray Priority in system settings Repots will be printed on A4 or Letter size paper Load one of these sizes of paper into the tray before printing reports For details about priority tray settings see p 266 System Settings For details about loading paper see p 94 Loading Paper Reading the Configuration Page Syste...

Страница 282: ...ss Tray Shows paper size and type settings Tray Priority Shows the fax printer and copy priority tray settings Bypass Tray Priority Shows the bypass tray priority settings B W Print Priority Shows the black and white print priority setting Notify TonerAlmstEmpty Shows the toner near end notification setting Supplies Status Shows information about supply levels Toner Black Toner Magenta Toner Yello...

Страница 283: ...r settings Copy Settings Shows the copy settings Scan Settings Shows the scanner settings Fax Features Shows the fax settings Network Settings Shows the settings for the following items MAC Address Set Ethernet Speed TCP IP SNMP E mail IPv6 Configuration Shows the IPv6 settings IPv6 DHCP IP Address DHCP Stateless Address Link local Address 7 Configuring the Machine Using the Control Panel 282 ...

Страница 284: ...ail Address Automatic POP POP Interval Auth Internet Fax TX Auth Internet Fax RX Internet Fax TX Error Notification E mail POP Server E mail Recept Set Insert System fixed Text Reading the Fax Journal No Shows the job number Date Time Shows the transmission start date and time for fax transmission Shows the reception date and time for fax reception Communication Type Shows the following informatio...

Страница 285: ...me registered for the destination if a name was not programmed shows the destination s fax number If a fax number was input using the control panel number keys shows the dialed fax number If the fax was sent from the computer LAN Fax shows the dialed fax number If the fax was sent via Internet Fax shows the destination e mail address No of Pages Shows the number of pages transmitted or received Re...

Страница 286: ...tered for the destination if a name was not programmed shows the destination s fax number If a fax number was input using the control panel number keys shows the dialed fax number If the fax was sent from the computer LAN Fax shows the dialed fax number If the fax was sent via Internet Fax shows the destination e mail address No of Pages Shows the number of pages a fax contained Reading the Scanne...

Страница 287: ...File Format Shows the file format Results Shows whether the transmission successfully ended or failed 7 Configuring the Machine Using the Control Panel 286 ...

Страница 288: ... keys to select Function Priority and then press the OK key 5 Press the keys to select the desired mode and then press the OK key 6 Press the User Tools key to return to the initial screen A password for accessing the Admin Tools menu can be specified in Admin Tools Lock You can press the Escape key to exit to the previous level of the menu tree For details about Admin Tools Lock see p 287 Adminis...

Страница 289: ...Specifies the user information for sending a fax Number Specifies the fax number of the machine using up to 20 characters including 0 to 9 space and Name Specifies the name of the machine using up to 20 alphanumeric characters and symbols Dial Push Phone Specifies the line type of the telephone line To configure this setting contact your telephone company and select the setting based on your telep...

Страница 290: ...period of time during configuration Also if the specified period elapses while the initial screen of the current mode is displayed the machine returns to the mode specified in Function Priority Default On 30 seconds On 30 sec 1 min 2 min 3 min 5 min 10 min Off Energy Saver Mode Sets the machine to enter Energy Saver mode Energy Saver mode 1 or Energy Saver mode 2 to reduce power consumption The ma...

Страница 291: ...ect the country code correctly Selecting a wrong country code may cause failures in fax transmissions The default value for this setting is the country code you have specified during the Initial Setup which is required after turning on the machine for the first time Reset Settings Be sure not to clear the settings by mistake Reset All Settings Resets the machine s settings to their defaults except...

Страница 292: ...r to enable or disable IPsec This function appears only when a password is specified under Admin Tools Lock Default Inactive Active Inactive Fax Number Confirmation Sets the machine to require a fax number to be entered twice when specifying a destination manually This function appears only when a password is specified under Admin Tools Lock Default Off On Off Administrator Settings 291 ...

Страница 293: ...o select None Long Edge Bind or Short Edge Bind and then press the OK key 6 Press the User Tools key to return to the initial screen You can press the Escape key to exit to the previous level of the menu tree Printer Feature Setting Parameters This section describes the printer feature setting parameters List Test Print Prints lists showing configurations on the machine The lists will be printed u...

Страница 294: ...r size if the specified paper is not loaded in any tray Alternative sizes are preset to A4 and Letter Default Off Auto Off Page Size Specifies the paper size to be used when the paper size is not specified in the print job This setting is disabled if the number of pages to print is specified by the printer driver Default A4 8 1 2 11 A4 B5 JIS A5 B6 JIS A6 8 1 2 14 8 1 2 11 5 1 2 8 1 2 7 1 4 10 1 2...

Страница 295: ...the machine to print an error page when the machine detects a printer or memory error Default Off On Off PCL Menu Specifies conditions when using PCL for printing Orientation Specifies the page orientation Default Portrait Portrait Landscape Form Lines Specifies the number of lines per page Default 64 60 5 to 128 in increments of 1 Font Number Specifies the ID of the default font you want to use D...

Страница 296: ... D N PC 850 PC 852 PC 858 PC8 TK Win L1 Win L2 Win L5 Desktop PS Text VN Intl VN US MS Publ Math 8 PS Math VN Math Pifont Legal ISO 4 ISO 6 ISO 11 ISO 15 ISO 17 ISO 21 ISO 60 ISO 69 Win 3 0 MC Text ISO L6 ISO L9 PC 775 PC 1004 Win Baltic Courier Font Specifies a courier type font Default Regular Regular Dark Ext A4 Width Sets the machine to extend the width of the printable area of A4 size paper r...

Страница 297: ...ostScript for printing Resolution Specifies the print resolution in dots per inch Default 600 600 1bit 600 600 1bit 600 600 2bit 600 600 4bit Colour Profile Specifies the color profile Default Solid Colour Solid Colour Presentation Photographic Off 7 Configuring the Machine Using the Control Panel 296 ...

Страница 298: ...Registering the fax Special Senders Configuring the user restriction settings Configuring the network settings Configuring the IPsec settings Printing reports Setting the administrator password and e mail address Resetting the machine s configuration to the factory default Creating backup files of the machine s configuration Restoring the machine s configuration from backup files Configuring the m...

Страница 299: ...out configuring the machine using the control panel see p 239 Basic Operation Using the Menu Screen For details about TCP IP settings see p 69 Configuring the Machine 8 Configuring the Machine Using COMMAND CENTER 298 ...

Страница 300: ...hine s host name has been specified you can enter the host name instead of the IP address The top page of COMMAND CENTER appears Top page Every COMMAND CENTER page is divided into the following areas CES256 1 2 3 1 Menu area Clicking a menu shows its contents in the main area 2 Tab area Contains tabs for switching between information and settings you want to see or configure 3 Main area Displays t...

Страница 301: ... and cookies disabled display and operation problems may occur If you are using a proxy server configure the Web browser settings as necessary For details about the settings contact your network administrator The previous page may not appear even if the back button of the Web browser is clicked If this happens click the refresh button of the Web browser Changing the Interface Language Select the d...

Страница 302: ...Description Model Name Shows the name of the machine Location Shows the location of the machine as registered on the SNMP page Contact Shows the contact information of the machine as registered on the SNMP page Host Name Shows the host name specified in Host Name on the DNS page Device Status Shows the current messages on the machine s display Toner Item Description Black Shows the amount of black...

Страница 303: ... Soon or Replacement Required For replacing contact your service representative Paper Tray Item Description Tray 1 Shows the current state and paper size type setting of tray 1 Tray 2 Shows the current state and paper size type setting of tray 2 Bypass Tray Shows the current state and paper size type setting of the bypass tray The information about tray 2 appears only when it is installed If non g...

Страница 304: ...of black and white pages Scanner Shows the following for pages scanned using the scanner function Total number of pages Number of color pages Number of black and white pages Copier Shows the following for pages printed using the copier function Total number of pages Number of color pages Number of black and white pages Checking the System Information 303 ...

Страница 305: ...vered A4 pages Cyan Shows the following for pages printed using the printer copier and fax functions and lists reports Accumulated value of cyan toner A4 page coverage in percent Accumulated value of cyan toner consumption converted into fully covered A4 pages Magenta Shows the following for pages printed using the printer copier and fax functions and lists reports Accumulated value of magenta ton...

Страница 306: ...umulated value of cyan toner consumption converted into fully covered A4 pages Magenta Shows the following for pages printed in Economy Color Printing mode using the printer function Accumulated value of magenta toner A4 page coverage in percent Accumulated value of magenta toner consumption converted into fully covered A4 pages Yellow Shows the following for pages printed in Economy Color Printin...

Страница 307: ...d on the machine Engine FW Version Shows the version of firmware for the machine engine PCL Version Shows the version of the PCL interpreter PS Version Shows the version of the PS interpreter Machine ID Shows the serial number of the machine Fax Card Shows whether or not the fax card is installed Total Memory Shows the total memory installed on the machine 8 Configuring the Machine Using COMMAND C...

Страница 308: ...he volume of the beep that sounds when a key is pressed from Off Low Middle or High Ring Volume Select the volume of the ring when a call is received from Off Low Middle or High On Hook Mode Select the volume of the sound from the speaker during on hook mode from Off Low Middle or High Job End Tone Select the volume of the beep that sounds when a job is complete from Off Low Middle or High Job Err...

Страница 309: ...ing Thin Paper 60 65g m2 Plain Paper 66 74g m2 Middle Thick Paper 75 90g m2 Thick Paper 1 91 105g m2 Recycled Paper Color Paper Letterhead Preprinted Paper Prepunched Paper Label Paper Bond Paper Cardstock Envelope Thick Paper 2 106 160g m2 Tray 2 Item Description Paper Size Select the paper size for tray 2 from the following A4 8 1 2 11 Paper Type Select the paper type for tray 2 from the followi...

Страница 310: ...achine s settings An error will occur if the paper size type settings of the machine and printer driver do not match Any Size Type The machine prints all print jobs according to the printer driver s settings Printing proceeds even if the paper size type settings of the machine and printer driver do not match but if the paper is too small for the print job the printed image will be cropped Any Cust...

Страница 311: ...ints from the tray that contains the paper of the specified size except the bypass tray If tray 1 and tray 2 both contain the paper of the specified size the machine starts to print from the tray specified as the priority tray for Copier in the Priority Tray page If that tray runs out of paper the machine automatically switches to the other tray to continue printing If tray 2 is not installed only...

Страница 312: ...r can be used for printing faxes Make sure to select a tray that contains paper of the valid size If tray 2 is not installed only Tray 1 appears Fax Number Confirmation Item Description Fax Number Confirmation Enable this setting to configure the machine to require a fax number to be entered twice when specifying a destination manually This setting appears only when the administrator password is s...

Страница 313: ...a destination e mail address is not specified no notification will be sent even if this setting is enabled Forwarding Destination Specifies the forwarding destination E mail Address Enter a destination e mail address Can contain up to 64 characters Scan Destination Select a scan destination as a forwarding destination Number of Trials of Forwarding time Specifies how many times the machine attempt...

Страница 314: ...he Administrator Password and E mail Address For details about programming Special Senders see p 237 Registering the Special Senders Specifying the Priority Tray Click the Priority Tray tab on the system settings page to specify the priority tray Priority Tray Item Description Printer Select the tray that the machine uses first for printer jobs from tray 1 or tray 2 If automatic tray selection is ...

Страница 315: ...ray 2 If Auto is selected for Select Paper Tray in the Fax page and both tray 1 and tray 2 contain paper of the same size the machine starts to print from the specified tray If that tray runs out of paper the machine automatically switches to the other tray to continue printing If tray 2 is not installed only Tray 1 appears For details about copy paper selection see p 310 Specifying the Size of Pa...

Страница 316: ...the machine is of the same model If disabled you must install the printer LAN Fax driver separately for individual machines because the machine other than the original will be recognized as a new device upon USB connection Locked Print Timeout seconds Specifies how many seconds the machine holds a new Locked Print file when the machine cannot store any more Locked Print files 0 to 300 seconds With...

Страница 317: ...iority Enable this setting to suppress the consumption of color toner when printing black and white pages Also amount of color toner consumed during warm up time for maintenance will also be lowered 8 Configuring the Machine Using COMMAND CENTER 316 ...

Страница 318: ...ions can be registered See the scan and fax sections for more information on registering destinations For details about registering scan destinations see p 169 Registering Scan Destinations For details about registering fax destinations using COMMAND CENTER see p 198 Registering Fax Destinations Using COMMAND CENTER Registering Destinations 317 ...

Страница 319: ...nders can be registered using COMMAND CENTER A maximum of 30 Special Senders be registered For details about registering Special Senders see p 237 Receiving or Rejecting Faxes from Special Senders 8 Configuring the Machine Using COMMAND CENTER 318 ...

Страница 320: ...ome of the functions listed below and then register users who can use those functions Copying both color and black and white Color copying Sending faxes Scan to E mail FTP Folder Scan to USB Printing both color and black and white Color printing Sending faxes via LAN Fax For each user you can specify which functions are available upon authentication A maximum of 30 users can be registered For deta...

Страница 321: ...eed Shows the type and speed of the network connection IPP Printer Name Shows the name used to identify the machine on the network Network Version Shows the version of the machine s network module a part of the machine firmware MAC Address Shows the MAC address of the machine TCP IP Status Item Description DHCP Select whether the machine should receive a dynamic IPv4 address automatically using DH...

Страница 322: ...ork settings When disabled DHCP Manual Configuration Address Prefix Length and Gateway Address below cannot be configured IPv6 Address Item Description DHCP Select whether or not the machine obtains its IPv6 address from a DHCP server To specify the machine s IPv6 address manually select Inactive and enter the machine s IPv6 address in Manual Configuration Address IP Address DHCP Displays the IPv6...

Страница 323: ...dress Can contain up to 39 characters For details about IPv6 see p 275 Network Settings Configuring the Network Application Settings Click the Network Application tab on the network settings page to configure the network application settings Scanner Send Setting Item Description E mail Select to enable the Scan to E mail feature Max E mail Size Select the maximum size of scan files that can be att...

Страница 324: ... to use for raw printing The valid range is 1024 to 65535 except 53550 default is 9100 LPR Select to enable network printing using LPR LPD via TCP port 515 mDNS Setting Item Description mDNS Select to enable Multicast DNS via UDP port 5353 If disabled the item below cannot be configured Printer Name Enter the name of the machine Can contain up to 32 characters Configuring the DNS Settings Click th...

Страница 325: ...v6 Domain Name below become unavailable Primary IPv6 DNS Server Enter the IPv6 address of the primary IPv6 DNS server Can contain up to 39 characters Secondary IPv6 DNS Server Enter the IPv6 address of the secondary IPv6 DNS server Can contain up to 39 characters IPv6 Domain Name Enter the IPv6 domain name of the machine Can contain up to 32 characters DNS Resolve Priority Select whether to give p...

Страница 326: ... alert e mail to the specified address if paper runs out Toner Almost Empty Select to send an alert e mail to the specified address if toner becomes low Call Service Select to send an alert e mail to the specified address if the machine requires servicing Out of Toner Select to send an alert e mail to the specified address if toner runs out Cover Open Select to send an alert e mail to the specifie...

Страница 327: ...64 characters SNMP Management Host 2 Enter the IP address or host name of a management host Can contain up to 64 characters Community Item Description Get Community Enter the community name to use for authentication of Get requests Can contain up to 32 characters Trap Community Enter the community name to use for authentication of Trap requests Can contain up to 32 characters System Item Descripti...

Страница 328: ... number for SMTP 1 to 65535 Authentication Method Select an authentication method from the following Anonymous The user name and password are not necessary SMTP The machine supports NTLM and LOGIN authentication POP before SMTP The POP3 server is used for authentication When sending e mails to an SMTP server you can enhance the SMTP server security level by connecting to the POP server for authent...

Страница 329: ...an to E mail function even when the machine s clock is set correctly Configuring the POP3 Settings Click the POP3 tab on the network settings page to configure the POP3 settings POP3 Settings Item Description POP3 Server Enter the IP address or host name of the POP3 server for e mail reception The POP3 server specified here will be used for POP before SMTP Can contain up to 64 characters User Acco...

Страница 330: ...to enable or disable the Internet Fax function Error Notification E mail Select whether to send a notification e mail to the sender of the Internet Fax or not when e mail reception fails The text will include the machine s host name as set in the DNS settings page model name and contact e mail address as set in the administrator settings page Insert System fixed Text Select whether to include syst...

Страница 331: ... server after receiving them Save E mail Leave e mails on the server after receiving them Save Only Error Info Delete e mails that are successfully received from the server only POP Interval minutes Specifies how many minutes the machine waits between automatic connections to the POP3 server to acquire new e mails 2 to 1440 minutes For details about the DNS settings see p 323 Configuring the DNS S...

Страница 332: ...ault Policy Select whether to allow for the default IPsec policy Broadcast and Multicast Bypass Select the services that you do not want to apply IPsec from the following DHCPv4 DHCPv6 SNMP mDNS NetBIOS UDP Port 53550 All ICMP Bypass Select whether to apply IPsec to ICMP packets IPv4 and IPv6 from the following Active All ICMP packets will be bypassed without IPsec protection ping command echo req...

Страница 333: ...ddress filter of the IPsec policy as below Remote address Prefix length Action Displays the action of the IPsec policy as Allow Drop or Require Security Status Displays the status of the IPsec policy as Active or Inactive To configure IPsec policies select the desired IPsec policy and then click Change to open the IPsec Policy Settings page The following settings can be made on the IPsec Policy Se...

Страница 334: ...pe Select IPv4 or IPv6 as the type of IP address to be used in IPsec communication Local Address Displays the IP address of this printer Remote Address Enter the IPv4 or IPv6 address of the device with which to communicate Can contain up to 39 characters Prefix Length Enter the prefix length of the Remote Address using a value between 1 and 128 If this setting is left blank 32 IPv4 or 128 IPv6 wil...

Страница 335: ... for AH Specify the authentication algorithm to be applied when AH or ESP AH is selected for Security Protocol from the following MD5 SHA1 Encryption Algorithm for ESP Specify the encryption algorithm to be applied when ESP or ESP AH is selected for Security Protocol from the following None DES 3DES AES 128 AES 192 AES 256 Authentication Algorithm for ESP Specify the authentication algorithm to be...

Страница 336: ...D5 SHA1 IKE Life Time Specify the life time of the ISAKMP SA as a time period Enter a number of seconds IKE Diffie Hellman Group Select the IKE Diffie Hellman Group to be used in the generation of the IKE encryption key from the following DH1 DH2 Pre Shared Key Specify the PSK Pre Shared Key to be used for authentication of a communicating device Can contain up to 32 characters Key Perfect Forward...

Страница 337: ...st Prints a list of Quick Dial entries Fax Speed Dial Destination List Prints a list of Speed Dial entries Scanner Destination List Prints a list of scan destinations Scanner Journal Prints a scanner journal for the last 100 Scan to E mail Scan to FTP and Scan to Folder transmissions Maintenance Page Prints the maintenance page Reports cannot be printed via COMMAND CENTER if other jobs are printin...

Страница 338: ...utomatic fax journal printing see p 257 Fax Feature Settings For details about priority tray settings see p 313 Specifying the Priority Tray For details about loading paper see p 94 Loading Paper Printing Lists Reports 337 ...

Страница 339: ...Check this to configure the administrator password New Password Enter the new administrator password Can contain up to 16 characters Confirm New Password Enter the same password again to confirm Change E mail Address Check this to configure the administrator e mail address Administrator E mail Address Enter the administrator e mail address If the machine s e mail address is not configured in the S...

Страница 340: ...ttings Clear Address Book Select to clear the fax destinations and Special Sender list Reset IPsec Settings Select to clear the IPsec settings Reset IPsec Settings appears only when a password is specified in Administrator Password Backing Up the Machine s Settings Click the Backup Setting tab on the administrator settings page to create backup files containing the machine s configuration settings...

Страница 341: ...ons Backs up user restriction settings to a file Back up Address Book Backs up fax destinations and Special Sender list to a file Back up IPsec Settings Backs up the IPsec settings to a file Follow the procedure below to create configuration backup files 1 Select the radio button for the type of data you wish to back up 2 Enter the administrator password if required 3 Click OK 4 Click Save in the ...

Страница 342: ...Enter the path and name of the file to restore or click Browse to select the file Follow the procedure below to restore configuration backup files 1 Click Browse 2 Navigate to the directory containing the backup file to restore 3 Select the backup file and click Open 4 Enter the administrator password if required 5 Click OK If the settings are not restored successfully an error message appears Try...

Страница 343: ...AM or PM if 12 hour time format is selected hour 0 23 Enter the current hour if 24 hour time format is selected 0 23 hour 1 12 Enter the current hour if 12 hour time format is selected 1 12 min 0 59 Enter the current minute 0 59 Configuring the Energy Saver Mode Settings Click the Energy Saver Mode tab on the administrator settings page to set the machine to enter Energy Saver mode Energy Saver mo...

Страница 344: ...Saver mode 2 Energy Saver Mode 2 Select Active to set the machine to enter Energy Saver mode 2 after the period of time specified for Waiting Time 1 240 is passed 1 to 240 minutes The machine consumes less power in Energy Saver mode 2 than in Energy Saver mode 1 but it takes longer to recover from Energy Saver mode 2 than from Energy Saver mode 1 The machine recovers from Energy Saver mode when it...

Страница 345: ...8 Configuring the Machine Using COMMAND CENTER 344 ...

Страница 346: ... divided into the following sections p 346 Common Problems p 348 Paper Feed Problems p 361 Print Quality Problems p 362 Printer Problems p 366 Copier Problems p 368 Scanner Problems p 369 Fax Problems p 375 Error and Status Messages on the Screen p 385 Replacing Print Cartridges p 391 Replacing the Waste Toner Bottle 345 ...

Страница 347: ...t printed The interface cable is not connected correctly Reconnect the cable Check that the interface cable is the correct type Strange noise is heard The supplies or options are not properly installed Confirm that the supplies or options are properly installed Strange noise is heard The machine executes periodic cleaning of the interior when Auto Cleaning in System Settings is set to On The noise...

Страница 348: ... If any of these problems persist turn off the power pull out the power cord and contact your service representative Common Problems 347 ...

Страница 349: ...top and bottom of the paper and put it back in the tray Paper jams occur frequently If there are gaps between the paper and the paper guides adjust the paper guides to remove the gaps Avoid printing on both sides of paper when printing images that contain large areas of solid color which consume a lot of toner Use supported types of paper See p 81 Supported Paper for Each Tray Load paper only as h...

Страница 350: ...added while there was still some left in the tray Only add paper when there is none left in the tray Paper gets wrinkles Paper is damp Use paper that has been stored properly See p 81 Paper and Other Media Paper is too thin See p 81 Paper and Other Media If there are gaps between the paper and the paper guides adjust the paper guides to remove the gaps The printed paper is curled Load the paper up...

Страница 351: ...positions in the order indicated to locate the jammed paper Jammed paper may be covered in toner Be careful not to get toner on your hands or clothes Toner on prints made immediately after clearing a paper jam may be insufficiently fused and can smudge Make test prints until smudges no longer appear Do not forcefully remove jammed paper as it may tear Torn pieces remaining inside the machine will ...

Страница 352: ...r unit If paper jams inside the fusing unit If paper jams inside the fusing unit follow the procedure below to remove it The inside of this machine becomes very hot Do not touch the parts labeled indicating a hot surface Some of this machine s internal components get very hot For this reason take care when removing misfed paper Not doing so could result in burns Since the temperature around the gu...

Страница 353: ...wer the front cover CES141 2 Lower the fusing unit lever and pull out the jammed paper carefully CES257 Pull the paper downward to remove it Do not pull it upward CES144 If you cannot find the jammed paper check for it by pulling down the guide 9 Troubleshooting 352 ...

Страница 354: ... the front cover until it closes CES142 When closing the front cover push the upper area of the cover firmly After closing the cover check that the error is cleared If paper jams inside a tray If paper jams in tray 1 or 2 follow the procedure below to remove it Paper Feed Problems 353 ...

Страница 355: ...er and then carefully lower the front cover CES141 2 Pull out the jammed paper carefully CES083 If paper has jammed inside the transfer unit holding both sides of the paper pull the paper carefully forward and out CER063 9 Troubleshooting 354 ...

Страница 356: ...aper carefully push tray 2 all the way back inside the machine When closing the front cover push the upper area of the cover firmly After closing the cover check that the error is cleared If paper jams inside the transfer unit If paper jams inside the transfer unit follow the procedure below to remove it 1 Pull the opening lever on the front cover and then carefully lower the front cover CES141 Pa...

Страница 357: ...142 When closing the front cover push the upper area of the cover firmly After closing the cover check that the error is cleared Removing Scanning Jams If a paper jam occurs in the ADF one of the following messages appears on the screen ADF Original Misfeed Open ADF Cover and Remove paper Misfeed Tray 1 Misfeed Tray 2 Follow the procedure below to remove the original jammed in the ADF 9 Troublesho...

Страница 358: ...al to remove it Be careful not to pull the original too hard as it may rip CES101 3 If you cannot pull out the jammed original easily move the lever slightly to the machine rear and then pull it up to unlock the paper feed roller CES044 Paper Feed Problems 357 ...

Страница 359: ...nd pull it out toward you CES113 5 Gently pull the jammed original to remove it CES114 6 If you cannot pull out the jammed original easily raise the input tray to see if the original is jammed in the output area CES120 9 Troubleshooting 358 ...

Страница 360: ...ntly pull the jammed original to remove it CES121 8 Put the paper feed roller back in with the roller part facing downwards CES115 9 Lower the lever until it clicks into place CES116 Paper Feed Problems 359 ...

Страница 361: ...ft the ADF and if there is original remaining in the ADF gently pull the jammed original to remove it Be careful not to hold the input tray when lifting the ADF for the tray might be damaged CES153 12 Close the ADF 9 Troubleshooting 360 ...

Страница 362: ...ct Make sure that the paper type setting of the printer driver matches the type of paper loaded See p 113 Specifying Paper Type and Paper Size A non genuine print cartridge is being used Refilled or non genuine print cartridges reduce print quality and can cause malfunctions Use genuine print cartridges only See p 414 Consumables An old print cartridge is being used Print cartridges should be open...

Страница 363: ...printer driver is being used A print job is canceled Printing on Legal size paper may be canceled if the printing is performed with a certain print quality setting If using the PCL printer driver set Gradation in Print Quality to Speed or Standard If using the PostScript 3 printer driver set Print Quality in Printer Features to Standard or High Quality For details see the printer driver Help If I ...

Страница 364: ... Help There is considerable delay between the print start command and actual printing Processing time depends on data volume High volume data such as graphics heavy documents take longer to process If Processing is displayed on the screen the machine is receiving data Wait for a while To speed up printing reduce the printing resolution using the printer driver For details see the printer driver He...

Страница 365: ... screen replace the indicated print cartridge Condensation may have collected If rapid change in temperature or humidity occurs use this machine only after it has acclimatized The toner is powdery and comes away from the paper or the printed image has a matt appearance Check if the fusing unit levers are properly set Pull up the fusing unit levers Printed envelopes come out creased Check if the fu...

Страница 366: ...onomy Color is enabled in the Print Quality tab PCL printer driver or under Printer Features PostScript 3 printer driver If Economy Color printing is enabled prints will be at lower density and the color gradation may appear differently For details see the printer driver Help Print Positions Do Not Match Display Positions If the position of items on the printed page differs from the position displ...

Страница 367: ...pied pages are too dark or too light Adjust the image density See p 164 Adjusting Image Density Copied pages do not look the same as the originals Select the correct scan mode according to the type of original See p 165 Selecting the Document Type According to Original Black spots appear when photocopying a photographic print The original may have stuck to the exposure glass due to high humidity P...

Страница 368: ...s one by one taking care not to touch printed areas The exposure glass or ADF is dirty See p 397 Cleaning Before placing originals on the exposure glass make sure that toner or correction fluid is dry When copying from the exposure glass the print area of the copy is out of alignment with the original Place the original copy side down making sure that it is aligned to the rear left corner and pres...

Страница 369: ...uring scanning The scanned image is upside down The original was placed upside down Place the original in the correct orientation See p 117 Placing Originals The scanned image is blank The original was placed with the front and back reversed When using the exposure glass place originals copy side down When using the ADF place originals copy side up See p 117 Placing Originals The scanned image is ...

Страница 370: ...ing See p 117 Placing Originals 1XXX21 The line could not be connected correctly Confirm that the telephone line is properly connected to the machine Disconnect the telephone line from the machine and connect a standard telephone in its place Confirm that you can make calls using the telephone If you cannot make calls this way contact your telephone company If the problem persists contact your ser...

Страница 371: ... Letter or Legal size paper Load valid size paper in the tray and configure the paper size settings under System Settings accordingly A cover or tray was open Close the cover or tray There was a paper jam Remove the jammed paper See p 350 Removing Printing Jams A print cartridge was empty Replace the print cartridge See p 385 Replacing Print Cartridges The received fax was too large Ask the sender...

Страница 372: ...e Network Settings 3XXX13 E mail transmission failed while sending an Internet Fax There was an error in the part header of the e mail Confirm that the network settings such as IP address DNS and SMTP settings have been configured properly make sure that no double byte character is used See p 320 Configuring the Network Settings 3XXX14 E mail transmission failed while sending an Internet Fax There...

Страница 373: ... reception failed while receiving an Internet Fax There was an error in the part header of the e mail Ask the sender to check the e mail settings The e mail had an invalid Content Type or an unsupported type of file such as PDF or JPEG was received Ask the sender to check the file type 4XXX25 E mail reception failed while receiving an Internet Fax There was an error in the text part of the part bo...

Страница 374: ...an Internet Fax The fax was too large Ask the sender to resend the document in parts as several smaller individual faxes or send at a lower resolution When other problems occur The table below describes how to troubleshoot problems that do not produce an error code Problem Solution Cannot send faxes See the solutions provided for errors 1XXX32 to 1XXX84 in the above table Cannot receive faxes See ...

Страница 375: ...riginals on the exposure glass make sure that ink or correction fluid is dry A fax you sent appears blank when received The original was placed upside down Place the original in the correct orientation See p 117 Placing Originals The background of received images is dirty or images from the rear side of the originals are visible Image density is too high Adjust the image density See p 212 Adjustin...

Страница 376: ...per tray was empty Load paper in the paper tray See p 94 Loading Paper The tray set for Select Paper Tray under Fax Features did not contain A4 Letter or Legal size paper Load valid size paper in the tray and configure the paper size settings under System Settings accordingly A cover or tray was open Close the cover or tray There was a paper jam Remove the jammed paper See p 350 Removing Printing ...

Страница 377: ...s See p 266 System Settings Available 2 Sided Copy Tray 1 or Tray 2 2 sided copy could not be performed because paper is set to be fed from the bypass tray Specify a setting other than Bypass Tray for the Select Paper setting See p 245 Copy Settings Available IDCard Copy A4 or 8 1 2 x 11 ID card copy could not be performed because the tray does not contain the valid size paper which are A4 or Lett...

Страница 378: ...in printing or press JobReset to cancel the job Connection Failed The line could not be connected correctly Confirm that the telephone line is properly connected to the machine Disconnect the telephone line from the machine and connect a standard telephone in its place Confirm that you can make calls using the telephone If you cannot make calls this way contact your telephone company Cover open A ...

Страница 379: ...le Press Clear key The Scan to USB function failed because the machine could not access the USB flash disk properly Use a USB flash disk that is not password or write protected Failed to Create File Press Clear key The Scan to USB function failed because there was not enough memory on the USB flash disk Use a USB flash disk with enough memory Fax Job Memory Overflow The number of fax jobs in memor...

Страница 380: ...machine with the printer driver s Gradation set to Fine in the Print Quality tab printing may be canceled depending on the machine s current memory usage When performing printing on Legal size paper under certain print quality setting print data becomes large and the job may be canceled Select 600 600 1bit in Resolution under Printer Features to reduce the size of data See p 292 Printer Feature Se...

Страница 381: ...ed in the paper tray Remove the jammed paper See p 350 Removing Printing Jams Misfeed Stnd Tray Paper has been jammed in the paper exit area Remove the jammed paper See p 350 Removing Printing Jams Misfeed Tray 1 Paper has been jammed in the ADF input tray Remove the jammed paper See p 356 Removing Scanning Jams Misfeed Tray 2 Paper has been jammed in the ADF output tray Remove the jammed paper Se...

Страница 382: ...Replace Fusing Unit The fusing unit is no longer usable and must be replaced Contact your service representative Replace IntTrans Belt The transfer belt is no longer usable and must be replaced Contact your service representative Replace Waste Toner Bottle The waste toner bottle is full Replace the waste toner bottle with a new one See p 391 Replacing the Waste Toner Bottle RX Comm Error A recepti...

Страница 383: ...Load A4 Letter Legal size paper in the tray and then select the corresponding paper size using keys and press the OK key The machine will then print out the fax Note that the paper size setting for the tray under system settings will be changed See p 266 System Settings Set Original to ADF Cannot use exposure glass with set in Scan Size Scanning could not be performed because the originals were no...

Страница 384: ...ee p 266 System Settings Unsupported Device Please Remove The Scan to USB function failed because a USB device other than a USB flash disk or a USB flash disk with an unsupported file system was used Use a USB flash disk that is compatible with the Scan to USB function Unsupported Device Press Clear key The Scan to USB function failed because a USB device other than a USB flash disk or a USB flash...

Страница 385: ...e there was not enough memory on the USB flash disk Use a USB flash disk with enough memory Write Protect Press Clear key The Scan to USB function failed because the machine could not access the USB flash disk properly Use a USB flash disk that is not password or write protected 9 Troubleshooting 384 ...

Страница 386: ...resulting in dirtying of skin clothing and floor and accidental ingestion Store toner new or used toner containers and components that have been in contact with toner out of reach of children If toner or used toner is inhaled gargle with plenty of water and move into a fresh air environment Consult a doctor if necessary When removing jammed paper or replacing toner avoid getting toner new or used ...

Страница 387: ...t be liable for any damage caused by the use of third party supplies in this machine Messages on the screen Replace the indicated print cartridge when any of the following messages appear on the screen Out of Toner Black Out of Toner Magenta Out of Toner Cyan Out of Toner Yellow Prepare the indicated print cartridge when any of the following messages appear on the screen Toner Almost Empty Replace...

Страница 388: ...in the illustration below CES137 If cyan magenta or yellow toner runs out you can print in black and white using just the black toner Change the color mode setting to Black and White using the machine s driver If black toner runs out you cannot print in black and white or color until the black print cartridge is replaced 1 Pull up the lever on the top cover and then carefully raise the top cover M...

Страница 389: ...d black K CES139 Do not shake the removed print cartridge Doing so can cause remaining toner to leak Place the old print cartridge on paper or similar material to avoid dirtying your workspace The toner color is indicated by the label on each print cartridge 3 Take the new print cartridge out of the box and then take it out of the plastic bag CBK123 9 Troubleshooting 388 ...

Страница 390: ...er from the print cartridge CER010 6 Check the toner color and corresponding location and then carefully insert the print cartridge vertically CES255 7 Using both hands hold the center of the top cover and close the cover carefully Be careful not to trap your fingers After closing the top cover wait until the initial screen is displayed Replacing Print Cartridges 389 ...

Страница 391: ... it into the box CER055 Make sure to cover the old print cartridge with the protective cover for recycling and environmental purposes Return the exhausted print cartridge to your dealer or service representative The collected print cartridge will be recycled or disposed in accordance with the relevant regulations 9 Troubleshooting 390 ...

Страница 392: ...e brought into contact with the mouth or nose The inside of this machine becomes very hot Do not touch the parts labeled indicating a hot surface Store toner new or used toner containers and components that have been in contact with toner out of reach of children Messages on the screen Replace the waste toner bottle when the following message appears on the screen Replace Waste Toner Bottle Prepar...

Страница 393: ...osed in accordance with the relevant regulations Before removing the waste toner bottle from the machine spread paper or similar material around the area to keep toner from dirtying your workspace 1 Pull the opening lever on the front cover and then carefully lower the front cover CES141 2 Slide both levers on the front cover forward CER014 3 Holding the tabs on both ends of the transfer unit tilt...

Страница 394: ...ll the waste toner bottle halfway out grab the bottle firmly and then pull it straight out CES074 CES075 To prevent the waste toner bottle touching the intermediate transfer unit the position shown by the arrow in the illustration below do not lift the bottle while pulling it out Replacing the Waste Toner Bottle 393 ...

Страница 395: ...CES076 6 Close the bottle cap CER039 CER089 7 Hold the center of the new waste toner bottle and then carefully insert it halfway into the machine body Leave the bottle cap open 9 Troubleshooting 394 ...

Страница 396: ...ate transfer unit the position shown by the arrow in the illustration below do not lift the bottle while inserting it CES079 8 Push in the waste toner bottle until it clicks into place Push the middle part all the way in CES080 Replacing the Waste Toner Bottle 395 ...

Страница 397: ...unit along the guide rails into the machine When it stops push on the PUSH mark until it clicks into place CER017 11 Using both hands carefully push up the front cover until it closes CES142 When closing the front cover push the upper area of the cover firmly 9 Troubleshooting 396 ...

Страница 398: ... and clean the prongs and the area around the prongs at least once a year Allowing dust to build up on the plug constitutes a fire hazard Clean the machine periodically to maintain high print quality Dry wipe the exterior with a soft cloth If dry wiping is not enough wipe with a soft damp cloth that is wrung out well If you still cannot remove the stain or grime use a neutral detergent wipe over t...

Страница 399: ...ity sensor of the yellow print cartridge as an example of how to clean a sensor The inside of this machine becomes very hot Do not touch the parts labeled indicating a hot surface 1 Pull up the lever on the top cover and then carefully raise the top cover Make sure that the ADF is closed CES138 2 Lift out the rearmost print cartridge CES086 10 Maintenance 398 ...

Страница 400: ...nce 4 Carefully insert the print cartridge removed in step 2 vertically CES088 5 Using both hands hold the center of the top cover and close the cover carefully Be careful not to trap your fingers After closing the top cover wait until the initial screen is displayed CES140 Cleaning 399 ...

Страница 401: ...ons could result in fire or electric shock Do not pull out the paper tray forcefully If you do the tray might fall and cause an injury Do not put your hands inside the machine when the input tray is removed Some internal parts become hot and are a burn hazard Do not use chemical cleaning fluids or organic solvents such as thinner or benzine 1 Turn off the power 2 Unplug the power cord from the wal...

Страница 402: ...a damp cloth CER058 5 Wipe the rubber part of the roller with a soft damp cloth After that wipe it with a dry cloth to remove the moisture CES146 6 Push the metal plate down until it clicks into place to lock it CER031 Cleaning 401 ...

Страница 403: ...id for tray 1 Cleaning the Registration Roller and Paper Tray The registration roller and paper tray can become dirty with paper dust if you print to non standard paper Clean the registration roller if white dots appear on prints Unplug the power cord from the wall outlet before you move the machine While moving the machine take care that the power cord is not damaged under the machine Failing to ...

Страница 404: ...ds or organic solvents such as thinner or benzine Do not touch the transcription roller shown in the illustration below 1 Turn off the power 2 Unplug the power cord from the wall outlet Remove all the cables from the machine 3 Pull out tray 1 carefully with both hands CES059 Place the tray on a flat surface If there is paper in the tray remove it Cleaning 403 ...

Страница 405: ... with a cloth CER217 5 Push the metal plate down until it clicks into place to lock it CER031 6 Reload the removed paper into the tray and then push the tray carefully into the machine until it clicks into place CES062 10 Maintenance 404 ...

Страница 406: ...gistration roller if prints are smeared after a paper jam is cleared 8 Clean the registration roller by applying a soft damp cloth while turning it 9 Using both hands carefully push up the front cover until it closes CES142 10 Plug in the power cord securely Connect all the interface cables that were removed 11 Turn on the power When closing the front cover push the upper area of the cover firmly ...

Страница 407: ...p cloth and then wipe the same parts with a dry cloth to remove any remaining moisture CES090 Cleaning the Auto Document Feeder The following procedure describes how to clean the ADF 1 Lift the ADF Be careful not to hold the input tray when lifting the ADF for the tray might be damaged 2 Clean the parts indicated with arrows with a soft damp cloth and then wipe the same parts with a dry cloth to r...

Страница 408: ...e precautions could result in fire or electric shock When disconnecting the power cord from the wall outlet always pull the plug not the cord Pulling the cord can damage the power cord Use of damaged power cords could result in fire or electric shock When moving the machine after use do not take out any of the toners nor the waste toner bottle to prevent toner spill inside the machine Repack the m...

Страница 409: ...on using the inset grips on both sides of the machine and then move it horizontally to the place where you want to use it CES052 5 If you have removed tray 2 reinstall it Be sure to hold the machine level while carrying it To prevent toner from spilling move the machine carefully For details about Scanner Carriage see p 266 System Settings Moving over a Long Distance If you intend to move the mach...

Страница 410: ...f tray 2 is installed remove it 3 Return the scanning unit inside the machine to its original position using Scanner Carriage under System Settings Toner might spill inside the machine if the machine is not kept level during transit For more information about moving the machine contact your service representative For details about Scanner Carriage see p 266 System Settings Moving the Machine 409 ...

Страница 411: ...Disposal Ask your service representative for information about correct disposal of this machine 10 Maintenance 410 ...

Страница 412: ...achine While moving the machine take care that the power cord is not damaged under the machine Failing to take these precautions could result in fire or electric shock Preparing the Machine for a Long Period of Inactivity Use this procedure to prepare the machine for a long period of inactivity with its power switch turned off Note that not using the following procedure could result in unusual noi...

Страница 413: ...t cover with both hands carefully CES142 This step is not necessary if the machine s power switch is on but the machine has been inactive for a long time Using the Machine Again After It Has Been Inactive for a Long Period Use the following procedure to start using the machine again after it has been inactive for a long period 10 Maintenance 412 ...

Страница 414: ... on the front cover and then carefully lower the front cover CES141 3 Pull up the fusing unit lever CES258 4 Close the front cover with both hands carefully CES142 5 Turn the power switch to On If the Machine is Not Going to Be Used for a Long Time 413 ...

Страница 415: ... are not changed when necessary printing will become impossible For easy replacement we recommend you purchase and store extra print cartridges The actual number of printable pages varies depending on the image volume and density number of pages printed at a time paper type and paper size used and environmental conditions such as temperature and humidity Print cartridges may need to be changed soo...

Страница 416: ...e image volume and density number of pages printed at a time paper type and paper size used and environmental conditions such as temperature and humidity If the waste toner bottle is not changed when necessary printing will become impossible For easy replacement we recommend you purchase and store extra waste toner bottles Consumables 415 ...

Страница 417: ...10 Maintenance 416 ...

Страница 418: ...e printer driver Scan to FTP Delivers files that have been scanned using the control panel to an FTP server Scan to E mail Sends files scanned using the control panel via e mail Scan to Folder Sends files scanned using the control panel to a shared folder on a computer on the network This function is not available on Mac OS X Network TWAIN Server Controls the scanning function from a computer on t...

Страница 419: ...s status and configure its settings using a Web browser Configuration Page Prints a configuration page that shows you the machine s configuration IP address and other details Internet Fax Transmission and reception of Internet Faxes 11 Appendix 418 ...

Страница 420: ...OMMAND CENTER see p 331 Configuring the IPsec Settings For details about enabling and disabling IPsec using the control panel see p 424 Enabling and Disabling IPsec Using the Control Panel Encryption and Authentication by IPsec IPsec consists of two main functions the encryption function which ensures the confidentiality of data and the authentication function which verifies the sender of the data...

Страница 421: ...ems use the term Compliance in place of Authentication Security Association This machine uses encryption key exchange as the key setting method With this method agreements such as the IPsec algorithm and key must be specified for both sender and receiver Such agreements form what is known as an SA Security Association IPsec communication is possible only if the receiver s and sender s SA settings ...

Страница 422: ...due to IPsec configuration problems disable IPsec on the control panel and then access COMMAND CENTER p 424 Enabling and Disabling IPsec Using the Control Panel Specifying Encryption Key Exchange Settings 1 Start the Web browser and access the machine by entering its IP address 2 Click IPsec Settings 3 Click the IPsec Policy List tab 4 Select the number of the setting you want to modify in the lis...

Страница 423: ...he General tab click Advanced 10 In Authenticate and generate a new key after every enter the same validity period in minutes that is specified on the machine in IKE Life Time and then click Methods 11 Confirm that the Encryption Algorithm Encryption Hash Algorithm Integrity and IKE Diffie Hellman Group Diffie Hellman Group settings in Security method preference order all match those specified on ...

Страница 424: ...a and address integrity without encryption AH and configure the following settings Set the value of Integrity algorithm to the same value as the Authentication Algorithm for AH specified on the machine Clear the Data integrity and encryption ESP check box 33 When ESP AH is selected for the machine in Security Protocol under IPsec Settings select Data and address integrity without encryption AH and...

Страница 425: ...c Using the Control Panel 1 Press the User Tools key 2 Press the key to select Admin Tools and then press the OK key 3 If you are requested to enter a password enter the password using the number keys and then press the OK key 4 Press the keys to select IPsec and then press the OK key 5 Press the keys to select Active or Inactive and then press the OK key 6 Press the Clear Stop key to return to th...

Страница 426: ...rd paper sizes A4 B5 JIS A5 A6 Legal 81 2 14 Letter 81 2 11 Half Letter 51 2 81 2 Executive 71 4 101 2 8 13 B6 JIS 81 2 13 Folio 81 4 13 16K 195 267 mm Com 10 41 8 91 2 Monarch 37 8 71 2 C5 Env 162 229 mm C6 Env 114 162 mm DL Env 110 220 mm Custom size 90 to 216 mm 3 54 to 8 5 inches in width 148 to 356 mm 5 83 to 14 0 inches in length Duplex supported paper sizes A4 B5 JIS Legal 81 2 14 Letter 81...

Страница 427: ... MB for printer functions only Power requirements 220 240 V 6 A 50 60 Hz when fully equipped 120 V 11 A 60 Hz when fully equipped Power consumption Maximum power consumption 1300 W Energy Saver mode 1 80 W Energy Saver mode 2 10 W Machine dimensions Width Depth Height 420 493 476 1 mm 16 6 19 5 18 8 1 inches 1 If tray 2 is installed the height increases by 125 mm 5 0 inches Weight machine body wit...

Страница 428: ...rnet 10BASE T 100BASE TX USB 2 0 Printer language PCL6 PCL5c PostScript 3 Fonts 80 fonts Network protocol TCP IP IPP Bonjour Copier Function Specifications Maximum resolution scanning and printing Exposure glass Scanning 600 600 dpi Printing 600 600 dpi ADF Scanning 600 300 dpi Printing 600 600 dpi Gradation Scanning 256 levels 1 dot First copy speed A4 Letter at 25 C 77 F 30 seconds or less Multi...

Страница 429: ...scanning area horizontal vertical Exposure glass 216 297 mm 8 5 11 7 inches ADF 216 356 mm 8 5 14 1 inches Maximum resolution when scanning from the control panel Scan to E mail Scan to FTP Scan to Folder Scan to USB Exposure glass 600 600 dpi ADF 600 600 dpi Maximum resolution when scanning from a computer TWAIN Exposure glass 19200 19200 dpi ADF 600 600 dpi Maximum resolution when scanning from ...

Страница 430: ...anel Ethernet 10BASE T 100BASE TX USB2 0 Scan to USB Scanning from a computer Ethernet 10BASE T 100BASE TX USB 2 0 Sendable file formats TIFF JPEG PDF Address book Maximum 100 items Number of redials 1 Fax Function Specifications Fax transmission and reception Access line Public switched telephone networks PSTN Private branch exchange PBX Transmission mode ITU T Group 3 G3 Scan line density 8 dots...

Страница 431: ... dial 200 items Quick dial 20 items Number of redials for Fax 1 Internet Fax transmission and reception Interface Ethernet 10BASE T 100BASE TX Communication protocols Transmission SMTP TCP IP Reception POP3 TCP IP Transmission function E mail E mail format Single Multi part MIME Conversion Attached file forms transmission TIFF S MH encoding Attached file forms reception TIFF S TIFF F MH MR MMR enc...

Страница 432: ...i Destination machine specifications Communication protocols Transmission SMTP TCP IP Reception POP3 TCP IP E mail format Format MIME Base64 Content Type Image tiff Multipart mixed text plain Image tiff attached file forms Data format Profile TIFF S Encoding MH Original size A4 Resolution dpi 200 100 200 200 Specifications of the Machine 431 ...

Страница 433: ...cifications of the various options Paper Feed Unit Paper capacity 500 sheets Paper size A4 Letter 81 2 11 Dimensions Width Depth Height 400 450 127 mm 15 8 17 8 5 inches Paper weight 60 to 105 g m2 16 to 28 lb Weight Less than 4 kg 8 9 lb 11 Appendix 432 ...

Страница 434: ...tic interference Televisions and radios may produce noise if located too close to this machine If this happens do the following Move the television or radio as far as possible from the machine Change the position of the antenna of the television or radio Use a different wall outlet on a different circuit Electromagnetic Interference 433 ...

Страница 435: ...d to do so subject to the following conditions The above copyright notice and this permission notice shall be included in all copies or substantial portions of the Software THE SOFTWARE IS PROVIDED AS IS WITHOUT WARRANTY OF ANY KIND EXPRESS OR IMPLIED INCLUDING BUT NOT LIMITED TO THE WARRANTIES OF MERCHANTABILITY FITNESS FOR A PARTICULAR PURPOSE AND NONINFRINGEMENT IN NO EVENT SHALL THE AUTHORS OR...

Страница 436: ...etting priority 308 C Cable cover 31 Cancel fax 205 223 Cancel print job 137 138 Cardstock 85 Characters 122 Cleaning 397 398 400 402 406 Clear Stop key 34 Color paper 85 Color Start key 34 Colour adjustment 246 Colour registration 266 COMMAND CENTER 297 Communication settings 257 Community 325 Compression Colour 252 Confidential document 139 Configuration page 279 280 336 Consumables 414 Control ...

Страница 437: ...ion 201 203 Fax transmission settings 254 Fax TX RX standby file list 336 FAX TAD mode 232 FAX TEL automatic mode 231 FAX TEL manual mode 230 Feature highlights 18 File type 252 Forwarding 233 Friction pad 400 Front cover 30 Function priority 55 287 G G3 analog line interface connector 31 Gateway 275 General status 320 Group LAN Fax 218 H How to read this manual 17 I I O timeout 266 315 ID card co...

Страница 438: ...Network printer 77 Network settings 69 71 275 320 Network status 320 Note 17 Notify toner almost empty 266 Number keys 34 O OK key 34 On Hook Dial 210 On Hook Dial key 34 One Touch buttons 34 179 207 Operation modes 55 Options 78 432 Original type 246 Output tray 30 Output tray for the ADF 30 Outside line access number 75 P Page counter 302 Paper capacity 81 Paper feed roller 400 Paper Feed Unit 7...

Страница 439: ...inations 169 175 179 317 Scan settings 164 183 212 Scan size 184 252 Scan to E mail 24 169 177 Scan to Folder 26 169 177 Scan to FTP 25 169 177 Scan to USB 26 180 Scanner carriage 266 Scanner destination list 279 336 Scanner function 23 428 Scanner journal 279 285 336 Scanner key 34 55 167 Scanner mode 34 167 Scanner send setting 322 Scanner settings 251 Scanning using the control panel 177 Screen...

Страница 440: ... cover 30 Top page 299 Trademarks 11 Transfer unit 33 Transmission mode 201 Trap 325 Tray 1 30 94 Tray 2 30 78 103 Tray paper settings 266 Troubleshooting 346 348 361 362 364 365 366 368 369 TWAIN scanning 23 187 TX RX standby file list 279 284 U Unpacking 42 USB connection 18 62 USB port 31 62 User code 128 User Tools key 34 W Waste toner bottle 33 391 414 WIA scanning 23 439 ...

Страница 441: ...MEMO 440 M100 7500 ...

Страница 442: ... 2011 ...

Страница 443: ......

Страница 444: ...5J3KMEN000 M100 7500 ...

Отзывы: