USING PUSH TO TALK
Saving, editing, and erasing PTT groups
PAGE 52
Regardless of how you set your availability
(presence), you can still make PTT calls.
1.
Select
Menu
→
Push to Talk
→
My Availability
.
2.
Select an option:
–
Available
allows you to make and
receive PTT calls.
–
Do Not Disturb
ensures that you will
not receive PTT calls.
Note:
You can set a shortcut to the
My Availability
option to make it
accessible with one keypress from the
home screen. (See “Creating and
updating your custom menu” on page 58.)
Saving, editing, and erasing
PTT groups
You can create up to 30 PTT groups with up
to 30 members per group. The total number
of contacts saved in your phone (including
PTT and non-PTT contacts and groups)
cannot exceed 99. You can create a PTT
group from a list of contacts in another
group or add new contacts to a group
from scratch.
Note:
To establish a group, your phone
must be provisioned by your service
provider.
1.
Select
Menu
→
Push to Talk
→
PTT Groups
.
2.
Press the left softkey
to select
New
.
3.
Enter the new group name using the
phone’s keypad. See page 18 if you
need help entering text.
4.
Press the left softkey
to select
Next
.
The
Select Contacts
screen appears.
5.
Highlight the name of the PTT contact
you want to add to your new group
and press the Amp’d/OK key
. A
check mark appears beside the
contact name.
Note:
The PTT contact must be
provisioned from the handset or a Web
interface before the contact can be
added to a group.
6.
If no PTT contact names appear, or if
the desired contact is not on the list,
then press the right softkey
to select
Options
.
7.
Press the Amp’d/OK key
to select
Add New
.
8.
Enter the phone number of the PTT
contact name to be added to the
group.
9.
Press the Navigation key
down to
the
Enter Name
field.
10.
Enter the name of the PTT contact to be
added, using the phone’s keypad.
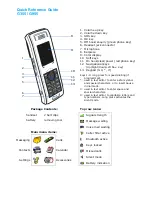
Group is not available
Group is set to DND, all users in the
group have presence of DND
Group is Pending (originator)
Group is Pending (terminator)
Group member state is unknown


