


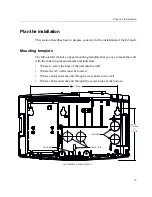


Plan the installation
15
•
ADA (Americans with Disabilities Act) compliance:
–
The 48 inch height specification (1219 millimeters) ensures that no part of
the InTouch that personnel will physically use (biometric sensor) will be
higher than the limit set by the ADA.
–
Devices mounted on a wall must not protrude more than 4 inches (10 cm)
from the wall. You must mount the InTouch directly to the wall.
–
If you are in doubt about any regulations, Kronos recommends that you
check the current ADA requirements.
Power sources and connections
Requirements
•
The AC power source must be grounded 100 to 240 VAC, 50/60Hz input
voltage.
•
The AC power source for the device must be connected to a 20A maximum
circuit breaker.
•
A licensed electrician must ensure that low-voltage wiring is routed securely
away from high-voltage wiring.
Power source options
•
Standard model — Uses standard AC power from an internal or external
source. It includes an integrated, autosensing, AC power transformer that
supports an IEC C7 external power cord connection. This type of connection
allows the use of compatible international power cords.
The following power supply methods are available:
–
Mounted over an AC outlet, with transformer plugged in
–
Mounted near an AC outlet, with transformer plugged in
–
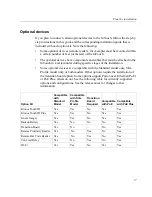
Power-over-Ethernet (PoE) or PoE Plus cable (
Note
: Can supply power in
certain configurations only. See the table in
“Optional devices”
on page
17.)
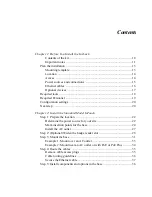
Содержание InTouch 9100 Slim Profile
Страница 4: ...Document Revision History Revision Release Date A June 2016 B December 2016 C March 2017 D April 2017 ...
Страница 9: ...Chapter 1 Before You Install the InTouch ...
Страница 21: ...Chapter 2 Install the Standard Model InTouch ...
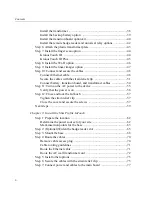
Страница 50: ...Chapter 2 Install the Standard Model InTouch 50 c Tighten both screws ...
Страница 60: ...Chapter 2 Install the Standard Model InTouch 60 ...
Страница 61: ...Chapter 3 Install the Slim Profile InTouch ...
Страница 75: ...Step 6 Secure the cables with the strain relief clip 75 ...
Страница 84: ...Chapter 3 Install the Slim Profile InTouch 84 ...
Страница 85: ...Chapter 4 Troubleshooting and Preventive Maintenance ...
Страница 94: ...Chapter 4 Troubleshooting and Preventive Maintenance 94 ...
Страница 95: ...Appendix A Replace a Series 4000 Device with the InTouch ...