background image

4

description oF operating systeM

4

-

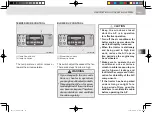
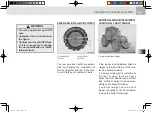
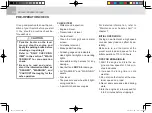
Do not weld or apply heat to 

the tire rim or disc. The tire 

can explode due to the rapidly 

increased pressure in the tire.

Check tires for inflation pres

-

sure, damage, deformation, 

and excessive wear on lug and 

damage of rim and disc. Also 

check if wheel bolts, rim bolts, 

and nuts are loose.

wARNING

Keep the front tire pressure to maximum when using the front end loader 

or front suitcase weights.
if tires with a different size from the ones already in use are installed, con-

tact the 

KIOTI

 dealer for the front/rear wheel speed ratio. improper front/

rear wheel speed ratio can result in excessive wear of the tires.


NOTE

Always maintain the proper tire inflation pressure. Make sure the tire pressure 

does not exceed the pressure recommended in the manual.

INFlATION PRESSuRE

* ag : agricultural tire

T46w031A

Class

Tire Sizes

Inflation Pressure

Front

12.4-24 / 8pr

2.8 kg/cm² 

275 Kpa

40 psi

rear

18.4-30 / 8pr

1.7 kg/cm²

165 Kpa

24 psi

Front

12.4-24 / 8pr

2.8 kg/cm² 

275 Kpa

40 psi

rear

18.4-34 / 8pr

1.5 kg/cm²

152 Kpa

22 psi

TG110-AU-04.indd   53

2013-03-06   오후 5:18:49

Содержание PX1002

Страница 1: ...nce 1947 and has been designed with the finest materials and under rigid quality control standards set forth by the KIOTI Engineering Department Knowledge of tractor operation is essential for many years of dependable service and reliability To help new owner s familiarize themselves with the KIOTI PX7520 PX9020 PX1002 it is the policy of KIOTI tractor to provide an owner s manual which includes h...

Страница 2: ...TG110 AU 00 indd 2 2012 11 15 오후 5 24 31 ...

Страница 3: ...BEFORE OPERATION SPECIFICATIONS DESCRIPTION OF OPERATING SYSTEM OPERATION 3 POINT HITCH MAINTENANCE STORAGE AND DISPOSAL TROUBLESHOOTING INDEX 3 POINT HITCH IMPLEMENT AND LOADER OPERATION SECTION TABLE OF CONTENTS TG110 AU 00 indd 3 2013 03 15 오후 5 09 56 ...

Страница 4: ... 1 14 Safety decal maintenance 1 17 Decal mounting location 1 17 DeCALs 1 18 Cautions for decal maintenance 1 21 Precautions before operation 2 1 Vehicle identification number 2 2 TRACTOR SERIAL NUMBER 2 2 Engine SERIAL number 2 2 Transmission SERIAL number 2 2 Essential replacement part 2 4 Oils and fluids 2 4 Filters 2 4 Belts and rubber parts 2 5 Other components 2 5 SPECIFICATIONS 3 1 General ...

Страница 5: ... 4 24 PTO SELECTION LEVER 4 25 Clutch Pedal 4 25 Brake pedal 4 26 Steering wheel adjustment 4 27 Parking Brake Lever 4 28 IMPLEMENT LIMITATIONS 3 12 Standard size by implement 3 12 DESCRIPTION OF OPERATING SYSTEM 4 1 Exterior view 4 3 switch 4 5 Mounting location 4 5 Key switch 4 6 Combination switch 4 7 Hazard lamp switch 4 9 PTO AUTO MANUAL SWITCH 4 10 PTO main SWITCH 4 10 Instrument panel 4 11 ...

Страница 6: ... 4 38 Rear window 4 38 side window 4 39 Working Light 4 39 Wiper 4 40 RADIO CASSETTE 4 41 ANTENNA 4 41 ROOM Lamp 4 41 accessory 4 42 Sun Visor IF EQUIPPED 4 43 SunROOF 4 44 Air Recirculation and Fresh Air Mode 4 44 Heater and Air Conditioner 4 44 Operating methods 4 45 SYSTEM CONFIGURATION 4 49 SELF DIAGNOSIS FUCNTION 4 50 7 pin power output socket 4 51 tires Wheels and ballast 4 52 general tire i...

Страница 7: ...ing 5 19 3 point hitch control 5 20 Remote hydraulic 5 24 Double acting valve 5 24 Connecting and disconnecting implement 5 26 3 POINT HITCH IMPLEMENT AND LOADER OPERATION 6 1 Removal and installation of 3 point hitch implement with pto shaft 6 2 Operation for 3 point hitch IMPLEMENTS 6 5 Adjustment of LIFT ROD 6 5 Adjustment of Top link 6 6 Precaution for installing How to use top link holes 6 6 ...

Страница 8: ... 17 Adjusting Brake Pedal o 7 18 Bleeding brake fluid line 7 19 Lubricating Grease LOCATIONS p 7 20 Checking Wheel Bolt nut Torque q 7 21 REPLACING Fuel Filter s 7 21 REPLACING Air Cleaner Primary Element t 7 23 Checking Fuel Lines u 7 24 Adjusting fan belt tension v 7 25 Battery w 7 26 checking intake air line x 7 27 Adjusting Toe in y 7 27 Checking Radiator Hose and Clamp z 7 28 Power steering l...

Страница 9: ...9 slow blow fuse ap 7 40 Replacing bulb aq 7 40 storage AND DISPOSAL 8 1 Tractor storage 8 2 Daily storage 8 2 Long term storage 8 2 Using tractor after storage 8 3 Usage and disposal 8 4 TROUBLESHOOTING 9 1 Engine Troubleshooting 9 2 Tractor Troubleshooting 9 4 INDEX 10 1 TABLE OF CONTENTS TG110 AU 00 indd 9 2013 03 15 오후 5 09 57 ...

Страница 10: ...f working procedures and information about technology for eas ier operation This indicates that a condition may result in damage to your vehicle or its equipment if the caution is not heeded Follow the advice provided with the caution This indicates that a condition may result in harm serious injury or death to you or other persons if the warning is not heeded Follow the advice provided with the w...

Страница 11: ...w range Back up light Power take off clutch control on position Middle range Turn up light Power take off clutch control off position High range Auto tilling depth work light Turn signal Creep Auto level work light Engine oil pressure Slow Auto draft work light Battery charging condition Fast L Low travel light Parking brake Four wheel drive on H High travel light Engine coolant temperature Headli...

Страница 12: ...TG110 AU 00 indd 12 2013 03 15 오후 5 09 58 ...

Страница 13: ...driving the tractor 1 8 When parking the tractor 1 9 When operating the PTO 1 9 When using the 3 point hitch 1 10 Safety precautions during servicing 1 10 Safety precautions when using the loader 1 14 Safety decal maintenance 1 17 Decal mounting location 1 17 DeCALs 1 18 Cautions for decal maintenance 1 21 TG110 AU 01 indd 1 2013 01 23 오후 8 33 36 ...

Страница 14: ...actor 7 When starting the tractor make sure your path is clear of people to avoid accidents caused by sudden movements 8 Before making reverse movements with your tractor you should al ways check to see that the path is clear 1 It is recommended that you read and understand this entire manual before operation of your new trac tor Failure to do so could result in accidents or injury 2 Only persons ...

Страница 15: ... seat is installed Keep bystanders away from the tractor while in operation 14 When getting on and off the trac tor handholds and step plates should always be used This will help to prevent accidental slips trips and falls 15 Be sure to scrape off mud or soil from your shoes before mounting the tractor T66O103a T66O104a T66O105a 9 Never operate this tractor or any other agricultural equipment whil...

Страница 16: ...riving tractors with narrow tread widths For added stability you should adjust your rear wheel tread width see page 4 54 19 Before starting your tractor you should depress the clutch and make sure that all shift levers are in the neutral position and park ing brake is applied 20 For your safety ROPS with a seat belt is recommended for all applications 1 Tread T66O106a T66O107a Always use seat belt...

Страница 17: ... tractor on a steep incline and remember to shut off the engine and PTO before dis mounting the tractor Precautions during operation When starting the engine 3 Do not operate your tractor in an enclosed building without the prop er ventilation Exhaust containing carbon monoxide can cause seri ous injury or death T66O109a T66O108a T66O110a TG110 AU 01 indd 5 2013 01 23 오후 8 33 39 ...

Страница 18: ...5 Pull only from the drawbar Never hitch anything to the axle housing or any other point except the draw bar Pulling from any other location only increase the risk of serious personal injury or death 6 If the front of the tractor tends to rise up when heavy implements are attached to the three point hitch weights should be installed on the tractor Do not operate the tractor with a light front end ...

Страница 19: ... operation 15 When working in groups always let the others know what you are going to do before you do it 16 Never freewheel Disengaging the clutch or shifting into neutral while descending a slope as this could lead to a loss of control 17 Do not operate near ditches holes embankments or other ter rain features which may collapse under the tractor s weight The risk of tractor upset is even higher...

Страница 20: ...ean and visible Use hazard lights as re quired 1 Lock the brake pedals together when traveling at road speeds Brake both wheels simultaneously when making an emergency stop Uneven braking at road speeds could cause the tractor to tip over When driving the tractor 1 Brake Pedal R 2 Brake Pedal L 3 Brake Pedal Lock 1 SMV Emblem T66O118a S43O116a TG1O103A TG110 AU 01 indd 8 2013 01 23 오후 8 33 43 ...

Страница 21: ... equipment use a safety chain and place an SMV emblem on it as well 1 Disengage the PTO lower all implements place all control le vers in the neutral position set the parking brake stop the engine and remove the key When parking the tractor T66O120a 1 PTO Shaft Cover 2 PTO Shaft Cap When operating the PTO 1 Make sure the tractor is completely stopped gears are in neutral and all moving components ...

Страница 22: ...lace the gear shift lever in neutral and stop the engine 1 Do not smoke while working around the battery or when refuel ing your tractor Keep all sparks and flames away from the battery and fuel tank The battery presents an explosive hazard because it gives off hydrogen and oxygen etc especially when recharging Safety precautions dur ing servicing T66O124a T66O122a 4 When operating stationary PTO ...

Страница 23: ...l of the in structions Refer to the page 5 9 6 Do not remove the radiator cap while the coolant is hot When cool slowly rotate the cap to the first stop and allow sufficient time for excess pressure to escape After all the pressure is released remove the cap completely If your tractor is equipped with a coolant recovery tank add coolant there rather than to the radiator T66O125a T66O126a 5 It is r...

Страница 24: ...d 2 Hydraulic Line 3 Magnifying Glass 12 Make sure that wheel bolts have been tightened to the specified torque 13 Escaping hydraulic fluid under pressure has sufficient force to penetrate skin causing seri ous personal injury Be sure to release all residual pressure Before disconnecting hydraulic lines T66O129a T66O128a 7 When working with your tractors electrical components you must first discon...

Страница 25: ...e This fluid can produce gangrene and or severe allergic reaction T66O130a Before adding pressure to the hydraulic system make sure that all connections are tight and that all lines pipes and hoses are free of damage 15 Keep environmental pollution in mind When replacing coolant or oil dispose of it the right way Be sure to observe all relevant regulations when you dispose of the engine oil transm...

Страница 26: ...and under the lifted loader or get close to it Also lower the loader arm onto the ground before leaving the tractor Otherwise it may lead to a fatal injury or even death H11O103a The loader can be turned over if a drawbar is improperly loaded Make sure to use a drawbar proper for the 3 point hitch lower link Other wise it may lead to an injury or even death H11O104a TG110 AU 01 indd 14 2013 01 23 ...

Страница 27: ...all parts which are con nected to the bucket and boom The bucket or boom can be accidentally dropped down leading to an injury or even death H11O106a H11O107a ROPS Roll Over Protective Structure sun canopy or cabin are not a FOPS Falling Object Protective Structure It never can protect the riders against falling objects Avoid driving the vehicle into a dangerous area such as fall ing rocks zone IM...

Страница 28: ...2 1 16 Do not allow loader arms or attach ment to contact electrical power lines Electrocution will cause serious injury or death H11O107a Keep bystanders away No riders H11O108a TG110 AU 01 indd 16 2013 01 23 오후 8 33 48 ...

Страница 29: ...1 SAFETY PRE CAUTIONS 1 17 Safety decal maintenance Decal mounting location TG1O105A TG110 AU 01 indd 17 2013 01 23 오후 8 33 51 ...

Страница 30: ...vehicle other than installation and removal of an implement Make sure to set all the levers in their neutral posi tion and apply the parking brake before working on level ground Turn OFF the P T O switch before working the tractor Working the tractor with the engine at a high speed can cause the attached implement moving up down left or right abruptly Make sure to run the engine at a low speed and...

Страница 31: ...7 Part No T4930 52321 Knob Button 10 Part No T4930 52361 CAUTION 1 Replace the hydraulic filter with a new one every 300 hours of use Otherwise the hydraulic system may experience reduction of its life and failure 2 When replacing the hydraulic filter make sure that the engine is stopped and cooled down sufficiently before doing so Otherwise you can get burnt by oil T4930 52361 11 Part No T4930 52...

Страница 32: ... parking brake and stopping the engine 3 Be careful not to hit the shift lever unintentionally causing shift operation while the engine is running It can lead to an accident T4930 52461 15 Part No T5310 52391 T5310 52391 CAUTION 1 When working with an implement using external hydraulic pressure such as a front loader make sure to check the transmission fluid amount If insufficient add fluid to the...

Страница 33: ...use a solvent such a thinner or acetone since it can ruin the decals Do not spray high pressure wa ter directly onto the decal The decal may fall off the tractor CAUTION If a decal is damaged or lost contact your local KIOTI deal er immediately to install a new decal Make sure to attach the decal to the correct position cleanly without bubbles after cleaning its mounting surface If a decal is atta...

Страница 34: ...MEMO MEMO TG110 AU 01 indd 22 2013 01 23 오후 8 33 52 ...

Страница 35: ...cation number 2 2 TRACTOR SERIAL NUMBER 2 2 Engine SERIAL number 2 2 Transmission SERIAL number 2 2 Essential replacement part 2 4 Oils and fluids 2 4 Filters 2 4 Belts and rubber parts 2 5 Other components 2 5 TG110 AU 02 indd 1 2013 03 15 오후 5 01 30 ...

Страница 36: ...de at clutch housing TG1O203A TG1O205A TG1O204A Transmission SERIALnumber This number is to identify the vehicle and its plate is attached on the front right side of the front axle frame This number also printed on the bar code label which is located on the dash board cover on your left hand side Engine identification plate is on the head cover Engine SERIAL number TG110 AU 02 indd 2 2013 03 15 오후...

Страница 37: ...e sure to see your KIOTI dealer For service contact the KIOTI dealership from which you purchased your tractor or your local authorized KIOTI dealer When in need of parts be prepared to give your dealer both the tractor and engine serial numbers Before using non KIOTI approved implements contact your nearest dealer regarding safety application of the implement Tractor Model Name To be filled in by...

Страница 38: ...actor in perfect condition Filters for the engine transmission air cleaner and A C are consum ables that purify oil and air Make sure to replace the these items when changing oil Filters Essential replacement part Oils and fluids H11O205a ITEM SPECIFICATION CAPA L U S gal Engine oil SAE 15W40 10 5 2 77 Trans mission fluid DAEDONG UTF55 Exxonmobil Mo bilfluid 424 BP Tractran UTH Exxonmobil Hy draul...

Страница 39: ...1 E7310 72612 A C Belt 1 Belts hoses and boots which are made of rubber get weakened and cracked as they age If these parts are kept left in this state they can be broken off leading to a serious prob lem in the tractor Therefore regu larly check or replace those items to prevent the failure The battery condition is very impor tant for engine start performance es pecially in winter Therefore make ...

Страница 40: ...MEMO MEMO TG110 AU 02 indd 6 2013 03 15 오후 5 01 36 ...

Страница 41: ...ral specifications 3 2 External dimensions 3 2 General specifications 3 4 TRAVELING SPEED 3 10 MANUAL 3 10 Power shuttle 3 11 IMPLEMENT LIMITATIONS 3 12 Standard size by implement 3 12 TG110 AU 03 indd 1 2013 03 15 오후 6 39 02 ...

Страница 42: ...to the ROPS model tractor E1 Front wheel tread E2 Rear wheel tread mm in ROPS ITEM MODEL PX9020 1 Overall length A 4 535 178 5 2 Overall width B 2 000 78 7 3 Overall height C 2 950 116 0 4 Wheel base D 2 305 90 7 5 Tread E1 1 510 59 5 6 Tread E2 1 535 60 4 7 Groundclearance F 475 18 7 TG1O301A TG110 AU 03 indd 2 2013 03 15 오후 6 39 03 ...

Страница 43: ... tread E2 Rear wheel tread mm in ITEM MODEL PX7520 PX9020 PX1002 1 Overall length A 4 535 178 5 2 Overall width B 2 000 78 7 3 Overall height C 2 770 109 1 2 820 111 0 4 Wheel base D 2 305 90 7 5 Tread E1 1 510 59 5 6 Tread E2 1 530 60 2 1 535 60 4 7 Groundclearance F 475 18 7 495 19 5 CABIN TG110 AU 03 indd 3 2013 03 15 오후 6 39 04 ...

Страница 44: ...w rpm 72 7 54 2 572 82 6 61 6 572 Rated Revolution rpm 2 200 Capacity Fuel Tank L U S gal 120 31 7 Transmission Case L U S gal 74 19 5 Support of front axle L U S gal 8 9 2 4 Engine Oil Filter Included L U S gal 10 5 2 77 Engine Coolant L U S gal 13 9 3 67 Drive Train Main Clutch Type Single dry clutch Transmission Shuttle Type Synchro Mesh Main Gear Shift Synchro Mesh 4 stages Range Gear Shift Co...

Страница 45: ...PR Hydraulic Pump Implement Pump lpm cc rev 48 4 22 Power steering pump lpm cc rev 30 8 14 Steering Hydrostatic Power Steering 3 Point Lift Control Type Position Draft Mixed Control No of standard remote valves 2EA 4Port Additional hyd Lift cylinder Opt 3 point Hitch Type Category Ⅱ Lift Capacity 24 in behind lift point Kgf lbs 2 200 4 850 2 169 4 781 lift point Kgf lbs 2 400 5 291 2 388 5 264 Tha...

Страница 46: ...Rear PTO SAE 1 3 8 6 spline 1 stages rpm 540 2 stages rpm 1 000 Weight with Cabin and AG tires Kgf lbs 3 500 7 716 3 615 7 969 3 630 8 002 Automatic System Draft Control Std Auto PTO The specifications are subject to change without notice TG110 AU 03 indd 6 2013 03 15 오후 6 39 06 ...

Страница 47: ...Rated Revolution rpm 2 200 Capacity Fuel Tank L U S gal 120 31 7 Transmission Case L U S gal 74 19 5 Support of front axle L U S gal 8 9 2 4 Engine Oil Filter Included L U S gal 10 5 2 77 Engine Coolant L U S gal 13 9 3 67 Drive Train Main Clutch Type Multi wet disc clutch Transmission Shuttle Type Power Shuttle Main Gear Shift Synchro Mesh 4 stages Range Gear Shift Hi Low hydraulic clutch constan...

Страница 48: ...ial Lock Rear Standard Tire Size Reverse Front 12 4 24 8PR Rear 18 4 30 8PR Hydraulic Pump Implement Pump lpm cc rev 48 4 22 Power steering pump lpm cc rev 30 8 14 Steering Hydrostatic Power Steering 3 Point Lift Control Type Position Draft Mixed Control No of standard remote valves 2EA 4Port Additional hyd Lift cylinder Opt 3 point Hitch Type Category Ⅱ Lift Capacity 24 in behind lift point Kgf l...

Страница 49: ... Rear PTO SAE 1 3 8 6 spline 1 stages rpm 540 2 stages rpm 1 000 Weight with Cabin and AG tires Kgf lbs 3 530 7 782 3 630 8 002 Automatic System Draft Control Std Auto PTO The specifications are subject to change without notice TG110 AU 03 indd 9 2013 03 15 오후 6 39 07 ...

Страница 50: ...15 59 9 69 20 40 12 68 26 52 16 48 34 62 21 51 0 75 0 47 0 96 0 60 1 25 0 78 1 63 1 01 2 01 1 25 2 63 1 63 3 42 2 13 4 46 2 77 5 58 3 47 7 29 4 53 9 49 5 85 12 38 7 69 15 48 9 62 20 26 12 59 26 34 16 37 35 04 21 77 0 82 0 51 1 07 0 66 1 39 0 86 1 82 1 13 2 24 1 39 2 93 1 82 3 81 2 37 4 98 3 09 6 22 3 86 8 14 5 06 10 58 6 57 13 81 8 58 17 28 10 74 22 60 13 71 28 71 14 04 38 36 23 84 0 80 0 50 1 04 ...

Страница 51: ...4 10 83 22 68 14 04 36 00 22 37 0 64 0 42 0 77 0 48 1 00 0 62 1 31 0 81 1 61 1 00 2 11 1 31 2 75 1 71 3 58 2 22 4 48 2 78 5 86 3 64 7 62 4 73 9 94 6 18 12 44 7 73 16 27 10 11 21 16 13 15 35 75 22 37 0 72 0 45 0 94 0 65 1 23 0 76 1 60 0 99 1 97 1 22 2 58 1 60 3 35 2 08 4 38 2 72 5 47 3 40 7 15 4 44 9 30 5 78 12 14 7 54 15 18 9 43 19 86 12 34 25 83 16 05 38 36 23 83 0 68 0 42 0 89 0 55 1 16 0 72 1 5...

Страница 52: ... by the warranty NOTE Implement size may vary depending on soil operating conditions Item Model Tread max width Lifting Capacity max loading weight W0 24 in aft of hitch Front Rear ALL 1 515 mm 59 4 in 1 535 mm 60 4 in 2 400 kg 5 291 lbs Item Model Actual figures Trailer loading weight W3 Max capacity Implement weight W1 and or size Max Drawbar Load W2 ALL As in the following list shown on the nex...

Страница 53: ...0 Loader Max Bucket width 2 134 mm 84 in bucket Backhoe with sub frame Max Diging depth N A 3 point mounting is not recommended by DAEDONG Tiller Max Cutting width Rated for 65 PTO HP Box Blade Max Cutting width 2 134 mm 84 in maximum or rated for 65 PTO HP w FWA Rear Blade Max Cutting width 2 438 mm 96 in maximum or rated for 65 PTO HP w FWA Rotary Cutter Max Cutting width Not to exceed 4 572 mm ...

Страница 54: ...oader Max Bucket width 2 134 mm 84 in bucket Backhoe with sub frame Max Diging depth N A 3 point mounting is not recommended by DAEDONG Tiller Max Cutting width Not recommended unless rated for 80 PTO HP Box Blade Max Cutting width 2 438 mm 96 in maximum or rated for 80 PTO HP w FWA Rear Blade Max Cutting width 2 740 mm 108 in maximum or rated for 80 PTO HP w FWA Rotary Cutter Max Cutting width No...

Страница 55: ...n Signal Lamp 4 15 Glow Plug Indicator 4 15 Parking brake warning lamp 4 15 PTO Indicator 4 16 4WD indicator 4 16 Brake one side lamp 4 16 AIR FILTER WARNING LAMP 4 17 Low fUEL LEVEL WARNING INDICATOR 4 17 forward Indicator 4 18 neutral indicator 4 18 reverse indicator 4 18 OPERATING THE CONTROLS 4 19 Shuttle shift lever 4 21 MAIN SHIFT LEVER 4 22 RANGE GEAR SHIFT LEVER 4 23 PTO CHANGE LEVER 4 24 ...

Страница 56: ...g the door 4 38 Rear window 4 38 side window 4 39 Working Light 4 39 Wiper 4 40 RADIO CASSETTE 4 41 ANTENNA 4 41 ROOM Lamp 4 41 accessory 4 42 Sun Visor IF EQUIPPED 4 43 SunROOF 4 44 Air Recirculation and Fresh Air Mode 4 44 Heater and Air Conditioner 4 44 Operating methods 4 45 SYSTEM CONFIGURATION 4 49 SELF DIAGNOSIS FUCNTION 4 50 7 pin power output socket 4 51 tires Wheels and ballast 4 52 gene...

Страница 57: ... Exterior view TG1O4B4A 1 ROPS 2 Rear View Mirror 3 Turn Signal Lamp 4 Step 5 Muffler 6 Side Lamp 7 Bonnet 8 Head Lamp 9 Top Link 10 Working Lamp 11 Lift Rod 12 Lower Link 13 Swing Draw Bar ROPS TG110 AU 04 indd 3 2013 01 22 오전 10 22 03 ...

Страница 58: ...9A 1 Working Lamp 2 Wiper 3 Rear View Mirror 4 Muffler 5 Turn Signal Lamp 6 Side Cover Engine Shield 7 Step 8 Bonnet 9 Head Lamp 10 Top Link 11 Lift Rod 12 Lower Link 13 Swing Draw Bar CABIN TG110 AU 04 indd 4 2013 03 06 오후 5 17 12 ...

Страница 59: ...SCRIPTION OF OPERATING SYSTEM 4 switch Mounting location TG1O460A 1 Instrument Panel 2 Combination Switch 3 Hazard Lamp Switch 4 PTO Auto Manual Switch 5 Key Switch TG110 AU 04 indd 5 2013 03 06 오후 5 17 15 ...

Страница 60: ... preheat sys tem s life E The position E indicates the Start In order to start the en gine depress the clutch pedal and put the PTO switch into the OFF position As soon as the engine is started release the key and the key switch is returned to the posi tion C C The position C indicates the ON position As soon as the key switch is turned to this position the oil pressure warning lamp and bat tery c...

Страница 61: ...nsists of the head light turn signal light and horn switches Its function by its po sition is as follows OFF Head light and tail light OFF Low beam and tail light ON High beam ON Turn signal light and tail light ON Head light OFF and tail light ON Head light switch The head light switch can be operat ed only while the key switch is turned to the ON position Turning the head light switch clockwise ...

Страница 62: ... that the needle is not in the red zone NOTE Driving with high beam head light disturbs the approach ing vehicle s visibility for safe driving Use the high beam head lights only if necessary WARNING Turn signal light switch 1 Turn Signal Light Switch A Left Turn B Right Turn The turn signal lights are used when turning the vehicle left or right Pull ing the lever up blinks the left turn signal lig...

Страница 63: ... be operated without the key inserted Pressing this switch sounds the horn Horn switch This switch can be used to warn other vehicles when malfunction oc curs in the tractor while driving on a public road Pressing this switch up blinks the hazard lamp and returning it turns off the lamp The turn signal lights cannot be operated while this switch is pressed up to operate the hazard lamps Hazard lam...

Страница 64: ... Otherwise the engine cannot be started The rear PTO rotates at 540 rpm 1st when the engine speed is approx 2 500 rpm PTO main SWITCH 1 PTO Main Switch TG1O482A This switch is used to switch the PTO between automatic and manual operation 1 PTO Automatic When the PTO selection switch is put to the automatic operation position the PTO is automatically disengaged after the hydraulic lift ing arm or i...

Страница 65: ...arge Warning Lamp 3 High Beam Indicator 4 Glow Plug Indicator 5 Turn Signal Lamp 6 Tachometer 7 PTO ON Indicator 8 One Side Brake Lamp 9 Parking Brake Indicator 10 Low Fuel Level Warning Indicator 11 Forward Indicator 12 4WD Operation Indicator 13 Fuel Gauge 14 Engine Oil Pressure Warning Lamp 15 Hour Meter 16 Coolant Temperature Gauge 17 Neutral Indicator 18 Reverse Indicator Symbols on the instr...

Страница 66: ... turned to the ON position F Fuel is fully filled E Replenish the fuel tank Tachometer HOURMETER 1 Tachometer 2 Hourmeter Indicator 3 Rated Engine Speed Indicator TG1O496A The tachometer indicates the engine rpm The mark 3 indicates approx engine rated speed You can have the 540 PTO rpm while the engine speed is around this indicator For speedy and effective work ad just the work load so that the ...

Страница 67: ...is lamp is turned On when the starting switch is turned On before starting the engine but turned Off after starting the engine If this lamp comes on while driving stop the engine immediately and check the engine oil level Engine oil pressure warn ing lamp Engine coolant temperature gauge H11O425A This gauge indicates the coolant temperature after the key switch is turned to the ON position C Coola...

Страница 68: ...local KIOTI Dealer CAUTION Battery charging lamp This lamp is turned On when the starting switch is turned On before starting the engine but turned Off af ter starting the engine Head light high beam lamp This lamp comes on in blue when the high beam head light is switched on Driving with high beam head light disturbs an approaching vehicle s visibility For safe driving use the high beam head ligh...

Страница 69: ...g lamp When the parking brake is actuated the lamp lights ON This indicates the operating condition of the preheat system When the key switch is turned to the ON position this indicator comes on for approx 8 seconds It is recommended to start the engine as soon as this indica tor goes off for best starting perfor mance This indicator may not turn on if the engine is warm In this case the engine ca...

Страница 70: ...his indicator shows the PTO en gagement condition When the PTO is engaged this indicator comes on When the PTO clutch is disengaged this indicator goes off This comes on to indicate 4WD en gagement 4WD indicator TG1O4A4A TG1O4A5A Brake one side lamp 1 Brake Pedal LH 2 Brake Pedal RH 3 Pedal Interlock A Lock B Unlock TG1O4A6A TG1O418A This lamp indicates the operating status of the brake One side T...

Страница 71: ...n IMPORTANT TG1O4A8A This lamp illuminates when the air filter is clogged by dust etc TG1O4A7A AIR FILTER WARNING LAMP Low fUEL LEVEL WARNING INDI CATOR This lamp comes on when the fuel tank is approaching empty When it comes on you should add fuel as soon as possible Dirving with the this lamp on or with the fuel level be low E can cause the engine to mis fire and damage the engine parts This com...

Страница 72: ...n this lamp turns in green forward Indicator TG1O4B1A If the shuttle lever is in neutral posi tion this lamp turns in green neutral indicator TG1O4B2 If the shuttle lever is in reverse posi tion this lamp turns in green reverse indicator TG110 AU 04 indd 18 2013 03 06 오후 5 17 43 ...

Страница 73: ... Shift Lever 4 Parking Brake 5 Main Shift Lever 6 Hand Throttle Lever 7 Joy stick Lever 8 Position Lever 9 Draft Lever 10 PTO Switch ON OFF 11 Double Acting Lever 12 Drive Mode Selection Switch 13 Clutch Pedal 14 Steering Column Tilt 15 Brake Pedal L 16 Brake Pedal R 17 Foot Throttle TG110 AU 04 indd 19 2013 03 06 오후 5 17 47 ...

Страница 74: ...in Shift Lever 6 Hand Throttle Lever 7 Joy stick Lever 8 Position Lever 9 Draft Lever 10 PTO Switch ON OFF 11 Double Acting Lever 12 Drive Mode Selection Switch 13 Clutch Pedal 14 Steering Column Tilt 15 Brake Pedal L 16 Brake Pedal R 17 Foot Throttle TG1O479A CABIN TG110 AU 04 indd 20 2013 03 06 오후 5 17 51 ...

Страница 75: ...warddriv ingandreversedriving p shuttle To switch between the forward driving and reverse driving push the shuttle shift lever forward while lifting it slightly to select forward driving Pulling it back selects reverse driving If the engine is just started op erate the shuttle shift lever at a low engine speed When the ma chine starts to move depress the accelerator pedal to increase the driving s...

Страница 76: ...g speeds and 16 reverse driving speeds are provided by combination of the main shift lever 4 speeds range shift le ver 4 speeds and shuttle shift lever This functions as the foot clutch ped al When pressing this button during driving the main shift lever can be operated Without depressing the foot clutch pedal Hand Clutch Four speeds can be selected by moving this main shift lever in 1 Main Shift ...

Страница 77: ...eeds can be selected by the range shift lever Make sure to shift the range shift lever after the tractor is completely stopped by depressing the clutch pedal If the lever is not moved freely or makes abnormal noise put the lever into the neutral position engage and disengage the clutch and then try to shift the lever RANGE GEAR SHIFT LEVER TG1O480A Position the creep speed lever in the H position ...

Страница 78: ... result in mal function or damage Therefore note the followings 1 It is recommended to use the creep speed under the following conditions When cultivating a field deeply or shallowly When it is not possible to work at the standard speed due to hard soil When transplanting When working with a trencher Agricultural When loading or unloading during driving 2 It is recommended not to use the creep spe...

Страница 79: ...PTO shaft turns in a clockwise direction As viewed from the rear of the trac tor GROUND SPEED PTO The PTO speed will be proportional to the tractor speed The PTO shaft will stop when the tractor is stopped It is important to note the PTO shaft will rotate in the opposite direction when the tractor is in reverse Clutch Pedal 1 Clutch Pedal Make sure to depress the clutch pedal to its end To start o...

Страница 80: ...ide pedal during the 4WD is activated and to use the brake one side pedal during the quick turn function is activated WARNING Brake pedal 1 Brake Pedal L 2 Brake Pedal R 3 Pedal Interlock A Unlock B Lock 1 Make sure to link the left and right brake pedals as shown in the fig ure while driving on a road The tractor can roll over if depressing only one brake pedal at a high speed 2 To make a sharp t...

Страница 81: ... of the brake disc CAUTION Parking Brake Lever 1 Parking Brake Lever A Pull B Push Steering wheel adjustment The angle of the steering wheel can be adjusted for the driver s comfort Hold the steering wheel with both hands depress the tilt pedal lightly and then adjust the position of the steering wheel as desired To stop the tractor depress the brake pedal and pull the lever up to apply the parkin...

Страница 82: ...speed by pushing the hand throttle lever position completely out while pulling the lever position decelerates the engine The hand throttle lever is mainly used while working on a field FOOT THROTTLE 1 Foot Throttle The foot throttle is mainly used dur ing driving on a road while the hand throttle lever is mainly used in a work field Hand THROTTLE Lever TG1O487A 1 Hand Throttle Lever Slow Fast TG1O...

Страница 83: ...eel Driving is to increase traction by driving four wheels It is hydraulically operated by a simple switch operation To engage the 4WD press the switch up To disengage it return the switch The 4WD function can be used un der the following conditions 1 If high traction is needed in a hu mid area 2 When towing a trailer or using a loader a40O464A a40O463A 1 Calibration Switch Calibration switch This...

Страница 84: ...o one is around the tractor and imple ment while the PTO is in op eration CAUTION When engaging the PTO low er the engine speed engage the PTO and then accelerate the tractor gradually in order to prevent impact load to the PTO from abrupt operation IMPORTANT The mark on the tachometer indicates 540 rpm of the PTO NOTE PTO switch The PTO switch is used to supply power from the tractor to the imple...

Страница 85: ...k Pedal REAR 1 Lock Pedal A Release to Disengage B Depress to Engage The differential lock is to secure the differential system and keep the wheel rotation on both sides the same in order to enhance the trac tion of the rear axle Depressing the pedal engages the differential lock while releasing the pedal disengages the differential lock Use this system under the following conditions 1 When any wh...

Страница 86: ...ustment Lever 1 Seat Belt Seat belt The seat cushion can be adjusted according to the weight of the driver Turning the cushion adjustment lever counterclockwise to the 50 kg posi tion makes the cushion lighter and turning the lever clockwise to the 120 kg position makes the cushion heavier 1 Cushion Adjustment Lever The seat belt is self retracting type Make sure to fasten the seat belt be fore dr...

Страница 87: ...t WARNING position control lever 1 Position Control Lever 2 Lock Bolt 3 Lower Link A Lowering B Lifting TG1O489A The position control lever is used to adjust the height of implements on the 3 point hitch ends The implement attached to the lifting arm can be lowered by pushing the lever while the implement is raised by pulling the lever In order to limit the lowering height of implements use the lo...

Страница 88: ...depth can be controlled by the soil status by putting the draft control lever into the Deep position to activate the draft function at mid load and putting joystick lever 1 Joystick Lever the lever into the Shallow position to activate the draft function at light load For detailed information refer to Ini tial Operation in Chapter 5 TG1O490A TG1O4b3A This joystick lever is used mainly to operate t...

Страница 89: ...ent to a certain position 1 Lowering Speed Control Knob A Low Speed B High Speed Lifting Arm Lower Link Speed Control KNOB TG1O465A Double Acting Lever 1 Double Acting Lever A Port A B Port B C Port C D Port D This lever is used to control a auxiliary hydraulic implement installed to rear TG1O491A Lowering the lever supplies hydraulic fluid to Port B while raising it sup plies hydraulic fluid to P...

Страница 90: ...r Air Conditioner Switch 4 CD Player 5 Sunroof Handle 6 Air Inlet 7 Room Mirror 8 Power Socket 9 Working Light Rear Switch 10 Working Light Front Switch 11 Wiper Operating Switch Front 12 Wiper Operating Switch Rear 13 Sunvisor Optional TG1O426A TG110 AU 04 indd 36 2013 03 06 오후 5 18 22 ...

Страница 91: ...al lamp 1 The cabin is designed optimally for the driver s comfort and conve nience 2 This tractor has wide windows as well as outside rearview mirrors on both sides to provide a clear and wide rear view 3 The cabin can be kept comfortable and pleasant by operating the air conditioner and heater TG1O428A TG1O470A 4 The cabin structure is safe as it is verified by the ROPS Roll Over Protection Stru...

Страница 92: ...ce to open the win dow to prevent damage and breakage by an implement WARNING Rear window 1 Handle of Rear Window 2 Button Press the button on the rear window handle lightly to open the rear win dow in the cabin To close it hold the handle and pull it gently H11O482a Unlocking the door Push the lever to open the door in the cabin 1 Door Lever TG1O429A TG110 AU 04 indd 38 2013 03 06 오후 5 18 26 ...

Страница 93: ...ors fully open while driving the tractor Side windows can be partially open to vent the cab 1 Side Window T85O452A side window Working Light The working lights are installed to the front and rear sections of the roof and their operating button are in stalled in the right panel in the cabin To turn on position the switch marked front to ON the position The key switch should be positioned to the ON ...

Страница 94: ...indow When operating the wiper while it is frozen to the window its fuse can be blown In this case op erate the wiper after increas ing the cabin temperature enough to defrost the wiper WARNING 1 Wiper Operating Switch Front 2 Wiper Operating Switch Rear 3 Wiper Front Wiper 1 To turn on position the switch marked wiper to the ON posi tion 2 The washer fluid is sprayed through the nozzle of the wip...

Страница 95: ...n discharge the battery CAUTION RADIO CASSETTE Pushing the PWR switch one time makes the power ON and pushing the PWR switch more one time again makes the power OFF 1 CD Player s430455a ROOM Lamp 1 Room Lamp If you press the lens the room lamp will be turned on If you press it again it will be turned off 1 Antenna ANTENNA t85O457a Check the contact and angle of the antenna in case of poor signal r...

Страница 96: ... mirror before driving to secure for a clear rear view a40O446a 1 Cup Holder 2 Storage There are two storage areas and three cup holders above the left and right lever guides in the cabin Cup Holder and Storage Power Socket ASHTRAY HANGER Convenience accessories include Power Socket mirror and clothes hanger 1 Power Socket 2 Hanger A40O447a TG1O434A TG110 AU 04 indd 42 2013 03 06 오후 5 18 34 ...

Страница 97: ...IPPED 1 Sun Visor Pull it down to block the sunlight from the front Keep it folded unless nec essary T85O460A SunROOF 1 Sunroof Lever 2 Sunroof 1 You can use it to let the fresh air in the cab 2 If you want to open it just press the button of the handle and rotate handle then it will smoothly open by the gas cylinder 3 If you want to close it after letting the fresh air in just pull the handle lig...

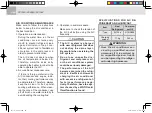
Страница 98: ... operating the air conditioner Ref to the Heater and Conditioner in this chapter It is not possible to block outside air from coming in even in the recircula tion mode In the fresh air mode air circulating in the cabin is 100 fresh air Air Recirculation and Fresh Air Mode TG1O466A Heater and Air Conditioner 1 Defrost Switch 2 Bi level Switch 3 Temp Down Switch 4 Temp Up Switch 5 Power Switch 6 Ven...

Страница 99: ...ness or frost on the windows Do not operate the recirculation mode for an extended period of time WARNING It is used to operate or stop the heat er air conditioning system as well to supply the power The power switch is used to turn the heating airconditioning system ON an OFF Operating methods Power switch If this switch is pressed air comes out from 4 grilles of the left right VENT SWITCH TG1O4B...

Страница 100: ...ns of the left right simultan eously BI LEVEL SWITCH If this switch is pressed air comes out from 4 grilles of the front Also it is efficient to defrost the windshield DEFROST SWITCH To operate the air conditioner press this switch A C SWITCH TG1O4C3A TG1O4C2A TG1O4C4A TG110 AU 04 indd 46 2013 03 06 오후 5 18 42 ...

Страница 101: ...educe the A C opera tion period as the engine may be overheated Make sure to operate the air conditioner once or twice a month in winter season to pre vent refrigerant leakage and facilitate the compressor lubri cation for durability of the A C compo nents If the tractor has been parked under strong sunlight for a long period of time open the windows to ventilate the cabin before operating the A C...

Страница 102: ...ring the winter time run the air conditioner once or twice every month to prevent refrigerant leak age and corrosion in the air con ditioner system and to facilitate oil circulation in the compressor in order to prevent malfunction The A C does not operate when the air temperature is below 2 É Therefore warm the inside air by operating the heater in order to be able to operate the A C 2 Air condit...

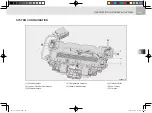
Страница 103: ...M 4 49 SYSTEM CONFIGURATION 1 Mode Actuator 1 2 Indoor Outdoor Air Actuator 3 Mode Actuator 2 4 Temperature Actuator 5 Water Valve Actuator A Defrost Outlet B Vent Outlet C Air Inlet S42O471A TG110 AU 04 indd 49 2013 03 06 오후 5 18 47 ...

Страница 104: ...ator Mode actuator 1 Mode actuator 2 Temperature actuator Water valve actuator Intake air actuator A C temperature sensor SELF DIAGNOSIS FUCNTION Diagnostic method If there is problem in the heater air conditioner inspect it as below self diagnostic method 1 Turn ON the ignition switch 2 Press the vent switch more than 4 times in 2 seconds with the air intake switch pressed 3 Check that the switch...

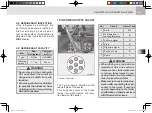
Страница 105: ... Consult your local KIOTI Dealer for this issue WARNING If the refrigerant is insufficient A C performance becomes inefficient Also overcharging has a bad ef fect on the system If malfunction is detected have it serviced at a local KIOTI dealer A C REFRIGERANT INSPECTION A C REFRIGERANT CAPACITY 7 pin power output socket The 7 pin socket is installed on the rear left side of the tractor This suppl...

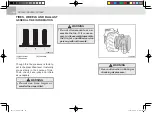
Страница 106: ...ice person perform the work WARNING Do not use tires larger or smaller than specified WARNING Though the tire pressure is factory set to the prescribed level it naturally drops slowly in the course of time Thus check it everyday and inflate as necessary A Insufficient B Standard C Excessive tires Wheels and ballast general tire information T85O530A T46w030a TG110 AU 04 indd 52 2013 03 06 오후 5 18 4...

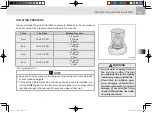
Страница 107: ...th a different size from the ones already in use are installed con tact the KIOTI dealer for the front rear wheel speed ratio Improper front rear wheel speed ratio can result in excessive wear of the tires NOTE Always maintain the proper tire inflation pressure Make sure the tire pressure does not exceed the pressure recommended in the manual Inflation Pressure AG Agricultural Tire T46w031a Class ...

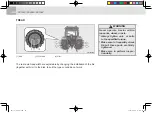
Страница 108: ...e to frequently check that all these parts are firmly tightened Make sure to perform inspec tion daily WARNING TREAD 1 Bolt 2 Rim Bolt 3 Rim The rear axle tread width are adjustable by changing the installation of the tire together with rim to the disk to suit the type or condition of work TG1O493A TG110 AU 04 indd 54 2013 03 06 오후 5 18 51 ...

Страница 109: ...39A mm in 1 513 59 57 1 603 63 11 1 713 67 44 1 404 55 28 1 532 60 31 1 977 77 83 1 636 64 41 2 081 81 93 1 728 68 03 2 173 85 55 1 812 71 34 2 257 88 86 1 904 74 96 2 349 92 48 1 264 49 76 1 709 67 28 1 356 53 39 1 801 70 91 1 440 56 69 1 885 74 21 TG110 AU 04 indd 55 2013 03 06 오후 5 18 51 ...

Страница 110: ...47 1 981 77 99 1 410 55 51 1 710 67 32 1 610 63 39 1 500 59 06 1 400 55 12 1 700 66 93 1 600 62 99 1 636 64 41 2 081 81 93 1 732 68 19 2 177 85 71 1 812 71 34 2 257 88 86 1 908 75 12 2 353 92 64 1 264 49 76 1 709 67 28 1 360 53 54 1 805 71 06 1 440 56 69 1 885 74 21 TG110 AU 04 indd 56 2013 03 06 오후 5 18 51 ...

Страница 111: ...0 47 2 003 78 86 1 410 55 51 1 710 67 32 1 610 63 39 1 500 59 06 1 400 55 12 1 700 66 93 1 600 62 99 1 636 64 41 2 103 82 80 1 732 68 19 2 199 86 57 1 812 71 34 2 279 89 72 1 908 75 19 2 375 93 50 1 264 49 76 1 731 68 15 1 360 53 54 1 827 71 93 1 440 56 69 1 907 75 08 mm in TG110 AU 04 indd 57 2013 03 06 오후 5 18 52 ...

Страница 112: ...be adjusted If it is necessary to adjust it contact your local KIOTI Dealer If it is damaged by unapproved mod ification it will not be covered by warranty Tightening torque Wheel nut Wheel nut 28 32 5 kgf m 274 6 318 7 N m 274 6 333 4 N m 28 34 0 kgf m For agricultural tires make sure to install them with their arrow marks on their side pointing the front driving direction The tire is correctly i...

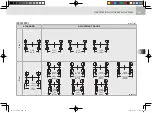
Страница 113: ...it the type or condition of work rear wheel installation pattern TG1O438A Additional weight IF EQUIPPED Additional front weight 1 Additional Front Weight If the loader is not installed attach a weight to the front frame of the trac tor as a safety measure If a heavy implement is installed at the rear or when towing a heavy trailer the front wheels may be lifted Add sufficient weight to keep steer ...

Страница 114: ...rac tor the tires can be worn faster and the durability of the front axle can be deteriorated 1 Pin 2 Plate 3 Spring 4 Grip Ass y 5 Spring Pin 6 Front Washer 7 Bolt 8 Plain Washer 9 Spring Washer 10 Nut Components for additional front weight 3 4 2 1 5 8 6 8 7 9 10 A40O4D4a When installing or removing a weight always check the tire inflation pressure and adjust it as necessary The front weights are...

Страница 115: ... of weight IMPORTANT 1 H11O4E1a 1 Rear Weight Additional rear weight IF EQUIPPED The rear weight is used to maximize the traction of the tractor by increas ing the grip of the rear wheels when using a heavy trailer or plow For detailed information on installa tion contact your local KIOTI Dealer A40O4E1A 1 Rear Weight 2 Spring Washer 3 Nut 4 Bolt Max load 92 kg 46 kg 2 Pieces TG110 AU 04 indd 61 2...

Страница 116: ...ect water and cal cium solution into the tire to use it as a ballast If one liter of water is mixed with 0 4 kg of calcium this liquid does not freeze down at 45 C 49 F For a tire without a tube fill it with water and calcium solution at least to the valve stem level 75 If the tire without a tube is not filled with water and calcium solution suf ficiently a part of the rim is exposed resulting in ...

Страница 117: ...MEMO MEMO TG110 AU 04 indd 63 2013 03 06 오후 5 18 55 ...

Страница 118: ...ps to upright position 5 14 Parking 5 15 Turning 5 16 Driving on slope 5 16 The cautions when coming in and out of WORK FIELD 5 17 precautions while driving on the road 5 17 loading into and unloading out of the truck 5 18 Precautions when using power steering 5 19 3 point hitch control 5 20 Remote hydraulic 5 24 Double acting valve 5 24 Connecting and disconnecting implement 5 26 TG110 AU 05 indd...

Страница 119: ... at the proper work load and speed for the initial operation of 10 to 20 hours Initial operation Walk around inspection Engine oil level Transmission oil level Coolant level Clean the front grill and radiator screen Air cleaner element Brake pedal free play All dash gauges and indicators Head lights tail lights and working lights Accessible wiring harness for any damage Seat belt and ROPS for dama...

Страница 120: ...ell ventilated area or you can be suffocated by exhaust gas Never start the engine unless you are on the driver s seat The tractor can abruptly start off resulting in an injury or accident WARNING Use of a starting aid can cause serious damage and will not be covered under warranty Never try to start the engine for over 10 seconds consecu tively to protect the start mo tor and battery from damage ...

Страница 121: ... position N 1 PTO Change Lever 7 Set the hand throttle lever to the Slow position In case of cold weather you may adjust it to Fast for easier starting 8 Depress the clutch pedal It cannot be started while the clutch is not depressed Make sure that no one is around the implement or be hind the tractor WARNING 1 Hand Throttle Lever Slow Fast TG1O488A TG110 AU 05 indd 4 2013 01 22 오전 10 29 37 ...

Страница 122: ...he preheating function acti vated for approx 15 seconds after the engine is started in order to enhance the engine combustion performance and reduce harmful emissions right after engine start 11 Warm up the engine for 3 to 4 minutes 10 minutes in winter after releasing the clutch pedal 10 When the engine is started re lease the key Then the key is automatically turned back to the ON position Opera...

Страница 123: ...s after the engine is properly started it means that the battery is not be ing charged Have the charging system such as the battery and alternator serviced 3 Refer to Instrument panel in chapter 4 for detailed information about other indicators and lamps Checking WARNING lamps The engine can be severely damaged if it is run with the oil pressure warning lamp ON WARNING If driving the tractor for a...

Страница 124: ...aving the tractor Do not leave the tractor out side unattended It can be stolen as the key used for all KIOTI tractors are the same in shape The horn turn signal lamp and hazard lamp can be oper ated without the key inserted Therefore using these com ponents without the engine started can discharge the bat tery IMPORTANT It is recommended always to warm up the engine before driving in order to mai...

Страница 125: ...m up the en gine for approx 15 minutes 4 The engine throttle can be open for 50 in order to shorten the warming up time 5 The engine is sufficiently warmed up when the temperature gauge on the instrument panel indicates 1 2 of the normal temperature range regardless of the warming up time 6 Do not increase the work load rap idly after starting work 7 Run the engine without load for approx 2 to 3 m...

Страница 126: ... battery Make sure to connect the clip to the body part without paint 6 Start the engine of the tractor with the normal battery 7 Start the engine of the tractor with the discharged battery 8 Disconnect the black cable from the negative battery terminals of both of the tractors 9 Disconnect the red cable 10 Run the engine for at least 30 minutes to charge the discharged battery 11 If the battery i...

Страница 127: ...ould lose the handle of your tractor causing an acci dent WARNING If depressing only one brake pedal at a high speed the trac tor can lose its balance and be overturned WARNING Always wear the seat belt when cap is installed If the seat belt is worn across the abdomen or waist not the hips an injury can occur in case of an accident or impact Do not wear the seat belt if the ROPS is not installed o...

Страница 128: ...the position control lever back ward to raise the attachment on the 3 point hitch 7 To release the parking brake lever pull up and press the thumb but ton Then while holding the button in lower the brake lever 1 Hand Throttle Lever Slow Fast TG1O488A 1 Parking Brake Lever A Pull B Push TG1O486A TG110 AU 05 indd 11 2013 01 22 오전 10 29 44 ...

Страница 129: ... clutch disc can be rapidly worn Make sure to operate the clutch fast when disengaging it and slowly when engaging it Do not change the tractor speed abruptly for safe driving When driving on a slope or loading or unloading the trac tor to a transporting vehicle reduce the speed in advance so that there is no need to shift the gear in the middle of the slope Also do not put your hand on the shift ...

Страница 130: ...ng or folding the rops Always perform such tasks from a safe and stable posi tion at the rear of the tractor CAUTION To avoid personal injury Hold the ROPS tightly with both hands and fold the ROPS slowly and carefully CAUTION It is very dangerous to drive with the ROPS folded Fold the ROPS only when there is ab solutely no possibility for roll over If the situation changes unfold the ROPS immedia...

Страница 131: ...et Pin 3 Clip Pin TG1O521A To avoid accidents Make sure to set the ROPS up right and fasten the seat belt during work If it is necessary to work with it folded do not fasten the seat belt It can be dangerous in case of tractor rollover CAUTION 3 Align pin holes insert set pin and secure them with the clip pin 1 Grip Bolt 2 Set Pin 3 Clip Pin TG1O517A To avoid accidents Make sure the pins are prop ...

Страница 132: ...way Only power shuttle model WARNING 2 Pull the parking brake lever 2 up 3 Before leaving the tractor after parking it make sure to stop the PTO lower the implement onto the ground and stop the engine 4 If it is necessary to leave the trac tor with the engine running put all the shift levers in the neutral posi tion and apply the parking brake firmly 5 When parking the tractor on a slope stop the ...

Страница 133: ...low temperature To prevent this symptom make sure to apply the parking brake Get off the tractor after check ing that the tractor is com pletely stopped and the park ing brake is firmly applied Do not park the tractor on tall grass or hay If grass or hay contacts with the muffler it can catch fire IMPORTANT To prevent accidents due to loss of steering control If you turn at high speed the tractor ...

Страница 134: ...hange the driving di rection on the road let the other car know your direction with turn signal lights 2 Do not use high beam headlights when another vehicle is approach ing from the opposite direction so that not to interrupt another driver s view 3 Always interlock the left and right brake pedal while driving on the public road 1 Turn Signal Light TG1O418A When you are driving on the road observ...

Страница 135: ...each the road After that restart the engine again to go up yyyO186a If the tractor is broken down during driving on the road move it to a safe place to ser vice If not it can cause per sonal injury WARNING Attach the tractor securely to the truck when transporting Be aware of the height of the loaded tractor and avoid low clearance areas Follow this instruction to avoid accidents WARNING TG110 AU ...

Страница 136: ... to make the front and rear balance more stable for safe working 4 When turning the steering wheel to its end the operating sound of the safety valve Relief valve can be heard Do not the tractor against the relief valve for extended peri ods Hydraulic temperature may increase and damage the tractor The power steering system in this tractor is a load reaction full hy draulic type The full hydraulic...

Страница 137: ...e to move the tractor turn on the hazard lights and set a warning triangle behind the tractor Otherwise a rear end accident may occur The center of gravity of the tractor is higher compared to other com mon vehicles so the possibility of the roll over accident is very high Be extra careful when driving on a lateral slope bumpy road road with puddles and narrow road Make sure to set the ROPS in its...

Страница 138: ...y controlled proportional to the position of the lever 4 The lower link is lifted by the hy draulic energy of the tractor while it is lowered by potential energy of its own weight Therefore the implement cannot be lowered by the hydraulic pressure 5 Therefore the implement attached to the lower link may be lifted by protrusion on the ground when it is lowered to the ground It is called as floating...

Страница 139: ... is not required Rotary etc B Heavy Load Traction Work C Normal Load Traction Work If trying to lift an object with excessive weight by the 3 point hitch while the tractor is not equipped with proper front suit case weights the front wheels may be lifted instead leading to roll over Make sure to follow the speci fications for use WARNING 2 The draft function is activated when the lowest or middle ...

Страница 140: ...orarily In this case let the engine idle for 3 to 4 min utes CAUTION 3 To keep the plowing depth shallow put the draft control lever to the rear shallow position The plow ing depth tends to become deeper naturally by outer conditions As the plowing depth increases the applied load also increases Plac ing the draft control lever to the Shallow position plowing depth is maintained as shallow because...

Страница 141: ...eturning Put the detent valve operating lever into the neutral position when the hydraulic implement is not in use If the detent valve is kept in the operating position for an extended pe riod of time the relief valve is kept open and the temperature of the hydraulic fluid rises leading to damage of various hydraulic parts such as the oil seals and O rings WARNING Port Push Pull Lever 1 A In Out B...

Страница 142: ... Connect one end of the hydraulic port to the single acting cylinder as shown in the figure The hydraulic pressure is properly supplied to the cylinder However when the hydrau lic pressure is released the cylinder is contracted only if there is outer force such as potential energy Single acting and double acting Cylinder 1 Single Acting Cylinder A External Load H11O585A 1 Double Acting Cylinder 2 ...

Страница 143: ...ating lever is operated to the opposite direction from the expansion position 1 Make sure to stop the engine be fore disconnecting it 2 Release any residual pressure in the hydraulic hoses of the imple ment and tractor by operating the double acting valve lever 4 to 5 times 3 Remove any foreign material around the couplers 4 Keep the implement balanced by removing any load applied Lower ing it ont...

Страница 144: ...in it is not released or the engine is run ning It is hard to connect and disconnect the hose and hy draulic fluid can be sprayed from the hose and get into your eyes or skin Stop the engine and wear pro tective glasses and gloves be fore work WARNING TG110 AU 05 indd 27 2013 01 22 오전 10 30 00 ...

Страница 145: ...MEMO MEMO TG110 AU 05 indd 28 2013 01 22 오전 10 30 01 ...

Страница 146: ... Top link 6 6 Precaution for installing How to use top link holes 6 6 Adjustment of stabilizer 6 7 dismounting the implement 6 7 Draft hitch and trailer 6 8 INSTALLING PTO SHAFT 6 9 Handling loader 6 10 Driving on slope 6 11 Joystick lever 6 12 Joystick valve 6 14 6 6 3 POINT HITCH IMPLEMENT AND LOADER OPERATION TG110 AU 06 indd 1 2013 01 22 오전 10 30 45 ...

Страница 147: ...e height of the low er link to be parallel to the pins of the implement 3 Put all the shift levers in the neu tral position 1 Implement Support 2 Lower Link 1 Check Link Pin 4 Remove the pins on either side of the check link 5 Remove the ball assembly by pushing the guide pin operating lever 1 Lever 2 Ball Assembly A40O607A A40O612A A40O613A PX7520 PX9020 PX1002 6 TG110 AU 06 indd 2 2013 01 22 오전 ...

Страница 148: ...e lock pins and fix it with the snap pin Remove the implement support as necessary 1 Top Link 2 Lock pin 3 Snap Pin 6 Attach the ball assembly to the implement 1 Lower Link 2 Ball Assembly 7 When the lower link is lifted it is secured with click sound 1 Lower Link 2 Ball Assembly A40O614A A40O615A A40O616A 3 POINT HITCH IMPLEMENT AND LOADER OPERATION 6 TG110 AU 06 indd 3 2013 01 22 오전 10 30 47 ...

Страница 149: ... PTO safe cover is in its position before driving the PTO shaft The PTO shaft and universal joint shaft should not be in terfered by any surrounding parts Never go close to the rotating PTO shaft or universal joint shaft A severe accident can happen WARNING Consult your local KIOTI Deal er for selection of the univer sal joint When selecting a universal joint make sure that it is not too short to ...

Страница 150: ...ment level bal anced by turning the lift rod han dle 2 After adjustment fix it with the stopper Adjustment of LIFT ROD TG1O609A 1 Top Link 2 Lift Rod L 3 Lift Rod R 4 Check Link 5 Lower Link 6 Draft Bar A40O602B 3 POINT HITCH IMPLEMENT AND LOADER OPERATION 6 TG110 AU 06 indd 5 2013 01 22 오전 10 30 50 ...

Страница 151: ... Lynch Pin 4 Top Link Hook 1 Install the top link to the desired position and install the pin and lynch pin 2 Tighten the lock nut on the top link securely after adjusting top link length Adjustment of Top link A40O603A TG1O607A Stop the engine and lower the attachment on the ground prior to disconnecting the lift rod from the lower link Check the attachment for proper support WARNING When there i...

Страница 152: ...re to insert the set pins lynch pins and snap pins back to the implement securely to keep those safe 4 Stop the engine and move the re mote hydraulic control lever back and forth to relief the hydraulic pressure in the system before dis connecting hydraulic couplers 5 Put the top link back to its hook Hold both lower links together with a rubber band Otherwise the low er links can contact with rea...

Страница 153: ...d to the draw bar Max Trailer Weight Trailer Load ed Weight 4 500 kg 9 920 lbs Vertical load of hitch Draw bar 1 500 kg 3 360 lbs TG1O611A 1 Safety Chain H11O682A H11O104a Never use any other part for pulling except draw bar Pull ing with top link ROPS and etc will cause a fatal accident Be sure to install the auxiliary safety chain when installing a trailer WARNING PX7520 PX9020 PX1002 6 TG110 AU...

Страница 154: ...e the joint back and forth to check that its lock pin is properly seated to the groove of the PTO shaft 1 Universal Joint H11O682A 1 1 C56O140a 1 Lock Pin Make sure that the PTO safe cover is in its position before driving the PTO shaft The PTO shaft and universal joint shaft should not be in terfered by any surrounding parts Never go close to the rotating PTO shaft or universal joint shaft A seve...

Страница 155: ...r 7 Bucket For detailed information about instal lation and use of the front loader refer to the separate manual of the loader TG1O603A Check the transmission fluid level and add fluid as neces sary after installing an imple ment IMPORTANT PX7520 PX9020 PX1002 6 10 TG110 AU 06 indd 10 2013 01 22 오전 10 30 58 ...

Страница 156: ...allast are installed H11O556A Driving uphill H11O557A Driving downhill To avoid injuries Keep the loader arm as low as possible when driving on a slope WARNING When driving on downhill with the empty bucket and rear ballast in keep the bucket end of the tractor uphill In other words drive forward on uphill and backward on downhill 3 POINT HITCH IMPLEMENT AND LOADER OPERATION 6 11 TG110 AU 06 indd ...

Страница 157: ...n unexpected accident such as roll over Parking with loader installed 1 1 FLOAT DOWN N UP ROLL DUMP Lock Unlock DUMP DOWN TG1O608A 1 Joystick Lock Lever stalled keep the rear ballast toward the higher level of the ground In other words drive backward on uphill and forward on downhill Use the 4WD to increase traction when driving on a slope with the loaded bucket and rear ballast in stalled Set the...

Страница 158: ... ground in a stall If moving the lever to the float ing position while the boom is up in the air the boom can fall freely and lead to the accident WARNING 4 Down dump The boom can be lowered and the bucket can dump by operating the joystick lever to the front right posi tion 2 o clock position However these two operations may not be performed simultane ously due to unbalanced hydraulic pressure in...

Страница 159: ... right for several times to remove residual pressure in the hydraulic hose IMPORTANT To avoid accidents Pressurized diesel fuel or hy draulic fluid may be sprayed on your skin or eyes lead ing to a severe injury or even death To check leakage use a board and wear protective gloves and goggles If your eyes come into contact with the hydraulic fluid seek medical attention immediately Never try to di...

Страница 160: ...ging engine oil and replacing filter l 7 13 Replacing transmission fluid and filter m 7 15 Changing front axle case oil n 7 17 Adjusting Brake Pedal o 7 18 Bleeding brake fluid line 7 19 Lubricating Grease LOCATIONS p 7 20 Checking Wheel Bolt nut Torque q 7 21 REPLACING Fuel Filter s 7 21 REPLACING Air Cleaner Primary Element t 7 23 Checking Fuel Lines u 7 24 Adjusting fan belt tension v 7 25 Batt...

Страница 161: ...aB cushion rubber Ah 7 32 replacing air filter Ai 7 32 Flush cooling system and changing coolant Aj 7 33 Antifreeze 7 34 Draining water from clutch housing al 7 35 Checking and replacing wiper am 7 35 Replacing Fuse an 7 37 Replacing cabin fuse ao 7 39 slow blow fuse ap 7 40 Replacing bulb aq 7 40 TG110 AU 07 indd 2 2013 03 15 오후 5 10 56 ...

Страница 162: ...level cold add premixed coolant as needed F G AC Seat Belt Check the condition of seat belt and mounting hardware Repair or replace as needed Tires Check for wear damaged tires and ensure for proper sized tires and correct air pressure Parking Brake Check operation and adjust if required Clean Pedals Clean brake pedals travel control pedal clutch pedal and footrest area H General Items Check for l...

Страница 163: ...r Replace M 3 transmission fluid Change M Check D 4 Front axle oil Change N 5 Front axle pivot Adjust 6 Engine start system Check 7 Greasing Apply P 8 Wheel bolt torque Check Q 9 Battery condition Check 3 W 10 Air cleaner element Check T Clean 1 T AF Replace 2 11 Fuel filter element Replace S 12 Fan belt Air con belt Adjust 3 V AB maintenance schedule chart TG110 AU 07 indd 4 2013 03 15 오후 5 10 56...

Страница 164: ...e and clamp Clean G Check Z Replace 15 Power steering hose and oil line Check AA Replace 16 Fuel line Check U Replace 17 Intake air hose Check X Replace 3 18 PTO shaft and guard condition Check 19 3 point hitch and draw bar condition Check 20 Secure pins Check 21 Tire pressure and damage Check 22 Parking brake condition Check 23 Toe in Adjust Y TG110 AU 07 indd 5 2013 03 15 오후 5 10 56 ...

Страница 165: ...ace 3 AN AQ AP 34 Light bulb Replace 3 AQ must be done after the first 10 or 50 hours of operation 1 Air cleaner should be cleaned more often in dusty conditions than in normal condition 2 Every year or every 6 times of cleaning 3 Replace only if necessary The items listed above marked are registered as emission related critical parts by KIOTI in U S EPA ex haust emission standard non road emissio...

Страница 166: ... SAE 90 gear oil or better or same as T M oil 6 Brake oil 0 47 0 12 Korea Shell Tellus 32 SK ZIC SV AW 32 7 Grease Ref to Grease fitting location in chapter 7 A little Multi purpose type grease LUBRICANTS To prevent serious equipment damage use only genuine KIOTI fluids oils and greases or equivalents Check the oil level regularly Correct the oil level if needed before operating Always check and a...

Страница 167: ... down the front section of the hood until it is locked into its original position 3 Do not apply excessive force to the lever to fix the hood The hood can be damaged Checking and adding fuel C The fuel tank cap is automatically locked as it is tightened To fuel unlock the cap with the ignition key before opening it 1 Fuel Tank Cap Fuel Tank Capacity 120 L 31 7 U S gal TG1O701A TG1O702A TG1O703A Ne...

Страница 168: ...AUTION Checking Transmission Fluid Level D TG1O760A 1 Park the machine on a flat surface lower the implement and shut off engine 2 Depress the brake pedals and ap ply the parking brake 3 Set all shift levers into the neutral position 4 Stop the engine 1 Oil Filler Plug 2 Oil Dipstick A Oil Level Is Acceptable Within Range Be careful not to let the fuel tank become empty otherwise air will enter th...

Страница 169: ...lower the implement 3 If the engine was just running wait for approx 5 minutes before checking the oil level 1 Engine Oil Filler Plug 2 Oil Dipstick A Oil Level is Acceptable Within This Range To avoid personal injury Be sure to stop the engine be fore checking the oil level CAUTION If oil level is low do not run engine Never add the oil over the up per limit Be sure to check the oil level after i...

Страница 170: ...e of the range In case of leakage add anti freeze and water in the specified mixing ratio up to the middle of the range 3 The tractor is furnished in the factory with a mixture of anti freeze ethyl ene glycol and water in a ratio of 50 50 which is usable in any season 1 Reservoir Tank A FULL B LOW TG1O762A When using oil of different maker or viscosity from the previous one remove all of the old o...

Страница 171: ...nd smooth operation 2 You should adjust this pedal if an incorrect measurement is found See maintenance code O and R in this chapter TG1O705A To avoid accidents Be sure to stop the engine be fore removing the screen CAUTION Bonnet Grill and screen must be clean from debris to pre vent engine from overheating and to allow good air intake for the air cleaner IMPORTANT When checking the brake ped als...

Страница 172: ... tractor 2 Replace if damaged Changing engine oil and replacing filter l 1 Park the tractor on a level ground and start the engine to warm it up 2 Stop the engine apply the parking brake and remove the drain plug 3 Remove the drain plug at the bot tom of the engine and drain the oil completely All the used oil can be drained out easily when the engine is still warm Be sure to put the drain plugs t...

Страница 173: ... or right after the engine is stopped Be careful not to be burned Avoid oil contact while chang ing or adding engine oil and wear eye protection to prevent eye contact WARNING The engine oil filter should be replaced when changing the en gine oil NOTE Prolonged and repeated con tact with the engine oil may cause skin disorders and skin cancer If skin contact is made wash thoroughly with soap or ha...

Страница 174: ...after the transmission is serviced or every 400 hours of operation When chang ing the transmission fluid make sure to change the fluid filter However replace the filter only at initial 50 hours and every 200 hours operation afterward 1 Park the tractor on a level ground and start the engine to warm it up 2 Stop the engine apply the parking brake and remove the drain plug 3 To drain the used fluid ...

Страница 175: ... hand 7 Run the engine for a few minutes and then stop it to check the leak age and fluid level Add fluid to the specified level as needed Transmission Oil Capacity 74 19 5 To avoid personal injury Be sure to stop the engine before changing the fluid or replacing the filter Cool down the fluid sufficient ly You can get burned by hot fluid CAUTION To prevent serious damage to the hydraulic system u...

Страница 176: ...n 2 After draining reinstall the drain plugs 3 Remove the oil level checking plug on the left of the front axle Changing front axle case oil n 4 Add new oil to the specified level through the oil filler 5 Wait at least 15 minutes to allow the oil flow to the bevel case be fore checking the oil level 6 Add oil as necessary and tighten the oil filler plugs and oil level checking plug 1 Oil Filler Pl...

Страница 177: ...e pedals 1 Slightly depress the LH and RH pedals separately and measure the free play of both pedals 2 If the difference between two ped als free play is out of the specified value adjust the free play with the bolt Tighten the mounting nut firmly af ter adjustment 1 Brake Pedal LH 2 Brake Pedal RH 3 Adjusting Bolt A Free play difference between brake pedals Make sure that the push rod does not pu...

Страница 178: ...uid so that it does not get empty 5 Repeat the step 4 until there is no air bubble coming out from the bleeder 6 After bleeding is completed tighten the bleeder with the brake pedal 2 depressed 7 Bleed the other side of brake line by repeating the steps from 2 to 6 8 The fluid level of the brake fluid tank 1 should be at the upper limit after bleeding the line S40O618B Brake Fluid Capacity 0 47 L ...

Страница 179: ...whenever nec essary and record the operating time when applying it Lubricating Grease LOCATIONS p 1 Front bracket axle pivot TG1O745A 1 Main Shift Lever TG1O746A 1 Rear bracket axle pivot 1 Bevel Gear Case LH RH TG1O747A 1 Top Link Holder 2 Piston Control Lever Shaft Housing A40O727B TG1O749A TG110 AU 07 indd 20 2013 03 15 오후 5 11 25 ...

Страница 180: ... assembly to retain spilled fuel oil 2 Thoroughly clean the outside sur faces of the fuel filter assembly Open the drain tap at the bottom of the filter casing to drain the fuel from the filter 3 Use a strap wrench to loosen the filter casing Remove the casing and element from the fuel filter head REPLACING Fuel Filter s 1 Drain Tap S43O637B To avoid personal injury Never operate tractor with a lo...

Страница 181: ... the filter head Tighten the as sembly a further 1 8 of a turn by hand Do not use a strap wrench 9 Close the drain tap and remove the container 10 Bleed the fuel system Refer to the air bleeding fuel system in this chapter 1 High Pressure Pipe T85O647A If the name of your tractor is PX9020 or PX1002 when the ignition key is turned to ON position and operated for 3 minutes air is automatically purg...

Страница 182: ...aner Primary Element t TG1O716A If the name of tractor is PX7520 air cannot be automatically eliminated 1 Loosen the injection nozzle cover setscrew and remove the injection nozzle cover 2 Turn the ignition key to ON posi tion for 3 minutes and then turn the key back to OFF position 3 Loosen the high pressure pipe 1 from the injection nozzle 4 Run the starting motor until fuel comes out of the con...

Страница 183: ...el pipes and hose clamps are found damaged or deterio rated earlier than two years then change them immediately 4 After the fuel pipe and hose clamps have been changed bleed the fuel system Refer to the Air bleeding fuel system in this chapter Stop the engine when check ing the items above The fuel pipes are subject to wear and aging Failure to perform periodic inspections may lead to a fuel leak ...

Страница 184: ...e to retighten the alternator mounting bolt and hinge bolt se curely after adjusting belt tension 6 Replace the fan belt if it is dam aged cracked or worn 1 Adjusting Bolt A Adjusting Belt Tension B Pull Adjusting fan belt tension v T85O626a In order to extend the fan belt s life time the tension of the belt should be correctly adjusted if it slips The belt tension should be inspected regularly ac...

Страница 185: ...t it in your eyes or on your skin flush with water and seek immidiate medical attentention Be sure to wear eye protection while working on the battery The battery fluid can hurt your eyes Use only the battery with the specified voltage Otherwise it may cause a fire WARNING The charge warning lamp comes on if the charging sys tem is defective If it comes on while driving have the system checked or ...

Страница 186: ...e air line x 1 air line Hose 1 If the hose clamps are loose tighten clamps securely 2 If the hoses and clamps are dam aged you must replace them at once Failure to do so could lead to engine damage TG1O718A Direction for Storage Adjusting Toe in y ADJUSTING PROCEDURE T46OA36A A Wheel to wheel distance at front B Wheel to wheel distance at rear 1 Park tractor on a flat place 2 Turn steering wheel s...

Страница 187: ... in value after the tie rod is adjusted 3 Adjust it again if necessary 1 Clamp 2 Radiator Hose Checking Radiator Hose and Clamp z Check to ensure the radiator hoses are free from damage and are tight TG1O751A 5 Measure distance between tire beads at the rear of tire and hub height 6 Front distance should be 2 8mm less than rear distance If not ad just ball joint length TG110 AU 07 indd 28 2013 03 ...

Страница 188: ...op the machine in a safe place and keep the engine idling 2 After 5 minutes of unloaded idling shut the engine down 3 Keep yourself away from the trac tor for another 10 minutes or until steam has stopped blowing out of the engine 4 Make sure that there is not danger and repair the cause of the over heating according to the manual s instruction Make sure to refer to Engine troubleshooting in chap ...

Страница 189: ...2 Lock Nut A Adjusting Belt Tension T85O634B Tension of air conditioner belt A When press the middle point of the belt 9 10 mm 0 35 0 39 in 1 Net 2 Condenser Cleaning air conditioner condenser Ac 1 Open the hood 2 Remove the net and clean it TG1O722A Stop the engine before checking air conditioner belt CAUTION Make sure to stop engine when checking If cooler fan is blocked by dirt clean with a sof...

Страница 190: ... by the engine sensitively Therefore contact your local KIOTI Dealer for this ser vice Adjusting Engine Valve Clearance ae If the air cleaner is not in a good con dition the lifetime of the engine can be shortened excessive soot can be produced and the engine power can be deteriorated Therefore the filter should be inspected frequently Its replacement interval can be changed according to driving c...

Страница 191: ...housing for damage 2 Release the air cleaner clip and remove the front cover 3 Clean the inside of the air cleaner housing by blowing compressed air through it 4 Replace the filter and check the housing for damage 5 Install the front cover and fix it with the clip 1 After loosening bolts from the left and right side of the cabin roof and separate the filter 1 Bolt 2 Filter replacing air filter Ai ...

Страница 192: ...rt and operate the engine for few minutes 8 Stop the engine and let it cool 9 Drain water and clears 10 Add coolant and water run for a few minutes and allow to come up to temperature 11 Stop engine and let cool 12 Check coolant level of reservoir tank and radiator Add coolant if necessary TG1O765A Coolant capacity 13 9 L 3 7 U S gal To avoid accidents Do not remove the radia tor cap while the coo...

Страница 193: ...ange wa ter into antifreeze before winter sea son comes When changing the antifreeze with one of another type flush the cooling system several times and contact a professional for the mixture ratio Vol Antifreeze Freezing Point Boiling Point F C F C 40 50 12 34 24 37 222 226 106 108 The temperatures shown on the left are industry standards that necessitate a minimum glycol content in the concentra...

Страница 194: ... wiper arm lift the cap of the wiper arm remove the nut and set the wiper arm upright Then hold the arm head and shake it left and right to remove the wiper arm from the drive spindle Disconnect the washer fluid hose and then install a new wiper arm to its position by aligning it to the proper angle Checking and replacing wiper am Inspection TG1O756A Replacement 1 Wiper Arm 2 Wiper Fixing Lever 3 ...

Страница 195: ...al so that the fixing lever is facing down Align the wiper arm with the fixing lever slot and lower the blade H11O652a 5 Lift the wiper blade to its end and install it so that the fixing lever is engaged with the wiper arm A clicking sound is heard When the wiper blade is sepa rated the wiper arm should not contact the windshield or rear glass The glass can be damaged CAUTION TG110 AU 07 indd 36 2...

Страница 196: ...rate the wiper In order to prevent damage of the wiper blade never use synthetic detergent thinner or solvent on the windshield CAUTION Fuses protect the tractor electrical system from potential damage A blown fuse indicates that there is an overload or short somewhere in the electrical system 1 Fuse Box Replacing Fuse an TG1O757A The fuse is located under the right side of the instrument panel TG...

Страница 197: ...tch to the OFF position and turn off all the electri cal devices 2 Open the fuse box cover and check the fuse in question using fuse tongs 1 Fuse Storage Case 2 Fuse H11O655a 3 If the fuse is blown replace it with a new fuse with same capacity Make sure it is firmly installed 4 Install the fuse box cover TG1O769A TG1O770A 1 Normal Fuse 1 Blown Fuse TG110 AU 07 indd 38 2013 03 15 오후 5 12 03 ...

Страница 198: ... the wir ing system is faulty In this case contact your local KIOTI Dealer If the fusible link relay or other electrical component is faulty contact your local KIOTI Dealer NOTE TG1O768A The fuse box in the cabin can be identified by opening the lever guide cover on the left side of the driver s seat It is to protect the electrical devices in the cabin excluding the body The fuse in this box can b...

Страница 199: ... can handle Replacing bulb aq No Bulb Capacity 1 Headlamp 35W 35W 2 Position lamp Front 5W 3 Stop Position lamp Rear 21W 5W 4 Turn signal lamp 21W 5 Work lamp 21W 6 Cluster Charging warning light 3W Indicator Others 1 4W 7 Backup lamp 10W Slow Blow Fuse 60A Using a non approved slow blow fuse can damage elec trical systems in the tractor severely Refer to the chapter Trouble shooting in this manua...

Страница 200: ...1 Connector 2 Rubber Cover 2 Disconnect the wire connector 3 Remove the rubber cover TG1O733A 4 Press down the safety spring and turn it counterclockwise to remove the bulb If the bulb is blown re place it with a new one with the same capacity 1 Connector 2 Safety Spring TG1O734A TG110 AU 07 indd 41 2013 03 15 오후 5 12 11 ...

Страница 201: ...fogged due to rain or car wash This is because of the temperature difference be tween the inside and outside of the lamp which is normal CAUTION The work lamp uses a halogen bulb Do not touch the illuminating part of the halogen bulb The bulb life can be shortened by finger prints dust and moisture or the bulb even can be broken Clean it with soft cloth Be careful of the following when re placing ...

Страница 202: ...ork Lamp Glass Case TG1O736A 2 Unscrew the ground wire screw disconnect the connector and turn the bulb counterclockwise to remove it Then install a new bulb with the same capacity 1 Work Lamp Bulb TG1O737A room lamp 1 Room Lamp 1 Fit a flat bladed screwdriver into the edge of the room lamp and pry off the room lamp cover A40O714A TG110 AU 07 indd 43 2013 03 15 오후 5 12 16 ...

Страница 203: ...g it up Install a new bulb Turn signal lamp rear 1 Turn Signal Lamp RR 1 The turn signal lamp rear is in stalled on the rear fender TG1O509A 2 Unscrew the mounting bolts from the inside of the rear fender 1 Protective Cover 2 Mounting Bolt A40O716A TG110 AU 07 indd 44 2013 03 15 오후 5 12 18 ...

Страница 204: ...lock wise to remove it 3 Remove the bulb by pressing it down lightly and install a new bulb Fit the socket to the grooves and turn it clockwise TG1O739A A40O718A License plate lamp 1 License Plate Lamp 2 Mounting Bolt 3 License Plate Lamp Bulb 1 Remove the cover and unscrew the bolt Then turn the bulb while pressing it down lightly to remove it Install a new bulb Do not touch the bulb if it is sti...

Страница 205: ...t your local KIOTI Dealer Do not touch the illuminating glass part of the halogen bulb The bulb life can be shortened by finger prints dust and moisture or the bulb even can be broken Clean it with soft cloth The halogen bulb contains compressed gas so it can ex plode if dropping or scratch ing it Therefore never use a bulb if it is scratched or was dropped When separating the cover by prying it o...

Страница 206: ...8 8 storage AND DISPOSAL Tractor storage 8 2 Daily storage 8 2 Long term storage 8 2 Using tractor after storage 8 3 Usage and disposal 8 4 TG110 AU 08 indd 1 2013 01 22 오전 10 31 28 ...

Страница 207: ...ods with grease 7 Remove the battery from the tractor Store the battery follow ing the battery storage proce dures 8 Keep the tractor in a dry place where the tractor is sheltered from rain Cover the tractor 9 Clean the engine components as well as the tractor 10 Add grease to all the grease fit ting 11 Flush the cooling system and drain water from it Also add an tifreeze as well as water 12 Chock...

Страница 208: ...rument panel and all parts operate correctly while running the engine for a few minutes 10 Drive the tractor outside and check if it is operating properly Park the tractor outside and idle engine for at least 5 minutes Using tractor after stor age To avoid injury Never clean the tractor body while the engine is running Never run the engine in an enclosed area without proper ventilation system in o...

Страница 209: ...ed tractor or implement but contact your local KIOTI Dealer to dispose it according to the regulations 3 Avoid working under high load as it can cause excessive exhaust gas which is harmful to the environ ment Stop the engine and visually in spect the tractor Check if there is leakage 11 Start the engine release the parking brake and check the brake condition while driving for ward Adjust the brak...

Страница 210: ...9 9 Engine Troubleshooting 9 2 Tractor Troubleshooting 9 4 TROUBLESHOOTING TG110 AU 09 indd 1 2013 01 22 오전 10 31 51 ...

Страница 211: ...tion lines the fuel pump will not work properly To attain proper fuel injection pressure check carefully for loosened fuel cap nut etc Loosen air vent screw over fuel filter and fuel injection pump to eliminate all the air in the fuel system Thick carbon deposits on orifice of in jection nozzle This is caused when water or dirt is mixed in the fuel Clean the nozzle injection piece being careful no...

Страница 212: ...d clean or fix it firmly 2 When output is insufficient Valve out of adjustment Adjust to proper valve clearance Inlet 0 25 mm 0 010 in Exhaust 0 30 mm 0 012 in Air cleaner is dirty Clean or replace the element at every 100 to 200 hours of operation Fuel injection pressure is wrong Adjust it to 184 Kgf cm or replace the injection nozzle 3 When color of exhaust is specially bad Fuel is of extremely ...

Страница 213: ...nd apply grease 4 Steering wheel is not operating prop erly Steering wheel is heavy or vibrate The toe in is incorrect Adjust it again The tire inflation pressure is different Inflate the left and right tires into the specified pressure Each connection is loose Re tighten each connection and replace the part Steering wheel play is excessive The steering wheel shaft is worn Have it repaired in a wo...

Страница 214: ...ps cannot be turned on or are dim The fuse is blown Check the wiring and replace the fuse The bulb is blown Replace it The ground and terminal wirings are poorly contacted Check and clean them The battery electrolyte level is low Charge the battery Battery cannot be charged Check the battery and alternator Horn does not sound The horn switch is faulty Replace or see KIOTI dealer The wiring is faul...

Страница 215: ...it 8 A C performance is poor Abnormal noise occurs The internal parts are not sufficiently lubricated Add lubricant The belt is loose Adjust the belt tension The bracket is loose Tighten its bolts again Inner and outer components are damaged Check and repair them Refrigerant and oil are leaking The sealing washer is broken Replace it The tightening bolt is loose Tighten it High temperature and low...

Страница 216: ...10 10 INDEX INDEX 10 2 TG110 AU 10 indd 1 2013 03 15 오후 5 14 50 ...

Страница 217: ... Adjusting Front Axle pivot Ad 7 31 ADJUSTING PROCEDURE 7 27 Adjusting Toe in y 7 27 Adjustment of LIFT ROD 6 5 Adjustment of stabilizer 6 7 Adjustment of Top link 6 6 AIR BLEEDING FUEL SYSTEM S 7 22 Air CondiTIONER BELT TENSION Ab 7 30 Air conditioner maintenance 4 47 AIR FILTER WARNING LAMP 4 17 Air Recirculation and Fresh Air Mode 4 44 Allowable tolerance of free play between LH and RH brake pe...

Страница 218: ...N K 7 13 Checking Transmission Fluid Level D 7 9 Checking WARNING lamps 5 6 Checking Wheel Bolt nut Torque q 7 21 Check item 5 2 Cleaning air conditioner condenser Ac 7 30 Cleaning Grill Radiator SCREEN G 7 12 Clutch Pedal 4 25 Combination switch 4 7 Components for additional front weight 4 59 Connecting and disconnecting implement 5 26 Connection 5 26 Cup Holder and Storage 4 41 Cushion strength ...

Страница 219: ...ions 3 2 F Filters 2 4 Flush cooling system and changing coolant Aj 7 33 FOOT THROTTLE 4 28 forward Indicator 4 18 front wheel installation pattern 4 57 Fuel gauge 4 12 G General precautions 1 2 General specifications 3 2 General specifications 3 4 general tire information 4 52 Glow Plug Indicator 4 15 H Hand Clutch 4 22 Handling loader 6 10 Hand THROTTLE Lever 4 28 Hazard lamp switch 4 9 Headlamp...

Страница 220: ...d Control KNOB 4 35 loading into and unloading out of the truck 5 18 Long term storage 8 2 Low fUEL LEVEL WARNING INDICATOR 4 17 LUBRICANTS 7 7 Lubricating Grease LOCATIONS p 7 20 M MAIN SHIFT LEVER 4 22 Maintenance check list 7 3 MAINTENANCE CODE 7 8 maintenance schedule chart 7 4 MAINTENANCE 7 1 MANUAL 3 10 Mounting location 4 5 N neutral indicator 4 18 O Oils and fluids 2 4 Operating methods 4 ...

Страница 221: ...eration 2 1 Precautions during operation 1 5 PrecautionS for handling 7 26 Precautions when using power steering 5 19 precautions while driving on the road 5 17 PTO AUTO MANUAL SWITCH 4 10 PTO CHANGE LEVER 4 24 PTO Indicator 4 16 PTO main SWITCH 4 10 PTO SELECTION LEVER 4 25 PTO switch 4 30 R RADIO CASSETTE 4 41 RANGE GEAR SHIFT LEVER 4 23 Readjustment 7 28 rear wheel installation pattern 4 58 Rea...

Страница 222: ...le acting Cylinder 5 25 slow blow fuse ap 7 40 Specifications for A C refrigerant and lu bricant 4 47 SPECIFICATIONS 3 1 Standard size by implement 3 12 STARTING THE ENGINE 5 3 Steering wheel adjustment 4 27 stopping the engine 5 7 storage AND DISPOSAL 8 1 SunROOF 4 44 Sun Visor IF EQUIPPED 4 43 switch 4 5 SYSTEM CONFIGURATION 4 49 T Tachometer HOURMETER 4 12 Temperature control 4 46 The cautions ...

Страница 223: ...g tractor after storage 8 3 V Vehicle identification number 2 2 VENT SWITCH 4 44 W WARMING UP 5 7 WHEEL INSTALLATION DIRECTION 4 57 WHEEL TORQUE AND DIRECTION 4 58 When driving the tractor 1 8 When loaded bucket and rear ballast are installed 6 11 When operating the PTO 1 9 When parking the tractor 1 9 When starting the engine 1 5 When unloaded bucket and rear ballast are installed 6 11 When using...

Отзывы: