54-5501 Rev A Service Department (800) 888-7009
(559) 256-8000
6
USER ADJUSTMENTS
Seat Height Adjustment
Grasp seat, pull out the seat adjustment knob and set to preferred height using the stenciled letters on the
seat post as a guide. Release knob and gently move seat up and down until the plunger locks into the
seat post tube. Seat height should be positioned according to rider’s hip while rider is standing next to
bike.
Front to Rear Seat Adjustment
Handlebar Adjustment
Resistance Adjustment
The friction belt supplies the desired resistance and is adjusted by turning the shift lever located on the
handlebar. Turn the lever clockwise to decrease resistance and counter-clockwise to increase resistance.
To use the resistance shifter as an emergency brake, push the lever to the maximum counter-clockwise
position.
Note! After every workout, wipe down the entire bike using a clean, dry cloth. Visually inspect the
chain cover for any cracks or breaks and verify that it is securely fastened to the bike. Check
pedals, crank arms and other components to verify that they are securely fastened in the correct
position.
ROUTINE MONTHLY MAINTENANCE
Lubricate the Chain: Proper lubrication will extend the life of the chain.
Tools required:
Torque wrench, 9/16-inch socket and “BEL RAY
Chain Lube with Molyphos Additive.”
Caution! Extreme care must be taken when working around an uncovered chain. Keep fingers,
clothing, hair, etc., away from moving chain. Failure to follow these instructions could result in
serious injury, including the loss of a finger.
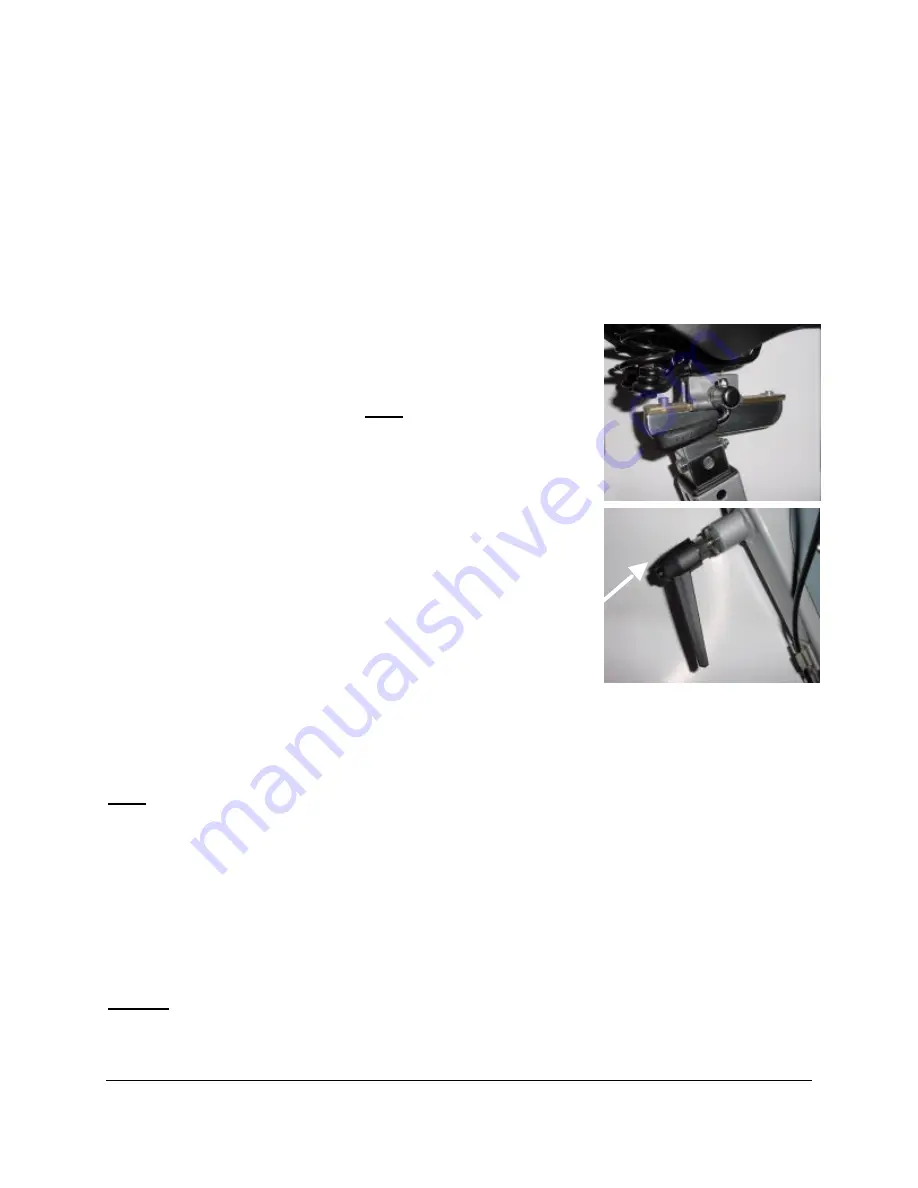
Grasp seat, pull out quick release lever, located under the right side of
the seat, so that the lever is perpendicular to the seat, slide the seat to
the desired position and return the quick release lever to the original
position to secure the seat in place.
Note! The quick release lever
should be horizontal and facing back as shown in illustration at
right. If the lever faces forward or out too much, it could interfere
with the rider.
Turn the handle stud assembly counter-clockwise to loosen the
handlebar. Adjust the handlebar to the desired position using the
stenciled numbers on the tube as a guide. Re-tighten the handle stud
assembly. To reposition the handle stud assembly so that it does not
interfere with the use of the bike, depress the button on the shaft
(indicated by the arrow in the illustration at right). Pull the handle back
and place in the desired position.


