background image

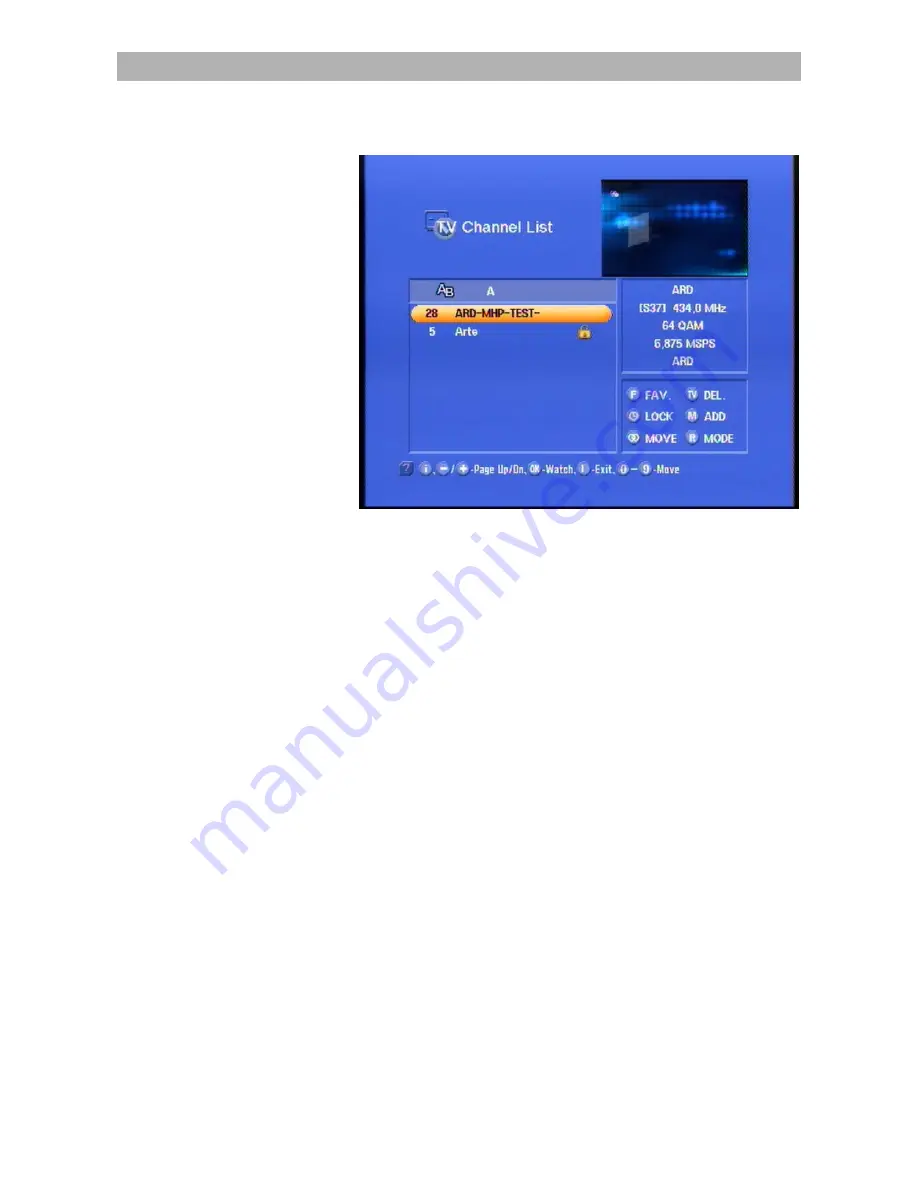
Channel list 


30 

Confirm the letter by pressing the 

-button. All programs beginning 

with this letter are then displayed. 

Using the 



-buttons, you can select the required transmitter. 

This is then highlighted by a color bar and is displayed in the top-right 
corner of the screen. You can then confirm your selection with the 

-button. 

To move back to the Channel List (displays all programs), first press 

the 

-button and then press the 

-button. 

Sorting your programs 

You can sort your programs as required. Programs are sorted by 
moving their entries within the channel list. 

Press 

 to move to the channel list. 

The screen now shows the required channel list. 

Select the program that you want to move with the 



 and 



-buttons. The line with the program currently being shown is 

highlighted in the list by a color bar and the program appears in the 
top corner of the screen. 

Содержание UFD 560

Страница 1: ...Operation Manual DVB C Receiver UFD 560 560S with Common Interface ...

Страница 2: ......

Страница 3: ...t amount of energy is consumed We wish you a great reception and much enjoyment with your new DVB C Receiver Your KATHREIN Team Important Notes If you have any unexpected problems with your receiver please contact your specialist supplier or call our hotline Tel 49 80 31 18 47 00 Fax 49 80 31 18 46 76 With regard to the program allocation changes always occur In such cases it is necessary to carry...

Страница 4: ...ver 13 Notes on operation 14 Menu concept 14 Key functions 14 Alphanumeric inputs 15 Language selection OSD 15 Screen displays OSD On Screen Display 16 Important screen displays 16 Help function 16 Channel messages 17 Error message 17 Channel list RADIO TV 18 Videotext Subtitle program selection 19 Selecting a program 19 Selecting a TV program 19 Reception status 19 Switching over to a radio progr...

Страница 5: ...ystem parameters 40 Parental Control 41 System Information 41 Local time Timer 41 TV Type 42 Aspect Ratio 42 Screen 42 A V mode 42 Installation menu 43 Signal Check 43 Network Scan cable network program search 44 Factory Set 44 Software Download 45 Automatic software recognition 46 Connecting a videorecorder 47 Recording 47 Playback 47 Technical appendix 48 Technical specifications 48 Technical da...

Страница 6: ...ur selection 5 Standby display 6 Cursor buttons for moving through the menu and program as well as for setting the volume same as on remote control 7 LED display four digit 7 segment display for displaying the program number and time 8 Common Interface for CA module and smartcards for pay TV e g BBC Prime 1 Dolby Digital output AC 3 2 SCART connection to TV 3 SCART connection to VCR AUX 4 Video ou...

Страница 7: ...o off deleted a channel Volume menu items Confirms selection of submenu and menu items Radio on off Selection mode of the channel list Dual tone menu language selection Shifts a channel program info Subtitles Overview of programs EPG Electronic Program Guide blocks a channel Channel list Help program selection select submenus and menu items Mute On Off Numerical input for programs parental lock LO...

Страница 8: ...mains switch off Keep the switch pressed Enter 901 using the numerical buttons To accept the code switch receiver 1 to standby mode using the button and then switch it off using the mains switch on the unit Switch back on receiver 2 Keep the switch pressed Enter 902 using the numerical buttons To accept the code switch receiver 2 to standby mode using the button and then back into operation Now al...

Страница 9: ...Children at play Danger of electric shock Pay attention that children do not insert objects into the ventilation slots There is a risk of mortal danger due to electric shock Grounding Warning of short circuit The parabolic antenna is to be grounded in accordance with regula tions The relevant local and or German VDE regulations are to be complied with here Repairs Attention Attention Loss of guara...

Страница 10: ...ectronic unit generates heat The rise in temperature howe ver lies within a safe range Slight color changes may occur to sen sitive furniture surfaces and veneers over the course of time due to the constant effect of heat In conjunction with treated furniture sur faces the units rubber feet can likewise give rise to changes in color Where necessary place the unit on a suitable pad Ventilation Noti...

Страница 11: ...RT cable The video recorder can also be connected with a SCART cable to the receiver VCR AUX SCART socket Audio connection If you want to reproduce the sound via the hi fi system then connect the audio Cinch sockets and the input sockets of the hi fi system with a suitable cable Dolby connection The Dolby Digital output AC 3 is for connecting the receiver to a Dolby Digital system Smartcard 1 2 3 ...

Страница 12: ...h menu after switching on the unit for the first time To start an automatic search you must now press the button The remaining parameters start frequency etc are only required for special applications and do not need to be changed here When the search is completed confirm this by pressing twice You can now receive the TV and radio programs received during the search and call them up using the butt...

Страница 13: ...ed by an interruption of the signal from the trans mitter or a fault in the cable system You should then first check the connection configuration and then whether the basic settings of the receiver are correct for your system When in doubt have en expert do this Factory settings of the receiver Please make a note of the basic settings of your receiver before changing them This will allow you to sw...

Страница 14: ... be accessed by pressing The settings in the various positions are either carried out using the buttons or by using the numerical buttons The main menu and submenus as well as the positions are quit using the or button Key functions Switchover button help function or TV channel list Function switchover button Radio to TV Switch on button with menu functions Exits settings and menus Switches on wit...

Страница 15: ...field The first position is automati ally darkened You can now also enter letters using the numerical buttons by pressing the appropriate button repeatedly For example A B and C are located on 2 refer to the following table Alphanumeric assignment of the number buttons of the remote control Key 1 x 2 x 3 x 4 x 5x 1 1 2 A B C 2 3 D E F 3 4 G H I 4 5 J K L 5 6 M N O 6 7 P R S 7 8 T U V 8 9 W X Y Z 0...

Страница 16: ...artcard slotted into the CI module Help function You can call up a short help screen for every menu and every menu function These help functions provide you with a short description of the most important functions of the selected menu For example you reach the main menu by pressing on the button The help display for the System Parameters menu item is reached by pressing the button You can find a d...

Страница 17: ...nd next to it the selected program and whether videotext and subtitles are being received and the time The in the third line is for program selection from the entire list If the favourite list is selected then the Apple Symbol is shown here This is followed by the program title as well as the stand and end times of the program currently being shown if this data is transmitted Error message Bad or ...

Страница 18: ...encryption The required program can be selected using the bar cursor or using by numerical input and then confirmed with the button The Program Channel Settings menu is in the bottom right corner of the screen The program and channel settings set at the factory can be changed here Pressing the FAV button adds the displayed channel to your list of favourite channels LOCK button locks the displayed ...

Страница 19: ...assume when describing these functions that the receiver has been correctly connected If you want to make these connections yourself then please read the previous sections Safety instructions Connecting the receiver and Putting into operation Selecting a TV program Reception status The following explains how you can select additional programs and what the screen display looks like in each case To ...

Страница 20: ...g a program you can select another TV program by entering the program number Use the numerical buttons to enter the number of the program Switching over to a radio program To do this press the button on the remote control and the receiver then switches to the last received radio program The LED display shows a small r together with the number of the program Note The screen goes blank dark after a ...

Страница 21: ...rtcards and CA modules are not included with this unit As soon as you insert a smartcard into the CA module you receive the following message after switching on the unit Note for Conax SECA Viaccess and CryptoWorks users Please note that the program providers activate unlock smart cards at various monthly activation intervals The card may the refore be activated some days prior to or after the end...

Страница 22: ...nding slot and you enter the corresponding CI CA module menu The CA module the validity of the card and the software version of the module are displayed in the submenu Follow the instructions contained in the operating instructions from your program provider As soon as you have loaded the new software for your CA module exit the menu by pressing on switch the unit off using the mains switch and th...

Страница 23: ...r to the required timer and confirm by pressing You can exit the timer by pressing Note Incorrect times will not be accepted You can select and set the type of channel TV radio or software download the channel number die the starting time date month year hour minutes the stop time and the status of the timer no once daily weekly for 14 timers Leading zeros must be entered for the time Make the set...

Страница 24: ...therefore program your external videorecorder to the same timer settings in your receiver Sound settings Setting the volume Set the required volume using the buttons on the receiver remote control A scroll bar is displayed on the screen showing the set volume Stereo and dual channel playback Call up the sound and language selection by pressing the button and make the appropriate settings if they a...

Страница 25: ... Output position Dolby Digital is then displayed when the program is transmitted in this format Only a few program providers transmit in AC 3 If no AC 3 signal is received then only the normal stereo and mono settings can be made or the additionally transmitted languages selected Switching off the sound Press the button on the remote control The sound is switched off The screen displays The sound ...

Страница 26: ...ish language programs or only those that are not interrupted by adverts The name of the program is displayed by the apple symbol in the TV Channel List or Radio Channel List which you can access using the button Select the required favorite program using the and buttons the program is then shown highlighted on a color bar The bars can be shifted one at a time or in pages using the cursor buttons Y...

Страница 27: ... by a color bar The selected program appears in the picture in the top corner of the screen Using the button the highlighted line can now be marked using the Apple symbol The next program is automatically selected from the channel list and appears on the small screen in the top right corner You can assign names to the individual favorite channels in order e g to gather programs together thematical...

Страница 28: ... favorite channel refer also to the operating instructions Alphanumeric Input Pressing the buttons accesses the other favorites which can now also be re named After entering all letters confirm by pressing on the button The program then returns you to the channel list Pressing moves you back to the TV picture You receive confir mation that your changes have been stored and the info screen for the ...

Страница 29: ...rite list in which the program is stored by pressing the buttons and the button and then delete the Apple symbol by pressing on the and button Search for a program alphabetically You receive a survey of the programs with the same initials as in the list This therefore allows you to find a particular program very quickly from the entire list of available programs You access the channel list by pres...

Страница 30: ... To move back to the Channel List displays all programs first press the button and then press the button Sorting your programs You can sort your programs as required Programs are sorted by moving their entries within the channel list Press to move to the channel list The screen now shows the required channel list Select the program that you want to move with the and buttons The line with the progr...

Страница 31: ...w highlighted with another color and you can now move it to the required position using the and the buttons and place it on the corresponding program location using The changed storage position is confirmed and appears for a few seconds on the screen The moved program appears on the screen ...

Страница 32: ...position of the program you want to delete by pressing the and the buttons Press the button to delete the program The control program prompts you Confirm the deletion using the appropriate button Yes No Pressing deletes the program location and pressing cancels the procedure The change is confirmed and the program from the next transmitter in the channel list appears on the screen ...

Страница 33: ... accepted Press to move back to the channel list You receive confirmation that your changes have been stored and the info screen for the currently set program is displayed for a few seconds on the screen The new program is added to the existing program list The required PID s can be found in the appropriate magazines in the Internet and in Videotext of SAT 1 The Operating Instructions section desc...

Страница 34: ...e column to the left the cursor can be placed on a program using the buttons that is to be switched to using the button The subsequent transmissions are shown by once more pressing the button Additional information regarding the program being shown is obtained by pressing the button On pressing the EPG button and you are provided with the program sequence of the transmitter currently being receive...

Страница 35: ...e you can select various timer settings using the or buttons e g whether the required program is to be recorded just once or daily weekly Confirm your selection with The following acknowledgement appears on the screen for a few seconds The program is then redirected to the videorecorder to be recorded at the set time You can exit this position without storing the timer by pressing twice on ...

Страница 36: ...PIN code for the smartcard s are different and have nothing to do with each other Keep the PIN code in a safe place so that you always have access to your programs even when you forget the code Factory settings The unit password is set as inactive at 0000 at the factory Entering the password Press the button to enter the main menu Here select the System Parameters position by pressing the buttons ...

Страница 37: ...merical buttons Verify Password Enter the new unit password a second time for confirmation using the numerical buttons Personal Here enter the unit ID that the unit itself reports on switching on This can be useful for identification purposes in case of theft The Operating Instructions section provides details on how to use the numerical buttons on the remote control in order to make alphanumerica...

Страница 38: ...m is marked by a colored bar Confirm the selection using the button the padlock symbol appears in the strip The next program in the channel list is now automatically displayed You can now lock another program using the button or by re pressing the button you can remove the lock the padlock symbol vanishes The change to the list is displayed after pressing the button The next program then appears i...

Страница 39: ...h horizontal and vertical arrows You can switch the unit on and off from standby using the On Off button The Menu button takes you to the main menu as does the button on the RC The vertical arrow buttons have the same functions as the buttons and access the submenus The horizontal arrow buttons have the same functions as the buttons The Select button has the same function as the button Note As the...

Страница 40: ...e factory settings or operational settings The System Parameters menu can be selected with the menu button the buttons in the main menu and with You can always get help regarding the menu item currently selected by pressing the button You can exit the help program by re pressing the button The System Parameters menu is comprised of the following submenus ...

Страница 41: ...Time Coordinate previously Greenwich Meantime This time is correct in the UK but must be corrected for other locations e g in Germany CET is applicable UTC 1 hour Note You may have to correct for summertime You can make these corrections yourself in half hour steps using the buttons or manually using the numerical buttons To do this move the cursor bar with the button to the Local time Timer posit...

Страница 42: ...o Confirm by pressing twice Screen Here select the type of screen display using the buttons Normal P S full format for 4 3 screens or Wide Letterbox in this setting widescreen format is forced for 4 3 displays Confirm by pressing twice A V mode Here select the type of video signal at the SCART connection using the buttons Select the signal that your TV is able to process Note Observe the operating...

Страница 43: ...he menu button the buttons in the main menu and with If a password is stored then you must enter it The additional positions are selected using the buttons The Installation menu is comprised of the following submenus Signal Check The quality of the reception signal of the selected channel is displayed in the Signal Check submenu You can switch channels using the buttons and check its receive signa...

Страница 44: ...ms using the buttons The program information of all programs can be loaded using the NIT program scan all available channels of the cable network will thereby be scanned Factory Set In this position all settings can be reset to those at the factory by pressing the button Note You may have to re enter all of your personal settings after re setting the unit ...

Страница 45: ... Software Download position and select it with Your receiver now searches automatically for new software and channel lists this can take a few minutes If there are no new versions then you will be informed of this on the screen You can move the bright cursor bar in Software Download with With in the Display Info position you receive information on the software being transmitted and on the channel ...

Страница 46: ...ion Your receiver detects automatically when new software is being transmitted Approx 5 minutes after the unit has been switched to standby it swit ches itself back on and checks whether new software is available appears in the display for a few seconds If this is the case then the receiver will inform you of this with the mes sage indicated below the next time you switch it on You can then decide...

Страница 47: ...o reset the time after a software update You can also call up the updates from the Internet The URL is www esc kathrein de download ufd Instructions on how to proceed are also located here Connecting a videorecorder The connection diagram at the end of these operating instructions and the description of your video recorder contain information on how to connect your video recorder to the receiver R...

Страница 48: ... EPG ELECTRONIC PROGRAM GUIDE 14 timers 2 000 storage locations each for TV and Radio 5 favorite program lists 8 menu languages D GB F I E NL TR P Program scan search run Aspect ratio detection 4 3 16 9 CVBS RGB and S VHS signal output via SCART socket Language selection for multi language transmissions Videotext 4 digit LED display Power switch to switch off from mains IR remote control with swit...

Страница 49: ...ce V Ω 1 75 S N dB 53 Output voltage at 10 kΩ mV 770 S N dB 65 Audio decoding MPEG 1 and 2 layer 1 and 2 Sampling rate kHz 32 44 1 48 Frequency range MHz 0 04 20 Memory Flash RAM MB 2 D RAM MB 8 SDRAM Processor clock rate MHz 81 Power supply Mains voltage V Hz 100 240 50 Power consumption in operation stand by 25 10 Connections HF input IEC socket HF output IEC plug TV VCR 2 x SCART socket Audio H...

Страница 50: ...Technical appendix 50 Connection example ...

Страница 51: ...gnals within a digital data stream The receiver establishes a unique assignment of the video and audio data trans mission using this number CI Common Interface general interface LED display display at the receiver Scart cable 21 pin connection cable Decoder decoding unit for Pay TV OSD On Screen Display PIN Personal Identification Number RGB video signal composed of three single color signals red ...

Страница 52: ... D 83004 Rosenheim Germany x Tel 49 80 31 1 84 0 x Fax 49 80 31 1 84 3 06 936 2609 0704 ZWT Subject to technical changes Service Important Note If you have any unexpected problems with your receiver please contact your specialist supplier or call our hotline Tel 49 080 31 18 47 00 Fax 49 080 31 18 46 76 ...

Отзывы: