Establishing a connection to the KACO device via WiFi
F
Connect the USB WiFi stick to the device and connect to the access point generated by the device using a notebook or
mobile device. Every device generates a unique AP-name based on its serial number so that it is possible to install sev-
eral devices at the same time if multiple WiFi sticks happen to be available.
F
Name of access point: <Device designation serial number> (e.g. “bp87-<serial number>” or “bp150-<serial number>”)
1. Password: kacowifi
2. Launch the browser on the terminal device and enter server name a) or server address b):
3. http:// 192.168.1.1
ð
The device configuration page is displayed.
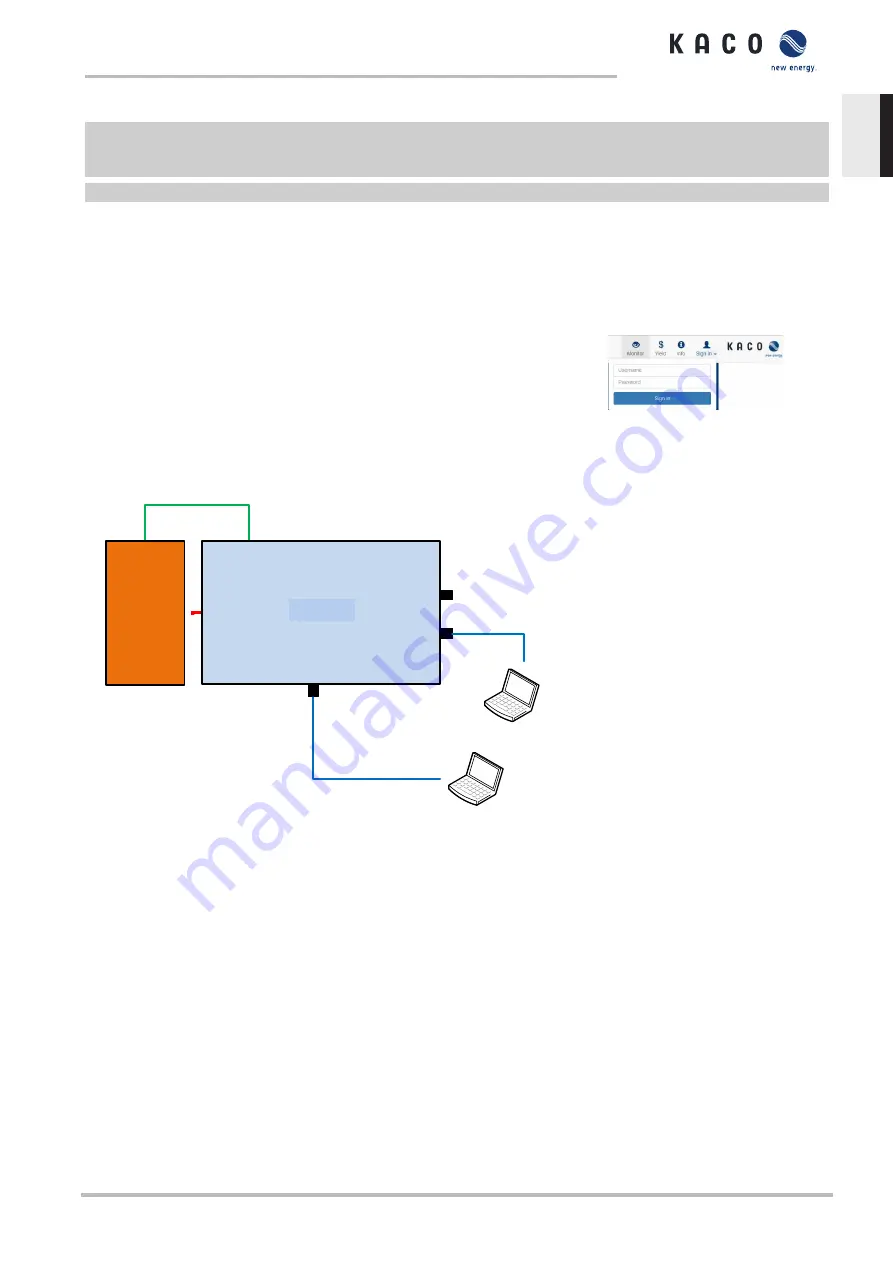
1. At the Login/register icon, log in as:
2. User name: user
3. Password: kaco-user
Fig. 43:
Login screen
8.4.2
Start-up via cable connection
MODBUS RTU
RS485
DC
Argus
SC
BP125
Et
h
er
n
et
P
o
rt
1
(D
H
C
P
)
Ethernet
Notebook
Ethernet
Notebook
Ethernet Port 0
(Static IP)
Inverter
Notebook
Notebook
Ethernet
Ethernet
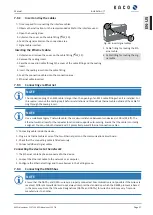
Fig. 44:
Start-up via Ethernet
Application
The planned network infrastructure or AC-coupling is not yet in place or has not been completed.
Required components
– Notebook with Ethernet interface
– Ethernet cable (uncrossed patch cable)
Establishing a connection to the KACO device
1. The device must be opened in order to connect the Ethernet cable! For safety reasons, KACO therefore recommends
establishing a connection via WiFi.
2. The device's communication circuit board has 3 Ethernet ports that can be used:
1. The 2 neighboring shielded Ethernet ports are marked LAN1 and LAN2. These ports have an internal switch and, in
their factory default state, they expect to receive an IP address from a DHCP server. As such, these can only be used if
the connected PC makes a DHCP service available.
Manual
Start-up | 8
KACO blueplanet 110 TL3 KACO blueplanet 125 TL3
Page 37
EN-US


