


(No.HC034<Rev.001>)1-19
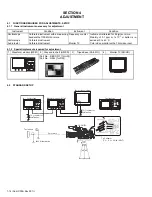
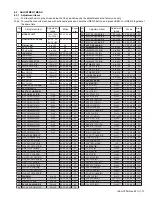
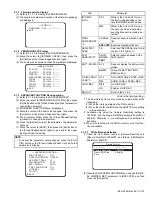
4.5.2 Cam adjustment
No.
Item
Measuring
Instruments &
Input Signals
Mode
Measuring Point (A)
Adjustment Points (B)
Adjustment Level (C)
Adjustment Procedure
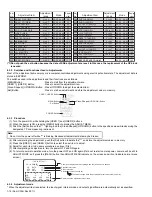
1
Preparation
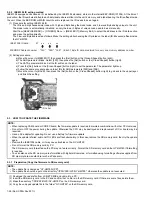
(1) Attach the Lens and Lens connector to the unit.
(2) Setting of Switches
ND FILTER : OFF
GAIN : L
WHT.BAL : A
FULL AUTO : OFF
(3) Select ADJUST MENU No.1 “VIDEO MODE CHANGE” and change the VIDEO MODE to [60](NTSC).
(4) Shoot the Light Box and set the Zoom position to TELE end and fix the position so that there is no chading
NOTE:
This adjustment is after more than 15 minutes switched on the power of GY-HM790.
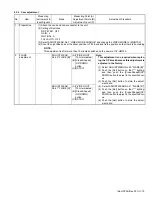
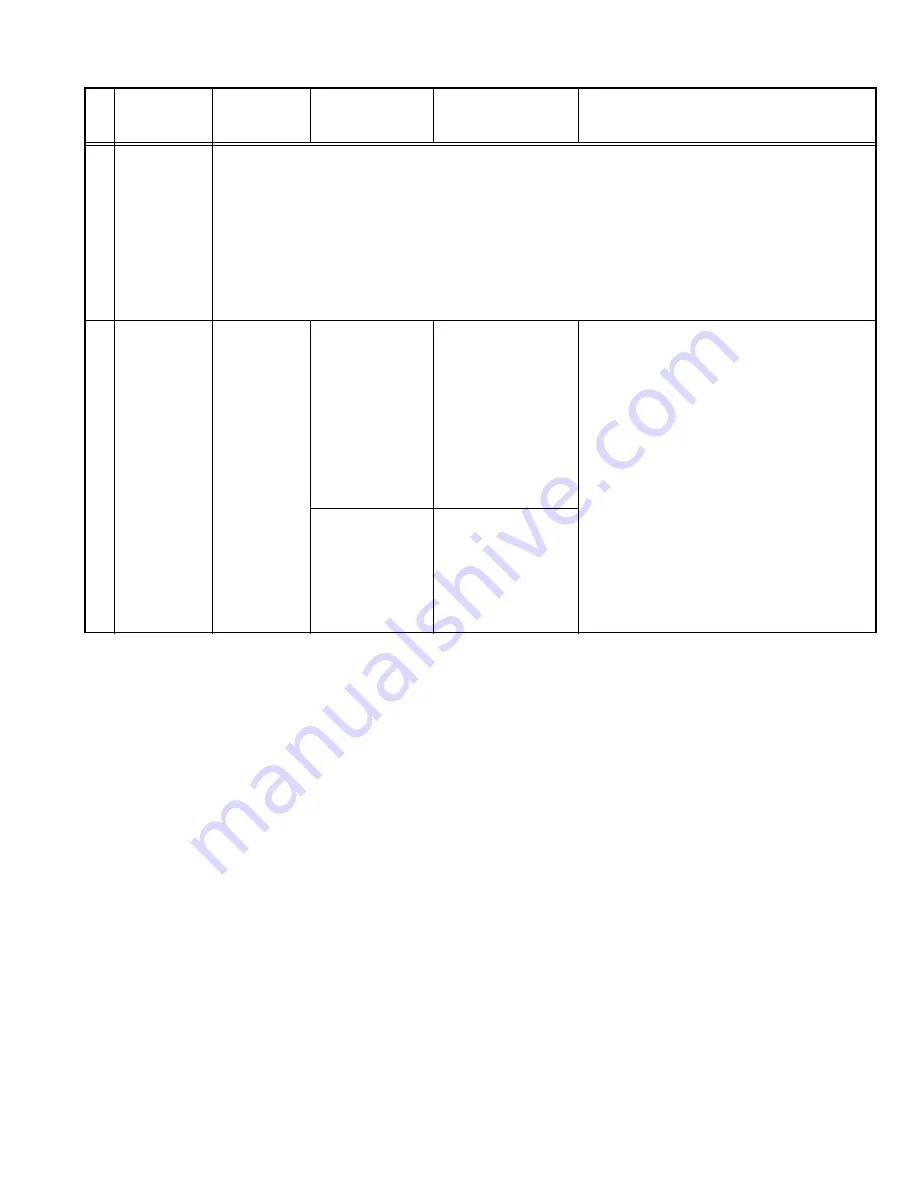
2
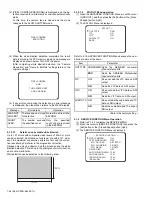
FLARE
adjustment
-
ADJUST MENU
No.40 "FLARE [B]"
(A)Y/VIDEO OUT
(75
Ω
terminated)
(B)[Cross-Shaped]
(UP/DOWN)
button
(C)DATA:13
Note:
This adjustment is no required when replac-
ing the OP block because this adjustment is
adjusted in the factory.
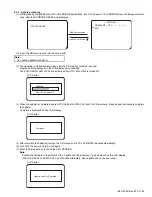
(1) Select ADJUST MENU No.40 "FLARE [B]".
(2) Push the [Set] button so that "*" lighting,
and then push the [Cross-Shaped](UP/
DOWN) button to adjust to the specified val-
ue.
(3) Push the [Set] button to store the adjust-
ment data.
(4) Select ADJUST MENU No.41 "FLARE [R]".
(5) Push the [Set] button so that "*" lighting,
and then push the [Cross-Shaped](UP/
DOWN) button to adjust to the specified val-
ue.
(6) Push the [Set] button to store the adjust-
ment data.
ADJUST MENU
No.41 "FLARE [R]"
(A)Y/VIDEO OUT
(75
Ω
terminated)
(B)[Cross-Shaped]
(UP/DOWN)
button
(C)DATA:13