


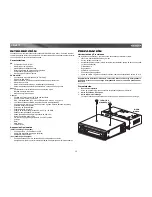


CD6111
7
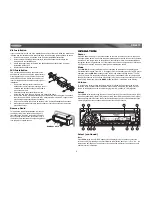
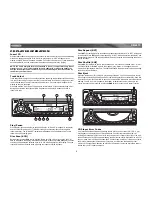
TUNER OPERATION
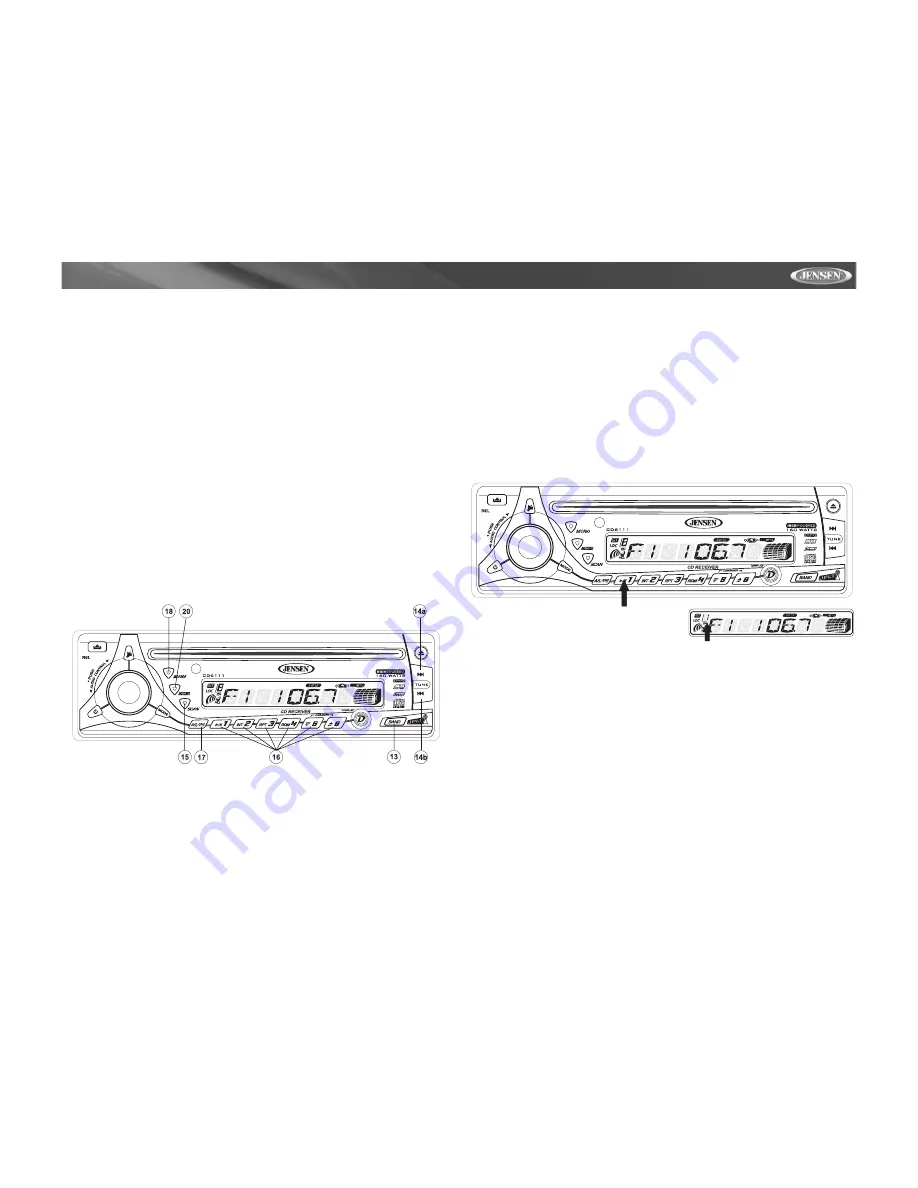
AM/FM Band Selector (BAND)
Press
BAND
(13) during radio play to switch between three FM bands and one AM band. “F1”,
“F2”, “F3” or “AM” will appear in the display to indicate the band currently selected.
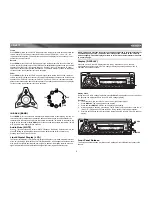
Tuning
Automatic Tuning
Press the Up Tuning (14a) button to tune upward in frequency and the Down Tuning (14b)
button to tune downward in frequency. The unit will automatically stop at the next strong
station. If the Local mode is active, the radio will seek the next strong local station when either
button is pressed.
Manual Tuning
Press the Up Tuning (14a) or Down Tuning (14b) button for more than two seconds to select
manual tuning mode. “MANUAL” will appear in the display. Press the Up or Down Tuning
buttons to move radio frequency up or down two digits at a time. Press and hold the Up or
Down tuning buttons to quickly advance to a certain frequency. Release when the desired
frequency is reached. If tuning is not adjusted within five seconds of entering manual tuning
mode, the radio will revert to automatic tuning and “AUTO” will appear in the display.
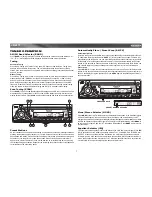
Scan Tuning (SCAN)
Press
SCAN
(15) to scan upwards through all the strong channels in the current band. The unit
will pause and play each station for five seconds, and the station frequency will flash in the
display during this time. Press
SCAN
again to stop scanning and listen to the current station.
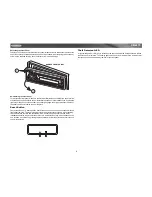
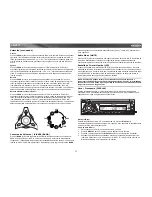
Preset Stations
Up to six stations on each band can be stored as presets and can then be instantly recalled by
pressing the associated preset button (16). To store a station, turn the radio on and select the
desired band and station. Press and hold the desired preset button (numbered one through six
on the face of the radio) for more than two seconds. When stored, the preset number will
appear in the display. The station is now stored and can be re-called at any time by pressing
the corresponding preset button. Repeat for the remaining five presets on the current band and
for all presets on the other three bands.
Automatically Store / Preset Scan (AS/PS)
Automatically Store
Select six strong stations and store them in the current band using the Automatic Store feature.
To enable this feature, press and hold
AS/PS
(17) for more than two seconds. The radio will
automatically scan the band in use and enter strong stations into the preset memory positions
for that band. After entering the stations into memory, the unit will automatically stop at each
station for five seconds so each can be heard. When using the Automatically Store feature, the
new stations replace any stations already stored in preset memory for the selected band.
Preset Scan
Press
AS/PS
(17) to scan the six preset stations in the current band. The unit will stop at each
station for five seconds before continuing to the next preset station, and the preset number will
flash on the display during the preset scan. Press
AS/PS
again to stop scanning and listen to
the current station.
Mono/Stereo Selector (MONO)
Press
MONO
(18) during FM radio operation to select stereo reception of the broadcast signal.
Under normal reception, the unit should be left in the stereo mode as indicated by the “ST”
designation and the associated signal strength indicator that appear on the display panel when
tuned to an FM stereo signal. If the signal is too noisy for comfortable listening, press
MONO
to
switch to mono reception, and the “ST” indication will disappear. Press
MONO
again to return
to stereo mode.
Equalizer Selector (iEQ)
The equalizer function applies preset sound effects to the unit’s audio output signal. Press
iEQ
(20) to activate one of the following operating modes: FLAT, CLASSICS, POP M, ROCK M or
DSP OFF. When the equalizer function is activated, the most recently selected bass/treble
levels are ignored. If the bass and/or treble levels are adjusted while the equalizer function is
active, the equalizer function will revert to FLAT. When the equalizer function is not active, the
unit will return to the most recently selected bass and treble levels.
PRESS AND HOLD
PRESET NUMBER APPEARS
Содержание CD6111
Страница 2: ......
Страница 4: ...ii CD6111...


