


Page 8 of 28
Technical Support
1 866 228-3762
Systems Engineer
321-243-0600
17.
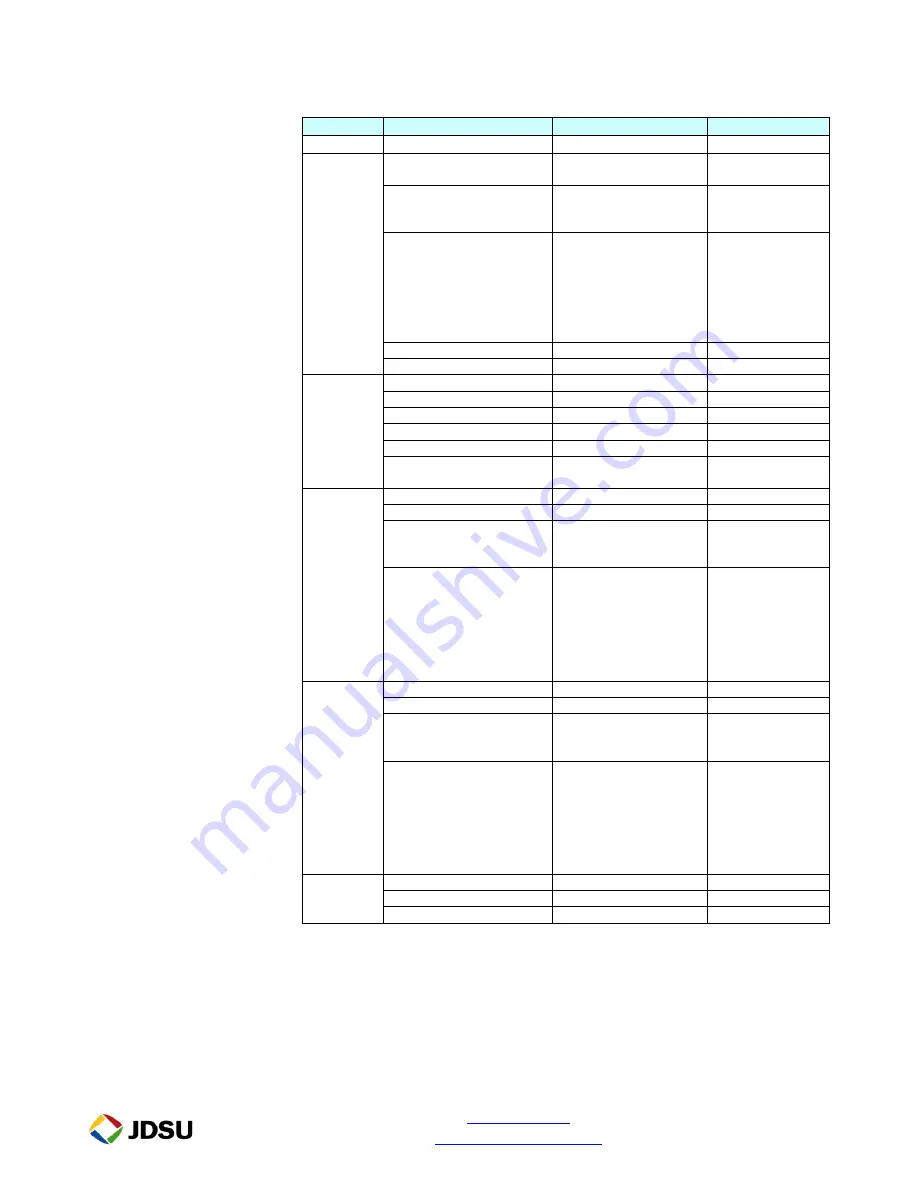
Setup
Select the indicated folders and configure your test as follows:
Folder
Option
Value(s)
Comment
Symmetry
Symmetric
Setup,
All Tests
Tests
Throughput, Latency,
Packet Jitter, Frame Loss
Frame or Packet
Frame
Option only
displayed if test =
Layer 3 IPv4
Frame Lengths to Test
64 and 1518 if no VLAN
68 and 1522 if VLAN
If the MTU is
greater than 1518
or 1522 w/ VLAN,
also select one
User Selected
frame length and
enter the MTU
Maximum Bandwidth
See Work Order for CIR
Load Format
Mbps
Setup,
Throughput
Measurement Accuracy (%)
To within 1.0 Mbps
Zero-in Process
JDSU Enhanced
Trial Duration (seconds)
60
Frame Loss Tolerance (%)
0
Show Pass/Fail Status
Selected
Throughput Threshold
(Mbps)
See Work Order for CIR
Setup,
Latency
(RTD)
Number of Trials
1
Trial Durations (seconds)
60
Show Pass/Fail Status
Select for VoIP, IPTV,
Circuit Emulation, or
Cell Backhaul service
Latency Threshold (µsec)
See Work Order
If not specified:
250,000 for VoIP
250,000 for IPTV
50,000 for Circuit
Emulation
20,000 for Mobile
Backhaul
Setup,
Packet
Jitter
Number of Trials
1
Trial Durations (seconds)
60
Show Pass/Fail Status
Select for VoIP, IPTV,
Circuit Emulation, or
Cell Backhaul service
Packet Jitter Threshold (µs)
See Work Order
If not specified:
40,000 for VoIP
250,000 for IPTV
20,000 for Circuit
Emulation
3,000 for Mobile
Backhaul
Setup,
Frame Loss
Test Procedure
RFC 2544
Trial Durations (seconds)
60
Bandwidth Granularity (%)
1Mbps


