53
Chapter 3: Troubleshooting & Testing
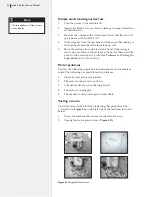
To replace a defective sensor:
IMPORTANT:
Never disconnect or connect sensors when power
is on to the machine or electronics. This will permanently dam-
age the sensor and might affect the logic board.
1.
Power off the printer.
2.
Disconnect the plug from the sensor.
3.
Note the orientation of the old sensor, specifically where the
optical ‘eye’ is pointing.
4.
Remove the old sensor by removing the hardware or adhesive.
5.
Mount the new sensor in exactly the same orientation as the old
one.
6.
Connect the plug to the sensor, it is keyed to only connect one-
way.
7.
Power on and test the installation.
General mechanical / electrical issues
If you encounter any of the following problems, try the diagnostics
test outlined below:
n
The FlexJet didn’t initialize (No LEDs, fans not running, car-
riage didn’t move, small jerking motion during power up)
n
The FlexJet has been working but did not initialize after being
reset by turning the power off them back on.
n
Jam messages occur without media or other objects obstructing
normal operation.
n
The carriage is making loud or unusual sounds.
Required tools
n
Multimeter capable of reading AC voltage
n
Phillips head screwdriver
n
Allen wrenches:
1
/
16
and
5
/
64
n
Nut driver or socket wrench with extension:
11
/
32
Содержание FlexJet
Страница 1: ...Service Manual Ioline FlexJet ...
Страница 3: ...Service Manual Ioline FlexJet ...
Страница 4: ......
Страница 8: ......
Страница 12: ......
Страница 60: ...60 Ioline FlexJet Service Manual This page intentionally left blank ...
Страница 90: ...90 Ioline FlexJet Service Manual This page intentionally left blank ...
Страница 96: ...96 Ioline FlexJet Service Manual This page intentionally left blank ...


