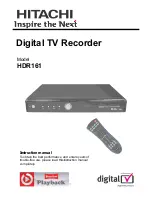
This short instruction explains the most important functions to ensure that you can directly watch television and make recordings with
your new digital receiver. Please note, additional adjustments may be required.
Please read the general safety instructions carefully.
1.1. Connections
Note:
Do not connect the digital receiver to the main power yet.
1.1.1. Connection LNB (Low Noise Block) with the digital satellite receiver
The LNB on satellite antenna dish can be connected to
a digital receiver in different ways. One of the ways is to
connect the LNB, on the satellite dish, directly to a digital
receiver in the “LNB in” connector of the Tuner 1, by means
of a coaxial cable. Use a loop-through cable to make loop
through between Tuner1 and Tuner2
(see picture 4).
Note:
In case of this confi guration, user has to set “Loop
1->2” option in installation type of antenna settings (see
chapter 4.1.5 Antenna settings).
A second way is to use two different satellite dishes. One
LNB from the fi rst satellite dish connect directly to the “LNB
in” connector of the Tuner 1 and second LNB, on the second
satellite dish, connect directly to the “LNB in” connector of
the Tuner 2 (see picture 4a).
Note:
In case of this confi guration, user has to set “Dual” option
in installation type of antenna settings (see chapter 4.1.5
Antenna settings).
A third way is to use one antenna dish with one twin LNB,
which has two outputs. One output from the twin LNB
connect directly to the “LNB in” connector of the Tuner 1 and
second output from the same twin LNB, connect directly to
the “LNB in” connector of the Tuner 2 (see picture 4b).
Note:
In case of this confi guration, user has to set “Dual” option
in installation type of antenna settings (see chapter 4.1.5
Antenna settings).
1. Quick installation guide
Picture 4
Picture 4A
Picture 4B
5


