


22
1 – Switch the digital receiver off using the main power switch (17) on the rear panel.
2 – Connect the USB stick to the proper connector (11) on the front panel
3 – Press the “Menu” key on the remote control
4 – Choose “Settings” followed by “System Information”.
5 – Plug the USB Stick into your PVR and make sure that it is recognized properly.
6 – If the USB stick is recongised by the product, the message “USB – Init: OK” will be displayed
7- Once this message has been displayed, start with the Upgrade, just by pressing “Software Update”, the receiver will now looking for
new updates in the USB stick
8- When Updates are has been found on the USB Port, then you will get the following screen.
9- Start the Upgrade process by clicking the green button and confi rm this window.
10- At this point you will get the last message to abort the upgrade. The user will be asked if it really wants to upgrade his product. Press
again the green key of the remote control to start the upgrade.
11- after this last confi rmation the product starts the download of the SW.
12 – Then just follow the instructions on the screen and wait until your PVR automatically reboots, this will take not more then one or
two minutes.
Note:
Do not switch off your product while it is downloading the software from the USB stick.
Note: In some occasions, a new software may require a factory reset of the product due to the new functionalities it may add. Consult
the internet at www.ftacom.com for the details regarding a specifi c software download.
4.1.8.2.4. Software update via USB
To update the software using the service USB connection, the user will require a USB cable, a PC running Windows with a USB
connection, and the software PCsuite, which is available on our website. The user must also have the software fi le. This and PCsuite
can be downloaded from the internet at www.ftacom.com. To update the software using the cable, please follow the instructions
provided with the PCsuite software.
After the fi le has been received and unpacked, the digital receiver will update the current software and automatic restart. All user
preferences and channel lists will remain unchanged.
Note: Do not switch off your product while it is downloading the software.
Note: In some occasions, a new software may require a factory reset of
the product due to the new introduced functionalities it may add. Consult
the internet at www.ftacom.com for the details regarding a specifi c
software download.
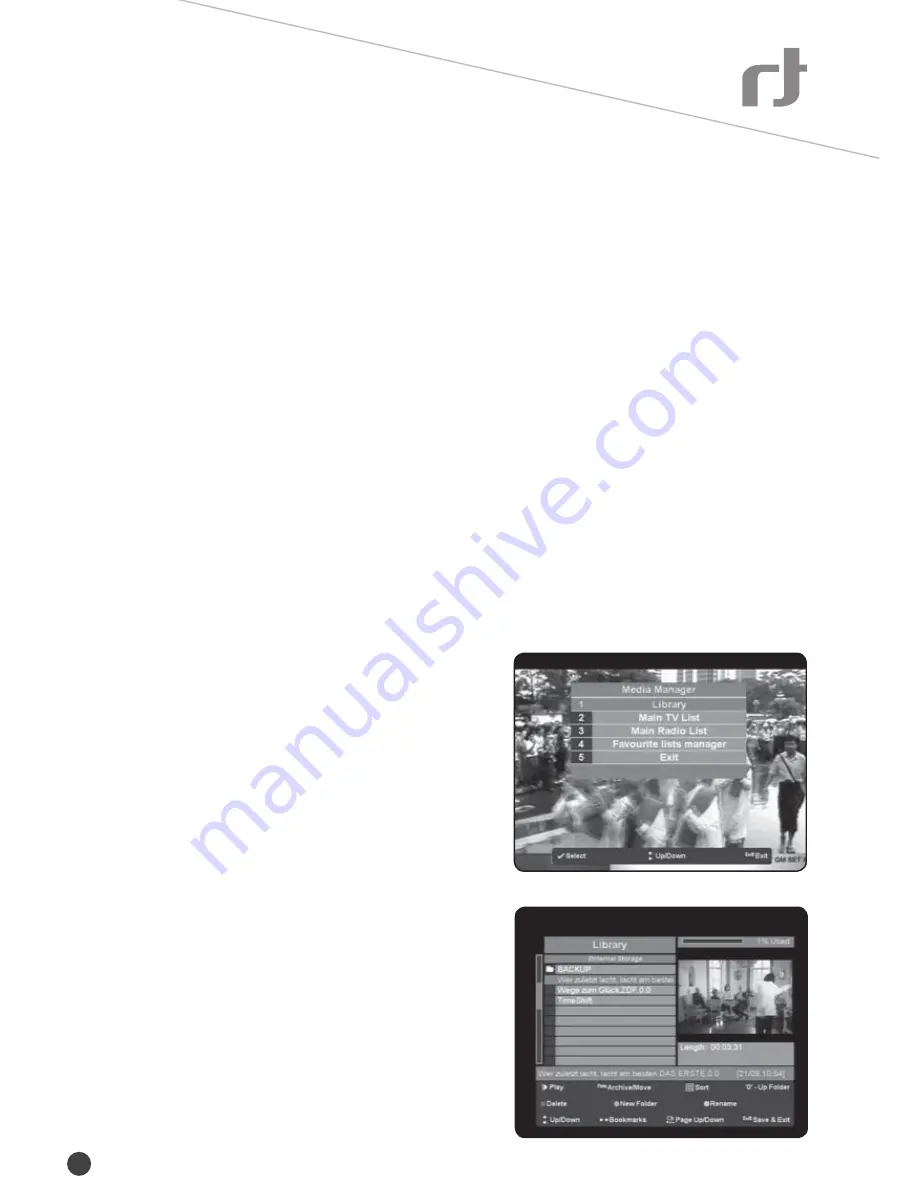
4.2. Media manager
The Media Manager is where all of the channel lists and recordings are
organized (see picture 26).
4.2.1. Library
You can open the Library using the “Menu” key (4) + select “Media Manager”
+ select “Library” option or by pressing the “Library” key (5) on the remote
control.
Picture 27 shows the Library interface. In the table, you can see the names
of the fi les that are on the hard disk or external USB device. On the right
side, there is a preview picture and at the bottom the user can see all
available commands.
In the left column, you will see icons for JPG and MP3 fi les. For scrambled
recordings a “$” will be displayed and for unscrambled recordings, the fi eld
will be empty.
4.2.1.1. File names and rename a file
The name of the fi le (recording) is automatically generated, based on
the information in the EPG. The format is: EPG c dot + the
Picture 26
Picture 27


