42
Camera Groups
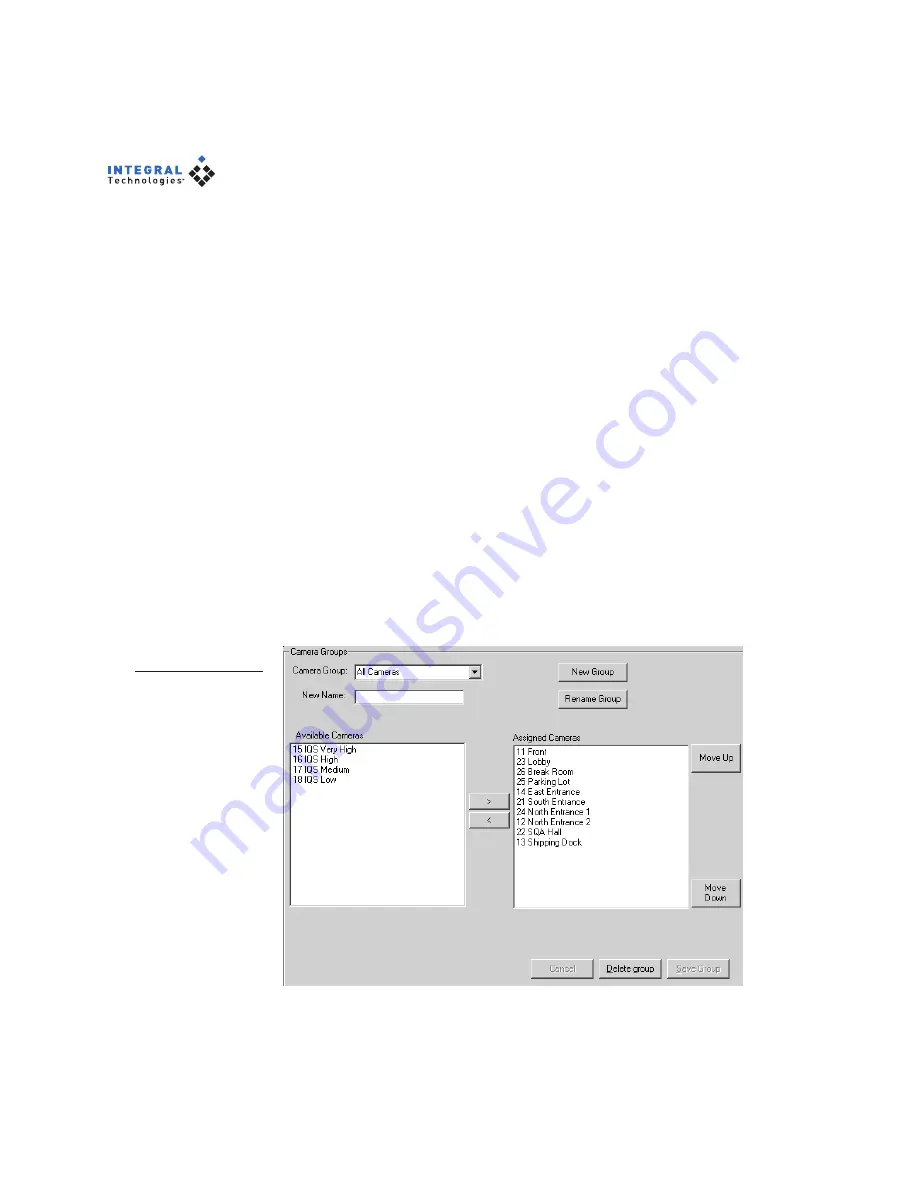
The Camera Groups directory (see Figure 21) contains groups of cameras with
some similar characteristic, such as location. These groups can be used for
quick selection of cameras from which to view live or recorded video. To
create a camera group, complete the following steps:
1. Click New Group and type a name for the group in the Camera Group
drop-down box.
2. In the Available Cameras list, select one or more cameras and click the
right arrow button. This adds the camera(s) to the Assigned Cameras
list. Repeat until all desired cameras (up to 16) are placed in the
Assigned Cameras list.
3. To remove a camera from the Assigned Cameras list, click the left
arrow button. To remove all cameras from the Assigned Cameras list,
click the double left arrow button. To adjust a camera’s position in the
group, highlight it and click Move Up or Move Down.
4. When you are finished modifying the camera group, click Save.
You can modify a camera group at any time by selecting the group from the
Camera Group list and performing steps 2–4. To rename a selected group, type
the new name in the New Name field and click Rename Group.
Figure 21
The Camera Groups
tab creates collec-
tions of cameras
with some similar
characteristic, such
as location.


