


ELITE
Installation guide
Chapter 1: Installation
7
2. Connect a dedicated C.O. line or PBX extension for the modem into the RJ-11
connector labeled Modem.
The line cord must plug into the Line jack of the modem, not the Phone jack.
3.
Connect the voice mail extensions to the Elite system.
Connect each line cord to the systems jacks labeled L1, L2 and so on. If your system
has proprietary interface cable(s), part # CAB0033, connect them to the 36-position
mini D cable plug(s) labeled L1-L8, L9-L12 (or L16) and so on.
4.
Power up the system.
Flip the power toggle switch to the “on” position. The Elite application will start
1
.
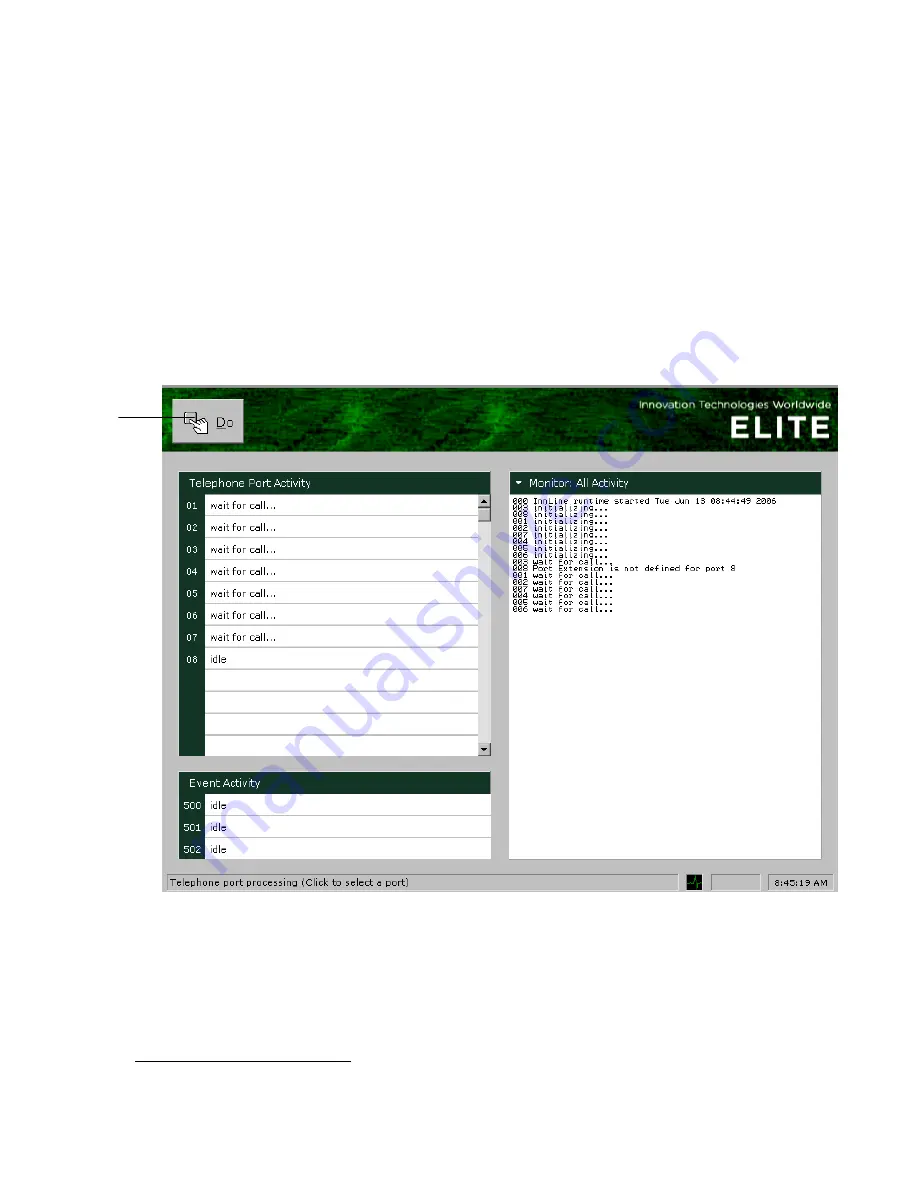
The system is ready to accept calls when you see the screen in the following
illustration.
5.
Call each voice mail extension to ensure that Elite answers each line.
Since no mailboxes have been programmed, the system will answer with an
automated attendant greeting. Dial 0 to ensure that the system transfers to the
attendant console. The last port of the system has been pre-configured by Innovation
as out-dial only (displays as “idle”) and will not answer if you call the extension
directly.
1
Startup time may take 5 minutes.
Do
Button
Содержание ELITE
Страница 6: ...ELITE Installation guide Introduction vi ...
Страница 8: ...ELITE Installation guide Introduction viii ...
Страница 171: ...ELITE Installation guide Chapter 4 Add on features 163 The printed DID card will look like the card shown below ...
Страница 184: ...ELITE Installation guide Chapter 4 Add on features 176 ...
Страница 188: ...ELITE Installation guide Index 180 ...