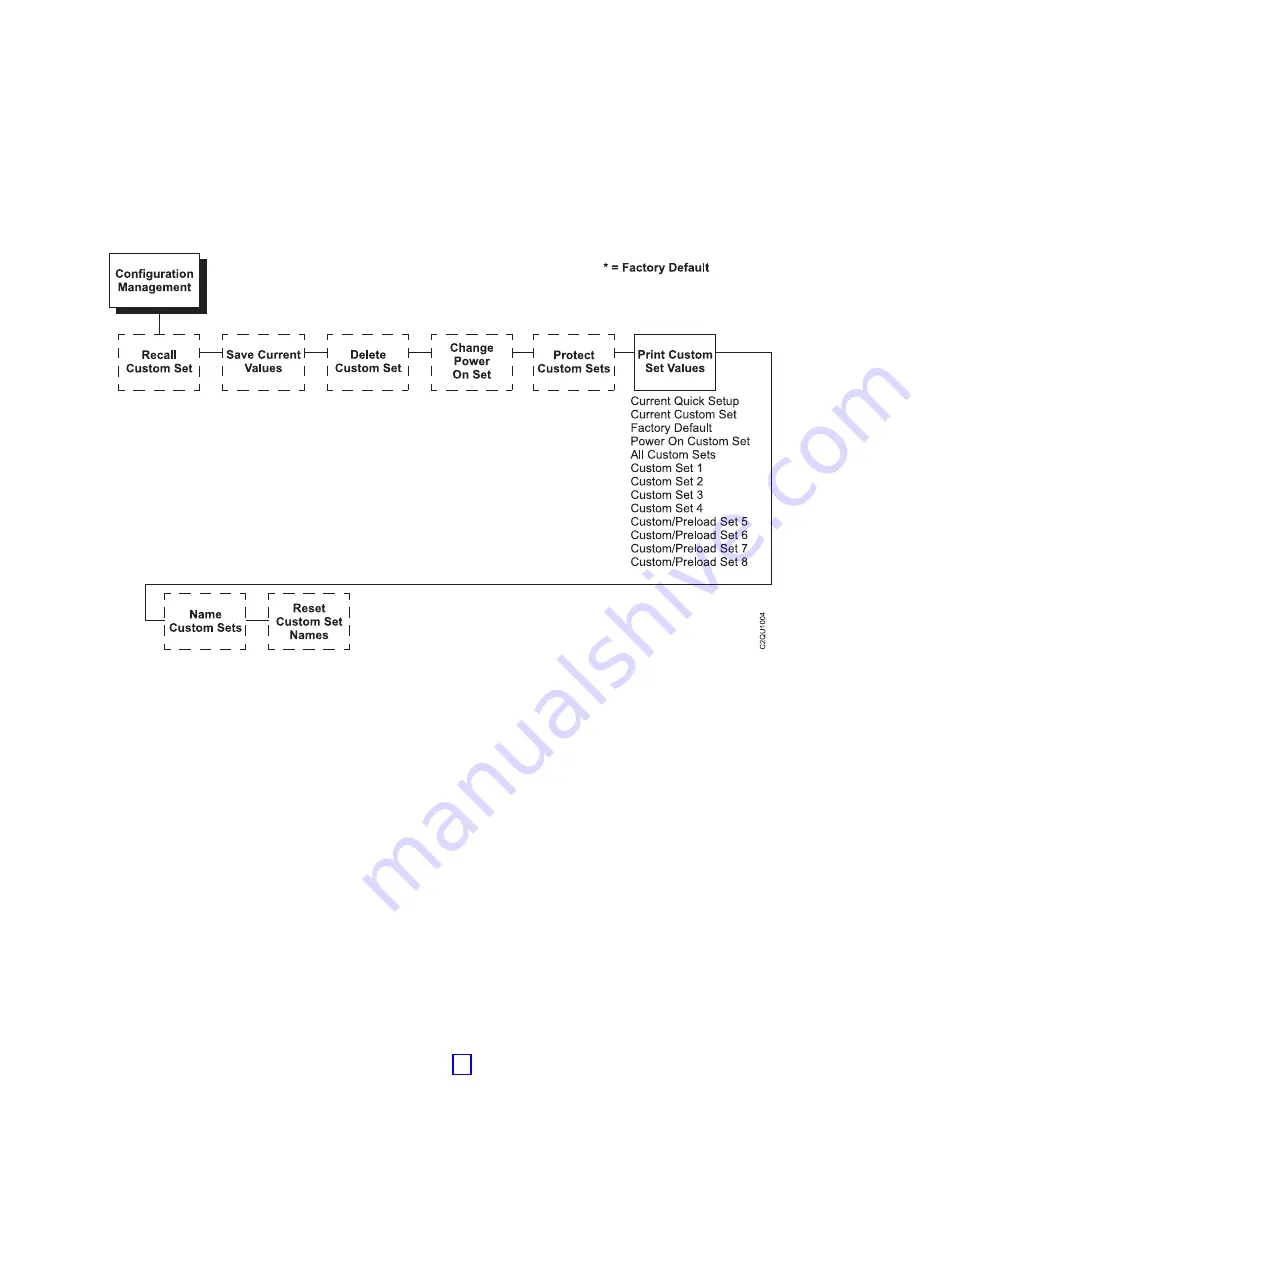
The second method for printing the current configuration, as well as several other
configurations, is to use the Print Custom Set Values menu option, shown on the
following page.
The Print Custom Set Values selection on the Configuration Management menu
allows you to print any or all of the configurations shown above. The default
setting, “Current Custom Set”, will print the same information as pressing the
Printer Configuration key. The Current Custom Set is the Power On configuration
until you begin modifying the printer configuration.
Custom sets 1 through 4 do not exist until you save configuration parameters to
them. You must define and save a custom set before you can print it.
Custom/Preload Sets 5 through 8 contain configuration sets that assist with the
installation and configuration of this printer.
The other options will only be useful once you have modified and saved the
printer configuration parameter settings.
The Power On Custom Set is defined by the “Change Power On Set” option.
Custom Sets 1 through 8 are defined by the “Save Current Values” option.
These options are described in detail under the Configuration Management Menu
description starting on page 54.
Figure 10. Configuration Management Menu - Print Custom Set Values
Chapter 3. Configuring the Printer
29
Содержание 6500-v05
Страница 1: ...InfoPrint 6500 V Line Matrix Printers User s Manual Cabinet and Pedestal Models S550 1002 01...
Страница 2: ......
Страница 3: ...InfoPrint 6500 V Line Matrix Printers User s Manual Cabinet and Pedestal Models S550 1002 01...
Страница 10: ...viii InfoPrint 6500 V User s Manual...
Страница 12: ...x InfoPrint 6500 V User s Manual...
Страница 14: ...xii InfoPrint 6500 V User s Manual...
Страница 38: ...Figure 8 Configuration Main Menu continued 22 InfoPrint 6500 V User s Manual...
Страница 57: ...Figure 16 6500 Series Main Menu Configuration continued Chapter 4 The Configuration Menus 41...
Страница 58: ...Quick Setup Menu Figure 17 Quick Setup Menu 42 InfoPrint 6500 V User s Manual...
Страница 59: ...Figure 18 Quick Setup Menu continued Chapter 4 The Configuration Menus 43...
Страница 74: ...Twinax Interface Menu Figure 22 Twinax Interface Menu 58 InfoPrint 6500 V User s Manual...
Страница 75: ...Figure 23 Twinax Interface Menu Print Language Chapter 4 The Configuration Menus 59...
Страница 83: ...Coax Interface Menu Figure 24 Coax Interface Menu Chapter 4 The Configuration Menus 67...
Страница 84: ...Figure 25 Coax Interface Menu Print Language 68 InfoPrint 6500 V User s Manual...
Страница 97: ...Figure 28 5250 Interface Menu Print Language Chapter 4 The Configuration Menus 81...
Страница 104: ...Figure 30 3270 Interface Menu Print Language 88 InfoPrint 6500 V User s Manual...
Страница 125: ...Wireless Parameters Menu Figure 38 Wireless Parameters Menu Chapter 4 The Configuration Menus 109...
Страница 152: ...Figure 48 IPDS Configuration Menu Print Language 136 InfoPrint 6500 V User s Manual...
Страница 158: ...ANSI Figure 49 ANSI Emulation Menu 142 InfoPrint 6500 V User s Manual...
Страница 159: ...Figure 50 ANSI Emulation Menu Font Attributes Character Set and Page Format Menus Chapter 4 The Configuration Menus 143...
Страница 173: ...Code V Emulation Menu Figure 52 Code V Emulation Menu Chapter 4 The Configuration Menus 157...
Страница 183: ...Proprinter III XL Emulation Menu Figure 55 Proprinter III XL Emulation Menu Chapter 4 The Configuration Menus 167...
Страница 188: ...Figure 58 pSeries Emulation Menu Print Language 172 InfoPrint 6500 V User s Manual...
Страница 194: ...Serial Matrix Emulation Menu Figure 60 Serial Matrix Emulation Menu 178 InfoPrint 6500 V User s Manual...
Страница 197: ...Print Format Menu Figure 61 Print Format Menu Chapter 4 The Configuration Menus 181...
Страница 224: ...208 InfoPrint 6500 V User s Manual...
Страница 266: ...250 InfoPrint 6500 V User s Manual...
Страница 282: ...266 InfoPrint 6500 V User s Manual...
Страница 288: ...272 InfoPrint 6500 V User s Manual...
Страница 338: ...322 InfoPrint 6500 V User s Manual...
Страница 339: ......
Страница 340: ...Printed in USA S550 1002 01...


