Perform Setup
62
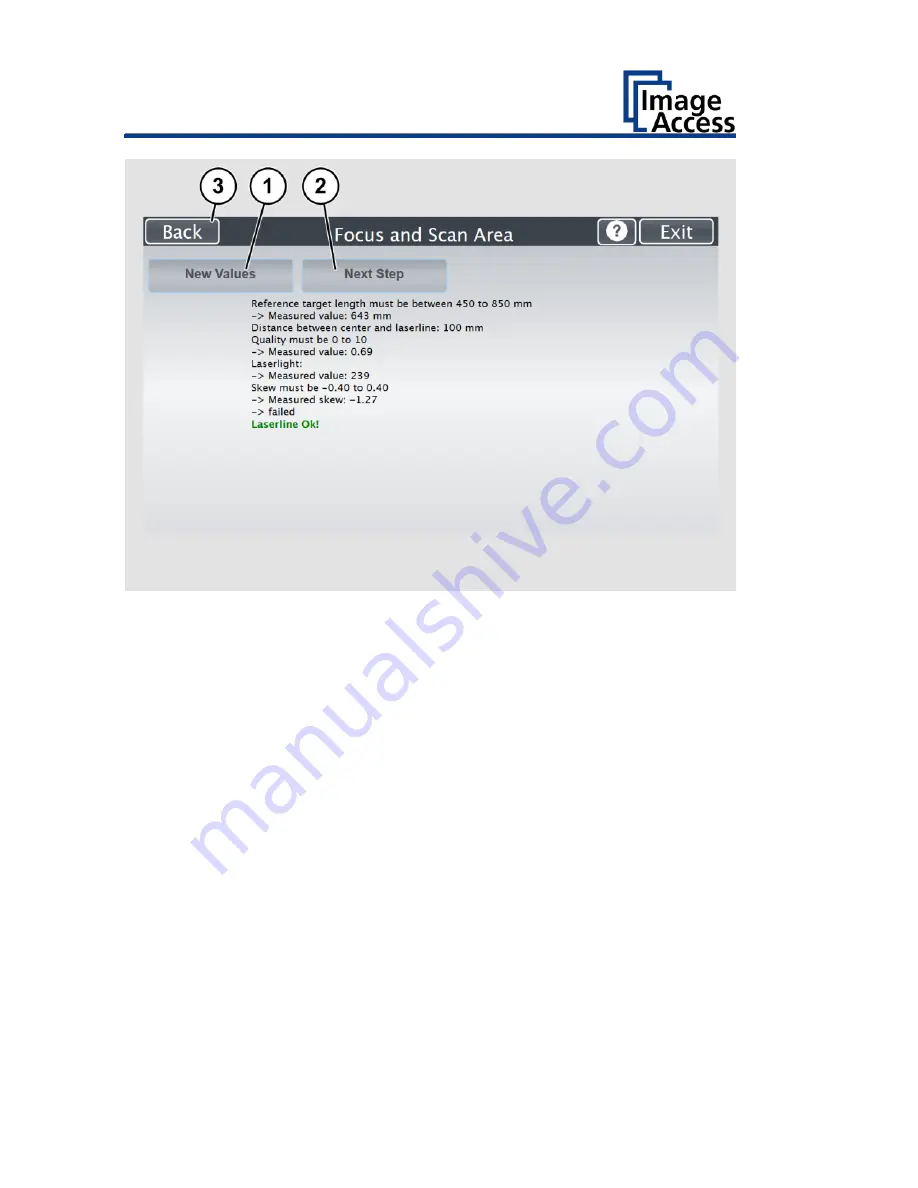
Values displayed in green indicate valid results. Any error will be shown in
red text, followed by explanatory remarks.
If the values are not OK, repeat the measurement with a tap on the NEW
VALUES (1) button.
It is normal that the measurement will return different values each time
the measurement is repeated.
➢
Tap the BACK (2) button to return to the Focus and Scan Area menu.
Содержание Bookeye 4 V1A Professional
Страница 1: ...Bookeye 4 V1A V2 V3 Setup Instructions English 02 2019 ...
Страница 23: ...Description 23 The following figure shows the Bookeye 4 V1A rating plate ...
Страница 29: ...Prepare for Setup 29 After a short wait the Start screen is displayed in English ...
Страница 36: ...Perform Setup 36 To complete the log in press OK 1 ...
Страница 38: ...Perform Setup 38 Perform White Balance On the Setup Menu screen tap on WHITE BALANCE 1 ...
Страница 41: ...Perform Setup 41 To perform the white balance proceed as follows Tap on CALIBRATE 1 ...
Страница 46: ...Perform Setup 46 Perform White Balance Glass Plate Tap on GLASS PLATE 1 ...
Страница 49: ...Perform Setup 49 Calibrate Focus and Scan Area On the S2N Setup Menu screen tap on FOCUS and SCAN AREA 1 ...
Страница 50: ...Perform Setup 50 The Focus and Scan Area screen page appears ...
Страница 71: ...Perform Setup 71 Tap the IP Address 1 field ...
Страница 72: ...Perform Setup 72 The IP Address window is displayed Enter the IP address 1 ...
Страница 73: ...Perform Setup 73 To delete a digit move the cursor to the right behind the digit to be deleted and tap DEL 1 ...
Страница 78: ...Perform Setup 78 Modify User Settings On the Setup Menu screen tap on USER SETTINGS 1 ...
Страница 82: ...Perform Setup 82 Configuring the GUI Selection Tap the User Settings screen on CONFIGURE GUI SELECTION 1 ...
Страница 85: ...Perform Setup 85 Set the Time and Date On the Setup Menu screen tap on TIME and DATE 1 ...
Страница 90: ...Perform Setup 90 Perform Test Suite On the Setup Menu screen tap on TESTSUITE 1 ...
Страница 120: ......


