Part 2 - Getting Started
23
Camera Registration
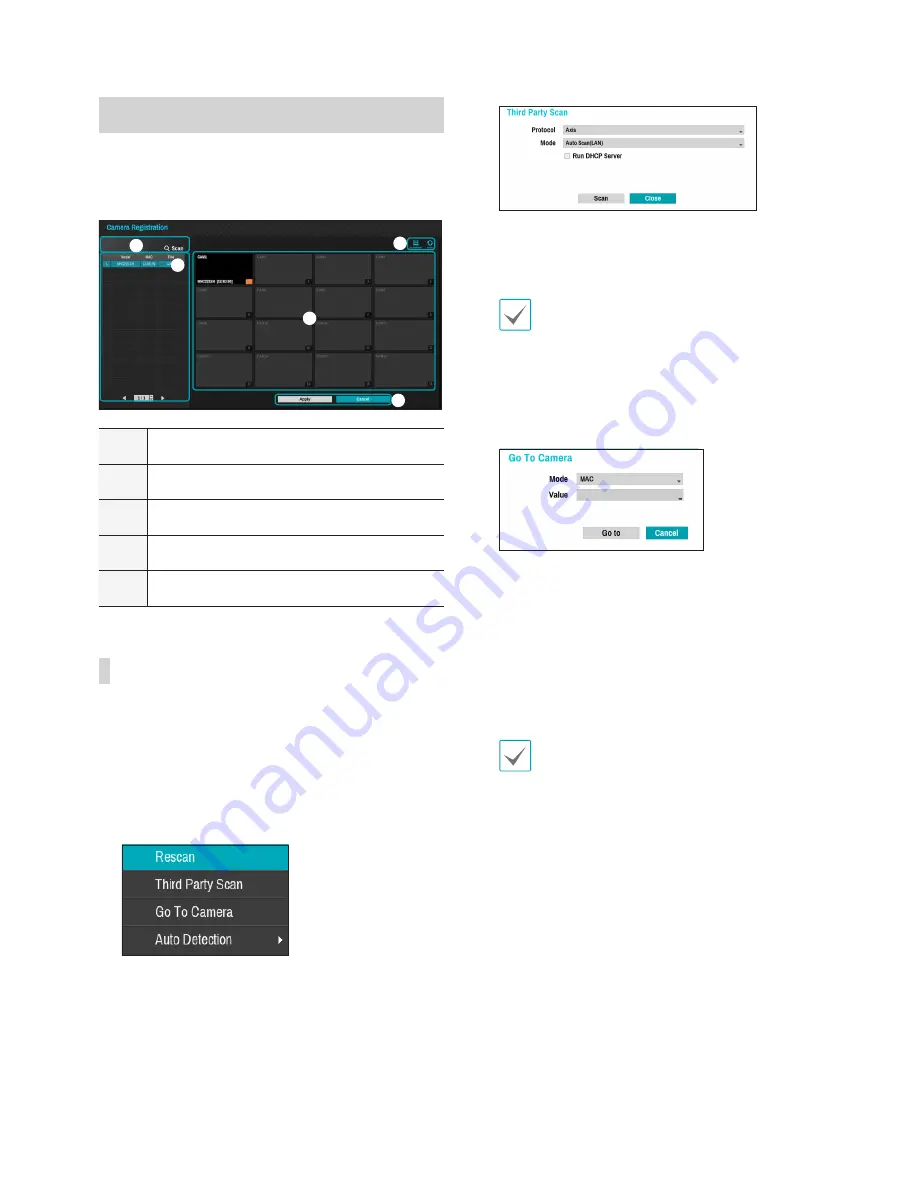
Once Network Setup Wizard is complete, the system
will automatically enter Camera Registration mode and
scan for cameras connected to the NVR.
1
2
3
4
5
1
Camera Scan Button
2
Camera View Menus
3
Camera List Area
4
Video Display Area
5
Apply/Cancel Buttons
Camera Scan Button
You can scan and search and register cameras
that were not detected automatically or third party
cameras.
1
Pressing the
Scan
button displays the following
submenu.
•
Rescan
: Scans for DirectIP™ cameras that were
not scanned automatically.
•
Third Party Scan
: Used to manually scan for
third-party cameras that cannot be recognized by
the auto scan feature.
–
Run DHCP Server
: Allocates IP automatically
to the camera connected to VIDEO IN port
using DHCP.
When several NVRs exist in the same network,
only one of DHCP severs has to be run. If
several DHCP servers are running, the redundant
IP may be allocated to the camera.
•
Go To Camera
: Moves the focus automatically
to the camera using MAC address of camera in
the camera list.
•
Auto Detection
: Activated in Live mode.
Automatically notifies the user of unregistered
DirectIP™ camera connections.
2
From the
Protocol
drop-down list, select the
protocol used by the network device you wish
to search for (Axis, Panasonic WV, or Onvif
Conformance).
Even if the network device uses a protocol
supported by the NVR, the device itself may not
be visible for scanning and registration by the
NVR. For more information about supported
network devices and models, contact your
retailer.
3
From the Mode drop-down list, select
Auto Scan
(LAN)
or
IP Address Scan
.
4
Select
Scan
to commence scanning.


