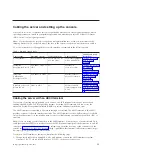
Table 5. Network configuration information for the service processor in a POWER7 processor-based system
POWER7
processor-based
systems
Server connector
Subnet mask
IP address of the
service processor
Example of an IP
address for your PC or
notebook
Service processor
A
HMC1
255.255.255.0
169.254.2.147
169.254.2.140
HMC2
255.255.255.0
169.254.3.147
169.254.3.140
Service processor
B (if installed)
HMC1
255.255.255.0
169.254.2.146
169.254.2.140
HMC2
255.255.255.0
169.254.3.146
169.254.3.140
5.
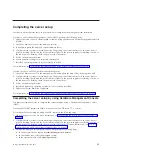
Set the IP address on your PC or notebook by using the values from the table. For details, see “Setting
the IP address on your PC or notebook.”
6.
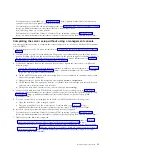
To access the ASMI using a web browser, complete the following steps:
a.
Use Table 5 to determine the IP address of the service processor Ethernet port that your PC or
notebook is connected to.
b.
Type the IP address in the
Address
field on the web browser of your PC or notebook and press
Enter. For example, if you connected your PC or notebook to HMC1, type
https://169.254.2.147
in the web browser on your PC or notebook.
Note:
It might take up to 2 minutes for the ASMI login display to be shown in the web browser after
the Ethernet cable is plugged into the service processor in step 3 on page 28. During this time, if you
use control panel function 30 to view the IP addresses on the service processor, incomplete or
inaccurate data is shown.
7.
When the Login display appears, enter
admin
for the user ID and password.
8.
Change the default password when prompted.
9.
Choose from the following options:
v
If you do not plan to connect your PC or notebook to your network, this ends this procedure. You
can now perform tasks such as changing the time of day or changing the altitude setting.
v
If you plan to connect your PC or notebook to your network, see Accessing the ASMI without an
HMC (http://publib.boulder.ibm.com/infocenter/systems/scope/hw/topic/p7hby/
connect_asmi.htm).
Setting the IP address on your PC or notebook
To access the ASMI through a web browser, you first need to set the IP address on a PC or notebook. The
following procedures describe setting the IP address on a PC or notebook running the Linux operating
system and the Microsoft Windows XP, 2000, and Vista operating systems.
You will need the information that you recorded in step 4 on page 28 in the “Accessing the ASMI by
using a web browser” on page 28 topic to complete the following procedure.
Windows XP and Windows 2000
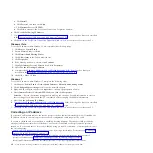
To set the IP address within Windows XP and Windows 2000, complete the following steps:
1.
Click
Start
>
Control Panel
.
2.
On the control panel, double-click
Network Connections
.
3.
Right-click
Local Area Connection
.
4.
Click
Properties
.
5.
Select
Internet Protocol (TCP/IP)
, and then click
Properties
.
Attention:
Record the current settings before making any changes. Use this information to restore
these settings if you disconnect the PC or notebook after setting up the ASMI web interface.
Note:
If
Internet Protocol (TCP/IP)
does not appear in the list, do the following steps:
Reference information
29
Содержание POWER 730
Страница 2: ......
Страница 6: ...iv Power Systems Installing the IBM Power 710 Express 8231 E1C or IBM Power 730 Express 8231 E2C...
Страница 36: ...24 Power Systems Installing the IBM Power 710 Express 8231 E1C or IBM Power 730 Express 8231 E2C...
Страница 57: ......
Страница 58: ...Part Number 00L5066 Printed in USA GI11 9861 03 1P P N 00L5066...

