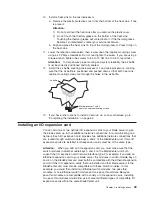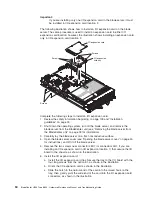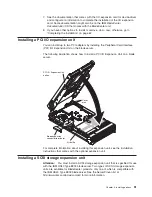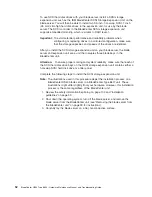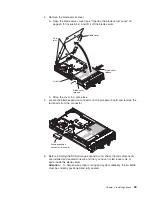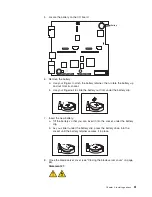
CAUTION:
Hazardous
energy
is
present
when
the
blade
server
is
connected
to
the
power
source.
Always
replace
the
blade
cover
before
installing
the
blade
server.
9.
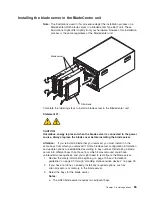
Reinsert
the
blade
server
into
the
bay
in
the
BladeCenter
unit.
10.
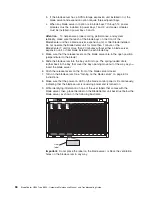
Turn
on
the
blade
server.
11.
Start
the
blade
server
Configuration/Setup
Utility
program
and
set
configuration
parameters
as
needed
(see
“Using
the
Configuration/Setup
Utility
program”
on
page
11
for
information).
Completing
the
installation
To
complete
the
installation,
perform
the
following
tasks.
Instructions
for
each
task
are
in
the
following
sections.
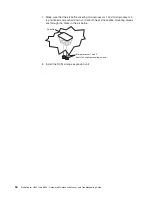
1.
Reinstall
the
blade
server
bezel
assembly,
if
you
removed
it
(see
“Installing
the
blade
server
bezel
assembly”).
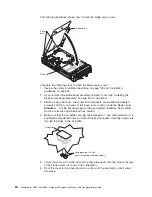
Attention:
To
help
ensure
proper
cooling
and
system
reliability,
the
air
baffle
must
be
correctly
positioned
and
fully
seated.
2.
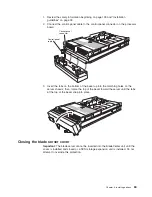
Close
the
blade
server
cover,
unless
you
installed
the
SCSI
storage
expansion
unit
option
(see
“Closing
the
blade
server
cover”
on
page
63).
Statement
21:
CAUTION:
Hazardous
energy
is
present
when
the
blade
server
is
connected
to
the
power
source.
Always
replace
the
blade
cover
before
installing
the
blade
server.
3.
Reinstall
the
blade
server
into
the
BladeCenter
unit
(see
“Installing
the
blade
server
in
the
BladeCenter
unit”
on
page
65).
4.
Turn
on
the
blade
server
(see
“Turning
on
the
blade
server”
on
page
6).
Note:
Reinstall
the
bezel
assembly
on
the
BladeCenter
T
unit
after
you
have
finished
turning
on
the
blades.
However,
if
you
installed
an
option
such
as
a
PCI
I/O
Expansion
Unit
with
PCI
adapters
that
require
cables,
you
will
not
be
able
to
install
the
bezel
assembly,
which
contains
an
air
filter
for
the
BladeCenter
T
unit.
If
you
cannot
install
the
bezel
assembly,
a
filter
must
be
provided
on
the
rack.
See
the
IBM
Eserver
BladeCenter
T
Planning
and
Installation
Guide
for
information
about
installing
an
air
filter
on
the
rack
(you
can
obtain
the
planning
guide
from
http://www.ibm.com/pc/support/).
5.
For
certain
options,
run
the
blade
server
Configuration/Setup
Utility
program
(see
“Updating
your
blade
server
configuration”
on
page
67).
Note:
If
you
have
just
connected
the
power
cords
of
your
BladeCenter
unit
to
electrical
outlets,
you
will
have
to
wait
until
the
power-on
LED
on
the
blade
server
flashes
slowly
before
pressing
the
power-control
button
on
a
blade
server.
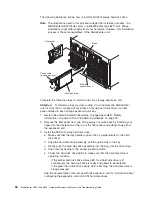
Installing
the
blade
server
bezel
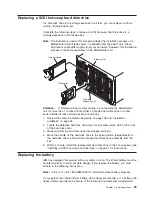
assembly
Complete
the
following
steps
to
install
the
blade
server
bezel
assembly.
62
BladeCenter
HS40
Type
8839:
Hardware
Maintenance
Manual
and
Troubleshooting
Guide
Содержание HS40 - BladeCenter - 8839
Страница 1: ...BladeCenter HS40 Type 8839 Hardware Maintenance Manual and Troubleshooting Guide ERserver...
Страница 2: ......
Страница 3: ...BladeCenter HS40 Type 8839 Hardware Maintenance Manual and Troubleshooting Guide ERserver...
Страница 6: ...iv BladeCenter HS40 Type 8839 Hardware Maintenance Manual and Troubleshooting Guide...
Страница 10: ...viii BladeCenter HS40 Type 8839 Hardware Maintenance Manual and Troubleshooting Guide...
Страница 20: ...10 BladeCenter HS40 Type 8839 Hardware Maintenance Manual and Troubleshooting Guide...
Страница 30: ...20 BladeCenter HS40 Type 8839 Hardware Maintenance Manual and Troubleshooting Guide...
Страница 42: ...32 BladeCenter HS40 Type 8839 Hardware Maintenance Manual and Troubleshooting Guide...
Страница 86: ...76 BladeCenter HS40 Type 8839 Hardware Maintenance Manual and Troubleshooting Guide...
Страница 114: ...104 BladeCenter HS40 Type 8839 Hardware Maintenance Manual and Troubleshooting Guide...
Страница 131: ...Appendix B Safety information 121...
Страница 132: ...122 BladeCenter HS40 Type 8839 Hardware Maintenance Manual and Troubleshooting Guide...
Страница 133: ...Appendix B Safety information 123...
Страница 134: ...124 BladeCenter HS40 Type 8839 Hardware Maintenance Manual and Troubleshooting Guide...
Страница 135: ...Appendix B Safety information 125...
Страница 136: ...126 BladeCenter HS40 Type 8839 Hardware Maintenance Manual and Troubleshooting Guide...
Страница 137: ...Appendix B Safety information 127...
Страница 149: ...Appendix B Safety information 139...
Страница 150: ...140 BladeCenter HS40 Type 8839 Hardware Maintenance Manual and Troubleshooting Guide...
Страница 151: ...Appendix B Safety information 141...
Страница 152: ...142 BladeCenter HS40 Type 8839 Hardware Maintenance Manual and Troubleshooting Guide...
Страница 153: ...Appendix B Safety information 143...
Страница 154: ...144 BladeCenter HS40 Type 8839 Hardware Maintenance Manual and Troubleshooting Guide...
Страница 166: ...156 BladeCenter HS40 Type 8839 Hardware Maintenance Manual and Troubleshooting Guide...
Страница 171: ......
Страница 172: ...Part Number 25K8105 Printed in USA 1P P N 25K8105...


