Chapter 3 - Standard CMOS Setup
3-2
IBC 2600 User’s Guide
STANDARD CMOS OPTIONS
The descriptions for the system options listed below show the values as
they appear if you have not run the Standard CMOS Setup program yet.
Once values have been defined, they display each time Standard CMOS
Setup is run.
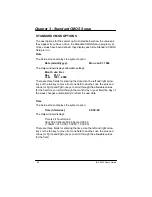
Date
The Setup screen displays the system option:
Date (mm/dd/yyyy):
Mon Jan 01, 1996
The Help window displays allowable settings:
Month Jan -Dec
Day
01-31
Year
1901 - 2099
There are three fields for entering the date. Use the left and right arrow
keys or the tab key to move from one field to another; use the plus and
minus (or PgUp and PgDn) keys to scroll through the allowable values
for the field. As you scroll through the month, day or year field, the day of
the week changes automatically to reflect the new date.
Time
The Setup screen displays the system option:
Time (hh/mm/ss):
00:00:00
The Help window displays:
Time is 24 hour format:-
Hour:00-23 Minute:00-59 Second:00-59
(1:30AM = 01:30:00,1:30PM = 13:30:00)
There are three fields for entering the time. Use the left and right arrow
keys or the tab key to move from one field to another; use the plus and
minus (or PgUp and PgDn) keys to scroll through the allowable values
for the field.
Содержание IBC 2600
Страница 1: ...IBC 2600 User s Guide 095 20081 00 Rev B ...
Страница 3: ...3 IBC 2600 User s Guide ...
Страница 6: ...IBC 2600 User s Guide 6 This page was intentionally left blank ...
Страница 13: ...Chapter 1 Specifications 1 3 IBC 2600 User s Guide SBC Block Diagram ...
Страница 14: ...Chapter 1 Specifications 1 4 IBC 2600 User s Guide SBC Board Layout ...
Страница 34: ...Chapter 1 Specifications 1 24 IBC 2600 User s Guide This page was intentionally left blank ...
Страница 54: ...Chapter 2 System BIOS 2 20 IBC 2600 User s Guide This page was intentionally left blank ...
Страница 90: ...Chapter 5 Power Management Setup 5 8 IBC 2600 User s Guide This page was intentionally left blank ...
Страница 98: ...Chapter 6 PCI Plug and Play Setup 6 8 IBC 2600 User s Guide This page was intentionally left blank ...
Страница 122: ...Appendix 3 Rear I O Transition Module A3 2 IBC 2600 User s Guide Rear I O Transition Module Board Layout ...
Страница 136: ...Appendix 4 Installing Microsoft Windows NT 4 0 A4 2 IBC 2600 User s Guide This page was intentionally left blank ...
Страница 138: ...Appendix 5 Limited Warranty A5 2 IBC 2600 User s Guide This page was intentionally left blank ...
Страница 140: ...Appendix 6 FCC Information A6 2 IBC 2600 User s Guide This page was intentionally left blank ...


