3.
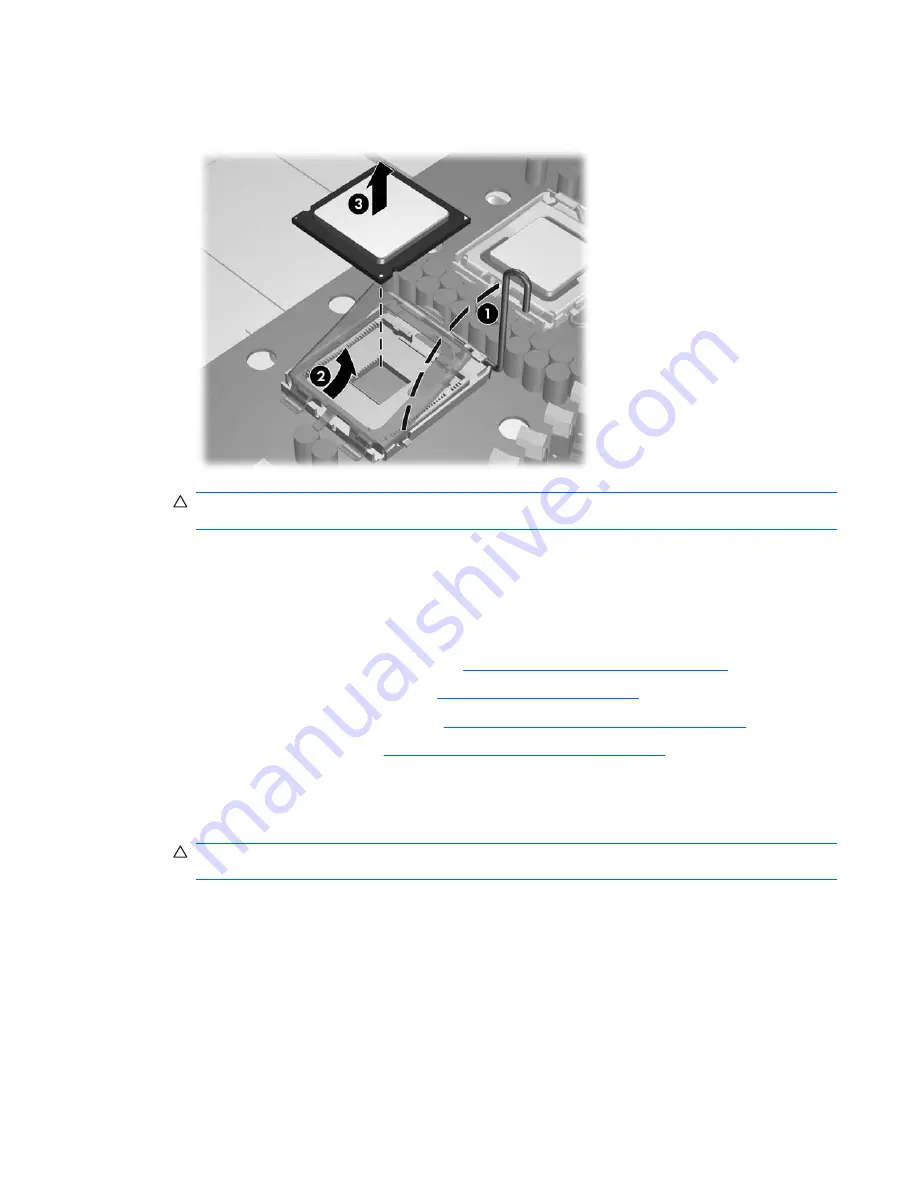
Raise the processor socket lever (1) and open the cover (2), as shown:
Figure 4-59
Removing the system processor
CAUTION:
The processor socket contacts are delicate. To avoid bending the contacts, use
extreme care when handling the processor.
4.
Pull the processor straight out of the socket (3), making sure not to touch the processor socket pins
or the gold pads underneath the processor, and handling the processor by the edges.
5.
Store the processor in a static free container in a safe place.
Installing a system processor
1.
Disconnect power from the system (see
Predisassembly procedures on page 52
).
2.
Remove the side access panel (see
Side access panel on page 58
).
3.
Remove the processor heatsink (see
Removing the processor heatsink on page 96
).
4.
Remove the processor (see
Removing a system processor on page 98
).
5.
Raise the processor socket lever and cover fully.
6.
If adding second processor to a workstation that originally contained only one, remove the plastic
cover from second processor socket
CAUTION:
The processor socket contacts are delicate. To avoid bending the contacts, use
extreme care when installing the processor in the socket.
ENWW
Removing and replacing components
99
Содержание Xw6600 - Workstation - 2 GB RAM
Страница 1: ...HP xw6600 Workstation Service and Technical Reference Guide ...
Страница 10: ...x ENWW ...
Страница 114: ...104 Chapter 4 Removal and replacement procedures ENWW ...
Страница 154: ...144 Chapter 7 Configuring password security and resetting CMOS ENWW ...
Страница 166: ...156 Appendix A Appendix A Connector pins ENWW ...


