


Powering on the device
WARNING!
This product can
only be used with an HP-approved power cord for your specific geographic region.
Use of a non-HP-approved power cord may result in: 1) not meeting individual country specific safety
requirements; 2) insufficient conductor ampacity that could result in overheating with potential personal
injury and/or property damage; and 3) an unapproved power cord could fracture resulting in the
internal contacts being exposed, which potentially could subject the user to a shock hazard. HP
disclaims all liability in the event a non-HP-approved power cord is used.
To power on the Autoloader:
1.
To use the web-based management interface, connect an Ethernet cable to a working LAN
connection and to the Ethernet connector on the back of the Autoloader.
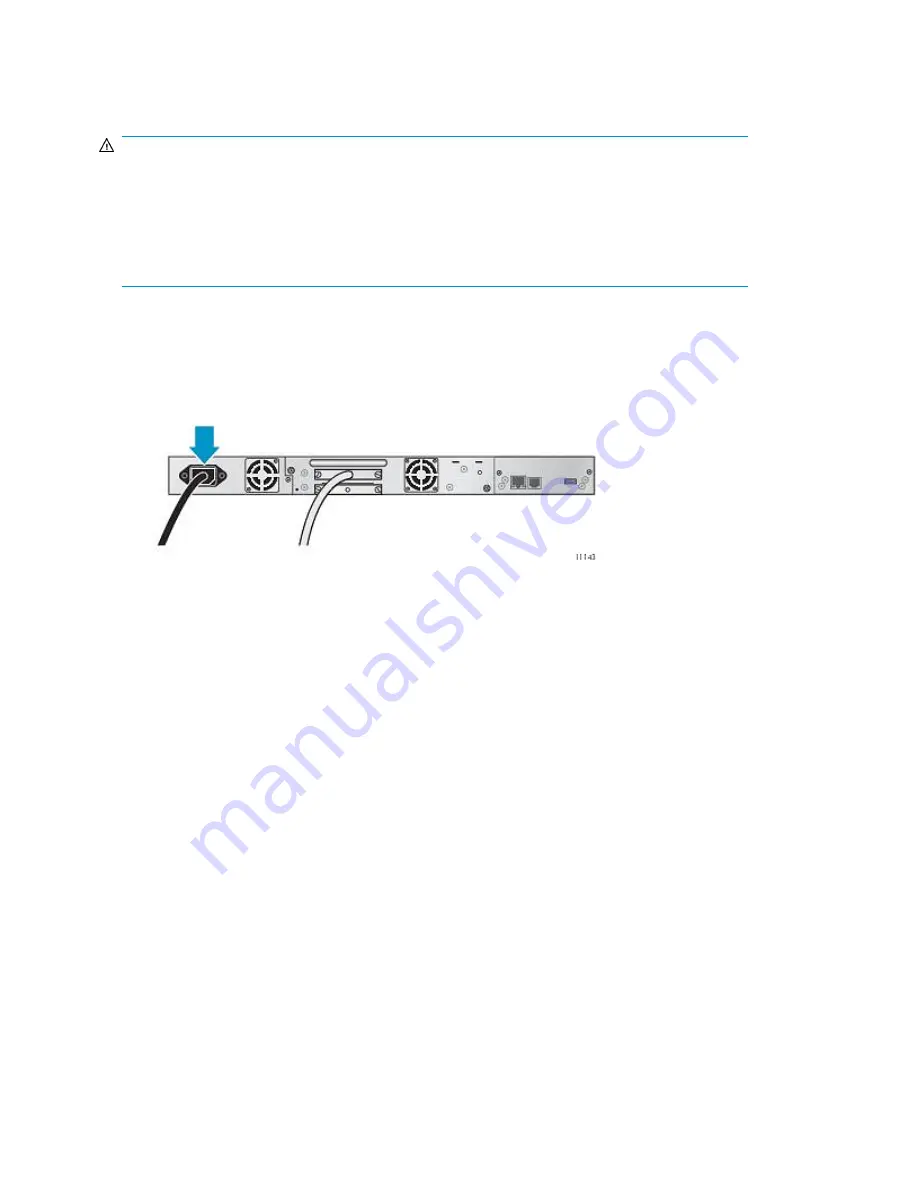
2.
Attach the power cable to the power connector on the back panel of the Autoloader (see
Figure
17
).
Figure 17 Attaching the power cord
.
3.
Plug the power cable into the nearest properly grounded power outlet.
4.
Power on the device by pressing the power button located on the front panel. Check the LCD
screen to make sure it has power. If not, check the power connections and your power source.
During the Power On Self Test (POST), all four LEDs are illuminated briefly, followed by a flashing
Ready
LED. When the initialization sequence is complete, the Home screen is displayed.
5.
Plug in the host server and all attached devices.
6.
Power on any other devices you powered off earlier.
7.
Power on the server.
Configuring the device
Now that the Autoloader is connected to the host and powered on, configure it for your environment.
To configure the Autoloader:
1.
Set the administrator password. Setting an administrator password provides access to the
administrator functions with the RMI or OCP, and restricts access to administrator functions to
only those who know the administrator password. The Autoloader comes with a null administrator
password, which until set allows unrestricted access to all administrative functions through the
OCP but not the RMI. Once the administrator password has been set from the OCP, it can be
changed from either the OCP or RMI.
Installing the Tape Autoloader
40
Содержание StorageWorks 1/8
Страница 14: ...14 ...
Страница 25: ...Figure 6 Tape drive LED 1 Tape drive LED HP StorageWorks 1 8 G2 Tape Autoloader User and service guide 25 ...
Страница 26: ...Features and overview 26 ...
Страница 106: ...Operating the Tape Autoloader 106 ...
Страница 156: ...Troubleshooting 156 ...
Страница 168: ...Upgrading and servicing the Tape Autoloader 168 ...
Страница 172: ...Support and other resources 172 ...
Страница 174: ...Technical specifications 174 ...
Страница 179: ...HP StorageWorks 1 8 G2 Tape Autoloader User and service guide 179 ...
Страница 182: ...Japanese laser notice Spanish laser notice Recycling notices English notice Regulatory compliance and safety 182 ...
Страница 184: ...Estonian notice Finnish notice French notice German notice Regulatory compliance and safety 184 ...
Страница 186: ...Lithuanian notice Polish notice Portuguese notice Romanian notice Regulatory compliance and safety 186 ...
Страница 188: ...Battery replacement notices Dutch battery notice Regulatory compliance and safety 188 ...
Страница 189: ...French battery notice German battery notice HP StorageWorks 1 8 G2 Tape Autoloader User and service guide 189 ...
Страница 190: ...Italian battery notice Japanese battery notice Regulatory compliance and safety 190 ...
Страница 192: ...Regulatory compliance and safety 192 ...
Страница 194: ...Electrostatic discharge 194 ...
Страница 204: ...204 ...