29
5
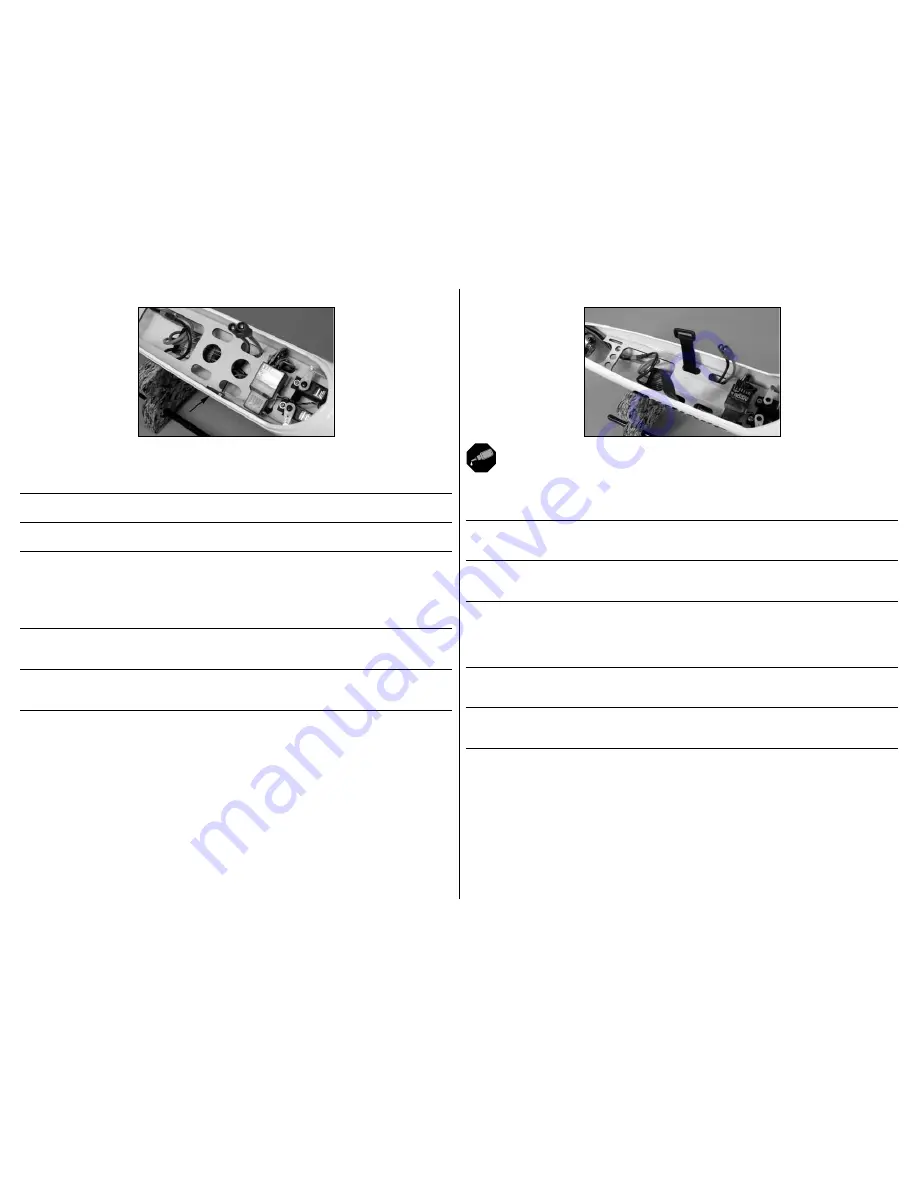
Route the battery lead from the speed control under the radio tray and through the slot so the battery can be
connected. Mount the switch on the opposite side of the fuselage from the battery lead and secure it using a small
piece of hook and loop tape.
Führen Sie die Akkukabel des Reglers unter der RC Platte und durch den Schlitz so dass Sie das Akku anschließen
können. Montieren Sie den Schalter auf der anderen Rumpfseite mit einem kleinem Stück Klettband.
Far passare i fili della batteria sotto al supporto radio e attraverso la fessura indicata in foto per poterli collegare al
regolatore. Montare l’interruttore sul lato opposto della fusoliera e fissarlo con un piccolo pezzo di nastro a strappo.
Î
When connecting the lead from the speed control to the receiver, it can be plugged into
either the throttle channel or into a port using a momentary switch. We recommend using a
momentary switch to operate the throttle, as this allows for the use of the throttle channel to
operate the spoilers so they can be varied to control the decent of your model during landing.
Î
Bei dem Anschluss des Fahrtenreglers an den Empfänger können Sie wählen ob Sie diesen in den
Gaskanal oder einem anderem Kanal mit Momentschalter stecken. Wir empfehlen für die Gasfunktion
einen Momentschalter, so dass der Gashebel zum Steuern der Störklappen verwendet werden kann.
Î
Il cavetto di controllo del regolatore si può collegare al ricevitore sia sul canale del motore che su un
altro canale per usare un interruttore momentaneo del trasmettitore. Noi consigliamo di usare quest’ultimo
lasciando il canale del motore per comandare gli spoiler in modo più diretto, utile specialmente in atterraggio.
6
Attach the hook portion to the battery tray. It may be longer than the tray, so use scissors to trim it so it doesn’t
hang forward of the tray.Insert the hook and loop strap through the slots in the radio tray. Make sure not to capture
the leads from the speed control between the strap and bottom of the radio tray.
Kleben Sie das Klettband auf die Einbauplatte. Das Klettband könnte etwas länger als benötigt sein, kürzen sie es mit
einer Schere, so dass es nicht überhängt. Bitte achten Sie dabei darauf dass Sie nicht versehentlich die Kabel des
Reglers kürzen.
Attaccare una parte di nastro a strappo al supporto della batteria adattandolo alla sua lunghezza. Inserire una
fascetta a strappo attraverso le fessure del supporto radio facendo attenzione a non legare insieme anche gli altri
cablaggi che passano sotto al supporto.
Î
Prepare the area for the hook and loop tape by applying a small amount of medium CA to the area of the
radio tray where the hook and loop tape will be placed. Remove the excess CA using a paper towel. Allow the CA to
cure before applying the tape. This will make the tape stick much better than applying it to the unprepared plywood.
Î
Bereiten Sie die Klebefläche des Klettbandes mit etwas mittlerem Sekundenkleber auf
der Einbauplatte vor. Entfernen Sie überschüssigen Klebstoff mit einem Papiertuch und lassen
diesen vollständig trocknen. Das sorgt für eine bessere Haftung des Klettbandes.
Î
Sul supporto radio preparare l’area dove applicare il nastro a strappo mettendoci una piccola quantità di
colla CA media. Togliere l’eccesso di colla con un fazzoletto di carta. Attendere che la colla si asciughi prima di
mettere il nastro. Tutto questo migliora l’aderenza rispetto all’applicazione diretta sul legno non preparato.
Содержание Mystique RES 2.9m ARF
Страница 51: ...51...


