Maintenance
4.6
Replacing the Sensor
WARNING
Use only genuine replacement sensors specifically for use with
Sensepoint XRL. Attempting to use non-genuine sensors will void
the warranty and could result in malfunction of the product.
Correct field repair and replacement of parts on Sensepoint XRL is
the responsibility of the user and must only be carried out by suitably
qualified and trained personnel.
WARNING
Always observe site procedures when opening the detector front or
sensor cover in the hazardous area. Never attempt to replace the
sensor without a) removing power to the Sensepoint XRL or b)
ensuring non-hazardous atmosphere and then placing the sensor
into the sensor maintenance mode.
Connect your smartphone to the Sensepoint XRL via Bluetooth. Tap the
Maintenance button and select Change Sensor. Follow the on-screen
instructions.
In cases where a smartphone running the mobile app is not available,
follow the steps below:
puj
vt
jv
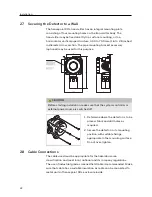
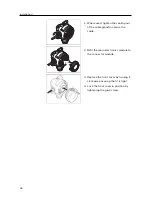
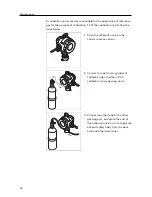
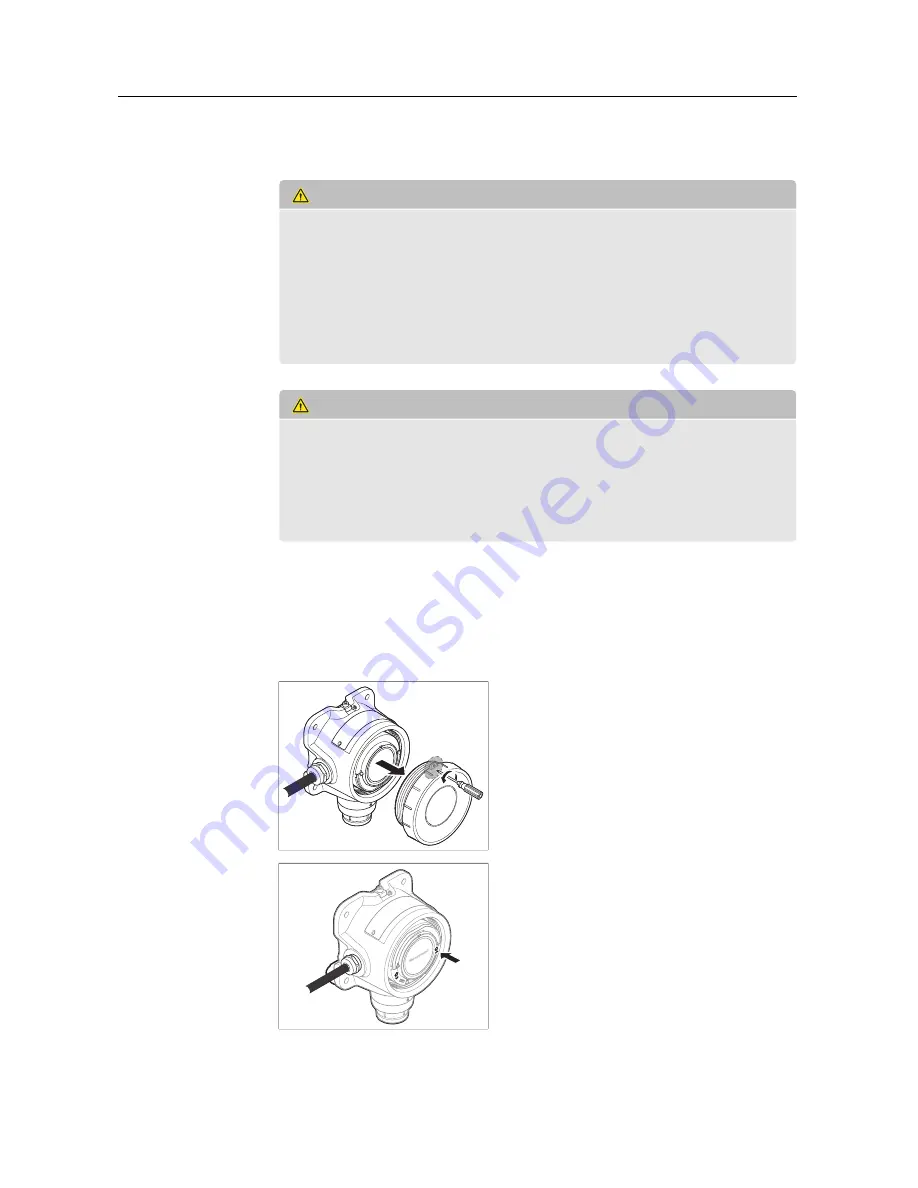
1. Loosen the grub screw on top of the
front cover.
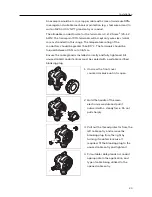
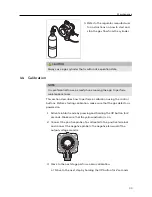
2. Unscrew the front cover
counterclockwise until it is open.
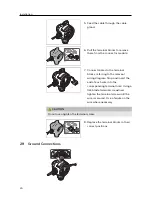
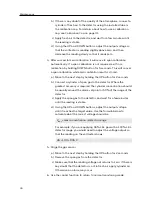
3. Press and hold the UP button for 10
seconds to switch to sensor
replacement mode. In this mode, the
detector output is inhibited and the
sensor circuits are internally isolated.
36
Содержание Sensepoint XRL
Страница 1: ...Sensepoint XRL Fixed Gas Detector Instruction Manual ...
Страница 5: ...Contents G Modbus Registers 56 H Contact Information 61 5 ...
Страница 40: ...Appendix A Detector Parameters 40 ...
Страница 61: ...Keep this manual for later use 3017M5023_1 HAA170035 2017 Honeywell Analytics ...

