LANDING GEAR INSTALLATION
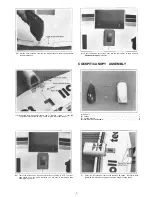
(2) Once the epoxy has cured, position the cockpit on the fuselage Make 4 small
holes where cockpit mounts are located Attach with the 4 small self-tapping
screws Do not glue the cockpit
(A) Main Gear . . . . . . .1
(B) Rubber Shock Absorber. . . . . . .1
(C) 4mmx30mm Screw . . . . . . . .2
(D) 4mm Washer . . . . . . . .4
(E) 4mm Nut . . . . . . . . . . .6
(F) 4mm Nylon N u t . . . . . . . . . . .2
(G) Wheel . . . . . . . . . . . . . .2
(H) Wheel Pants . . .2
(1) 4mmx40mm Screw . . .2
(J) 3mmx12mm Screw . . . . . . . . .2
(K) 3mm Washer . . . . . . . . . .2
(L) 3mm Nut . . . . . . . . . . .2
(M) Plastic Collar . . . . . . . . . . .2
(3) Trail fit the canopy to the cockpit If necessary, trim for a perfect fit Apply a thin
bead of Cyanoacrylate glue to the cockpit and attach and hold the canopy until
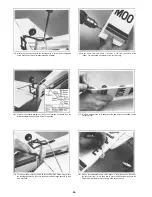
(1) Remove the cockpit and the wing Place the two 4mmx40mm screws with the
4mm washers into the two landing gear holes that are located inside of the front
fuselage section
(4) Apply the black striping tape to the edge around the canopy.
(2) Thread two 4mm nuts onto the two screws and tighten Next place the rubber
shock absorber over the screws.
-8-


