background image


                                                                                                                                                                                                            3 

General Features

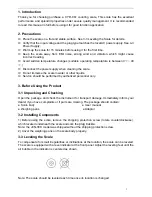
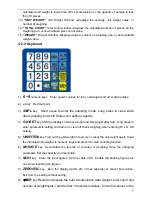
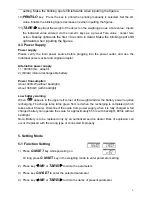
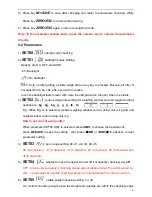
· Resolution up to 1/15000 
· Tare, Preset Tare, auto zero tracking   
· Single point and

 linear calibration

 available 

· HI/OK/LO quantity checking function 
· Weighing platter easy to disassemble with dust proof PVC cover   
· Low battery and charging status indication   
· Accumulation of weight and quantity 
· RS 232 port and

 RELAY port 

optional for external devices 

4-2 Front Panel 

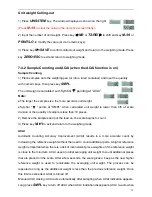
4-2-1 Display 


1) 


Low battery indication 

2) 

  Tare or Preset Tare indication 

3) 

  Center of Zero indication

.

 The zeroing range is ±2

of weighing capacity. 

4) Charge Lamp


5) 

HI Lamp 

(ON)  Indicating parameter item 

is selected when setting buzz                    

sounds. (See 5. Function Setting, setting buzz sounds) 

OK Lamp

 (ON) -- Indicating parameter item 

 or 

  is selected when setting buzz 

sounds.  

LOW Lamp

 (ON)—Indicating parameter item 

  is selected when setting buzz sounds. 

6) “

PRESET TARE”

 Symbol “ ” points at 

“PRESET TARE” 

when Tare value entered via 

numeric keys. 

7) “

NET”

 Net weight

--

Gross weight minus Tare. Symbol “ ” points at 

“NET”

 when TARE or 

PRESET TARE action is done. 

8) “

STABLE” 

Stable indication, Symbol “

  ” appears at the top of 

“STABLE” 

when scale 

is in stable condition.


9) “

ACAI” 

Symbol “ ” points at 

“ACAI” 

when


the average unit weight is

 calculated

 or 

recalculated. 

10) “

M+”

 Symbol “ ” points at

 “M+” 

when scale is in accumulation mode. 

11) 

“UW” 

Under entering a known unit weight mode, Symbol “ ” points at “

UW” 

when 

entered unit weight is lower than 4/5 of scale division. Unit weight is too small for ensuring 
accurate quantity calculations. 

12) “

SMPL” 

Under the sample counting mode, Symbol “ ” points at 

“SMPL”

 when 

Содержание CYD-C8+-15K

Страница 1: ...e 5 1 Function Setting 5 5 2 Parameters 6 6 Single and Multi point Calibration 8 7 Operation 7 1 Weighing 9 7 2 Tare Preset Tare 9 7 3 Checking function 7 3 1 Upper Lower Weight Limit Checking 10 7 3 2 Upper Lower Quantity Limit Checking 11 7 4 Basic Counting 7 4 1 Entering a Known Unit Weight and Unit weight Memory 12 7 4 2 Sample Counting and ACAL 13 7 5 Accumulation Accumulation Display and Acc...

Страница 2: ...in water or other liquids Service should be performed by authorized personnel only 3 Before Using the Product 3 1 Unpacking and Checking Open the package and check the instrument for transport damage Immediately inform your dealer if you have complaints or if parts are missing The package should contain Scale body User manual Weighing pans Adaptor 3 2 Installing Components 1 Before using the scale...

Страница 3: ...otection screws Power socket 4 1 Specifications General Features Specifications Model CYD C8 3K CYD C8 6K CYD C8 15K CYD C8 30K Capacity kg 3 6 15 30 Weighing units Kg g lb Display LCD backlit displays 6 5 6 Digits Pan size 294 x 228 x 13 5mm Scale dimensions 330 x 289 x 104mm Power supply DC 9v 400mA or rechargeable battery 6V 4A ...

Страница 4: ...ounds OK Lamp ON Indicating parameter item or is selected when setting buzz sounds LOW Lamp ON Indicating parameter item is selected when setting buzz sounds 6 PRESET TARE Symbol points at PRESET TARE when Tare value entered via numeric keys 7 NET Net weight Gross weight minus Tare Symbol points at NET when TARE or PRESET TARE action is done 8 STABLE Stable indication Symbol appears at the top of ...

Страница 5: ...y 4 G N SET key Shift the displays of Gross weight and Net weight after tare Long press to enter parameters setting And turn on or turn off check weighing when entering HI LO OK setting 5 UWS ITEM key Find out the unit weight in memory or reset the unit weight again Input the indicated unit weight via numeric keys and press it to start counting function 6 M SAVE key Accumulate the records of count...

Страница 6: ... rechargeable battery Power Consumption About 300mW without backlight About 380 mW with backlight Low battery warning When appears in the upper left corner of the weight window the battery power requires recharging The charge lamp turns green from red when the recharging is completed which takes about 8 hours Disconnect the scale from power supply when it is fully charged A full charged battery ca...

Страница 7: ...ight window options are kg kg kg g g g lb lb E g When Kg G is selected means weighing window current using unit is kg and unit weight window current using unit is g How to set current using units When parameter SET02 UNIT is selected press SMPL to choose the desired unit press M SAVE to save the setting then press e MR or TARE f to advance to next parameter setting 4 SET03 zero range setting d0 d1...

Страница 8: ...eds the upper or lower limits and the weight of the material is more than 20 divisions no beep No sound alarm 8 SET07 external equipment setting PC JMS Godex BIRCH ZEBRA GP DMP CK ET CX U KEY PC computer output JMS connect with weighing system GODEX Godex printer paper size 5cm 3cm BIRCH Birch printer paper size 5cm 3cm ZEBRA Zebra printer paper size 5cm 3cm GP Adhesive sticker label printer paper...

Страница 9: ...out stable indication after pressing the key TARE or ZERO auto Press key TARE or ZERO but it works only when get the stable indication 14 SET13 weight memory parameter on off On display the last weight when powering on again Off do not display the last weight when powering on again 15 SET14 the kinds of checking Qty ck Wt ck Qty ck start amount checking Wt ck start weighing checking 16 SET15 ACAI ...

Страница 10: ...an and then press TARE to complete the first point calibration Note After the first point calibration the window can display the weight value If no need for the other point calibration move to Step 6 to finish the calibration procedure 5 Add another weight 500g to the current weight The window will show the total weights value Press TARE to complete Repeat this step to complete the calibrations of...

Страница 11: ...and key M HI or PRINT LO to modify the value or via numeric keys Press key M SAVE to save and return to weighing mode 2 Put the items into the container and the weight of container will be tared automatically from the total weight 3 To cancel tare action clear the pan and press TARE f or ZERO ESC Method 2 1 Enter the tare value by pressing the numeric botton the screen will show the tare value the...

Страница 12: ...the item on the weighing pan is between upper and lower limits LO indication appears when the item on the weighing pan is smaller than lower limit Note the item on the weighing pan should be more than or equal to 20e When changing the Hi Lo value the scale will activate the weighing checking function automatically If the Lo value is higher than Hi value then the Hi value will become the same value...

Страница 13: ...ng checking function automatically If the Lo value is higher than Hi value then the Hi value will become the same value as Lo data 7 4 Basic Counting 7 4 1 Entering a Known Unit Weight 1 Under the weighing mode use the numeric keys together with key to input unit weight value and then press UWS 2 Put the items on the weighing pan the scale starts counting Note Symbol points at UW when entered unit...

Страница 14: ...n or the quantity of sample is less than 10 pieces 2 Remove the samples and put the load on the scale begins to count 3 Press key M HI to exit and return to the weighing mode ACAI Automatic Counting Accuracy Improvement ACAI results in a more accurate count by increasing the reference weight without the need to count additional parts A higher reference weight is important when there is a risk of i...

Страница 15: ...g to zero after the first one under the condition of more than or equal to 20d with stability Minus weight and gross weight can t be accumulated After resetting the sample value or unit weight the quantity accumulated will be adjusted automatically according to the new setting value Accumulation display 1 Press keye MR to displays the total accumulation data weight quantity and number of weighment...

Страница 16: ...to be initialized when init appears Press key M SAVE to start initialization or press key ZERO ESC to return to the printer choosing without initialization It displays ok when initialization is finished and shows the type of printer after one second Go further to other parameter setting or press key ZERO ESC to return to weighing mode 7 7 The Control from PC to Scale Optional Step 1 Connect the in...

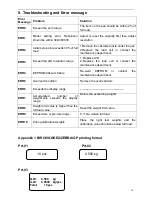
Страница 17: ...tment ERR3 Exceed the A D resolution range 1 Replace A D 2 Replace the load cell or contact the maintenance department ERR4 EEPROM Chksum failure Re weld EEPROM or contact the maintenance department ERR5 Overload condition Remove the overload item ERR6 Exceeds the display range ERR7 Accumulated number of weighments exceeds the display range Delete the exceeding weights ERR8 Weight limit value is h...

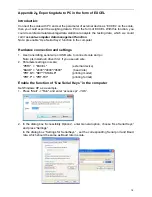
Страница 18: ...t conduct as follows 1 As for BRICH GODEX ZEBRA GP printers the factory designs the format as planned and email to the user Add the format into the previous format file via computer Then it is successful to add the new format and able to print the new format 2 As for DMP and CK printers it needs to change the scale design N W 0 500 kg U W 0 0500 kg pcs Total 10 pcs 10 pcs 0 500 kg N W 0 500 kg U W...

Страница 19: ...connection and settings 1 Use transmitting serial wire or USB wire to connect scale and pc Note pls install usb driver first if you use usb wire 2 Parameter settings in scale PERI EXCEL external device BAUD 2400 4800 9600 baud rate PRT M KEY STABLE printing model PRT F PRT F01 printing format Enable the function of Use Serial Keys in the computer Set Windows XP as a example 1 Press Start Run and e...

Страница 20: ...how Weighing data 3 Use Format Cells to beautify Excel Troubleshooting 1 Enable Fast User Switching function will disable Use Serial Keys in the computer Note Start Control Panel User Account Fast User Switching function 2 The data export requires only GND RX TX three lines while some wire include nine lines including usb 9 25pin adapter which may cause abnormal function Note cut other useless lin...

Страница 21: ... the position where the mouse cursor in With one USB port you could connect scale to computer easily 二 Precaution 1 Close the input method program before connecting 2 Ensure the decimal point digit is same as the parameter setting of scale if use EXCEL file in computer For Example Scale shows Total Weight 1 000KG Unit Weight 0 001g Total 1000PCS EXCEL Setting the decimal point digit should be 3 fo...

Страница 22: ...21 ...
Отзывы: