background image

9

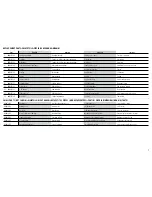
required radio equipment•erForderliche rc ausrüstung•equipement radio requis•apparecchiature radio


english 

deutsch 

français 

italiano

SPMAR7010 

AR7010 7-Channel DSMX

®

 Receiver 

AR7010 7-Kanal DSMX Receiver 

Récepteur 7 voies DSMX AR7010 

Ricevitore AR7010 DSMX a 7 canali

JRPA004 JR

®

 Chargeswitch 

Ladestecker 

Interrupteur avec prise de charge JR 

JR Interruttore per carica

JRPB5006 

Receiver Pack 2500mAh, 6V Ni-MH 

Empfängerakku 2500mAh, 6V Ni-MH 

Pack Ni-MH 2500 mAh, 6 V de récepteur 

Pacchetto ricevitore 2.500 mAh, 6V Ni-MH

SPMSA6060 (3) 

A6060 Standard Digital Aircraft Servo 

A6060 Standard-Flugzeug-Digitalservo 

Servo numérique aéronef standard A6060 

Servo digitale standard per aerei A6060

SPMSA5030 (4) 

A5030 Mini Digital Aicraft Servo 

Spektrum A5030 Mini Digital Flug -Servo 

Mini-servo numérique A5030 pour aéronefs 

Servo digitale mini A5030 per aeromodelli

SPMA3051 (4) 

Standard Servo Extension, 6-inch 

Spektrum Servokabelverlängerung 152mm 

Rallonge servo standard, 152mm 

Prolunga standard per servo, 152mm

SPMA3052 

Standard Servo Extension, 9-inch 

Spektrum Servokabelverlängerung 228mm  

Rallonge servo standard, 228mm 

Prolunga standard per servo, 228mm

SPMA3053 (2) 

Standard Servo Extension, 12-inch 

Spektrum Servokabelverlängerung 305mm 

Rallonge servo standard, 305mm 

Prolunga standard per servo, 305mm

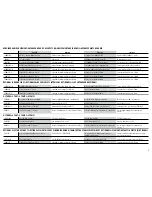
optional inboard Flaps•optionale klappen•Volets intérieurs optionnels•Flap entrobordo opzionali

SPMSA5030 (2) 

A5030 Mini Digital Aicraft Servo 

Spektrum A5030 Mini Digital Flug -Servo 

Mini-servo numérique A5030 pour aéronefs 

Servo digitale mini A5030 per aeromodelli

SPMA3058 

Standard Y-Harness, 6-inch 

Spektrum Hochleistungs Y-Servokabel 

Câble Y standard, 152mm 

Collegamento a Y standard, 152mm

SPMA3050 (2) 

Standard Servo Extension, 3-inch 

Spektrum Servokabelverlängerung 76mm 

Rallonge servo standard, 76mm 

Prolunga standard per servo, 76mm

2-stroke•2-takt•2 temps•2-tempi

EVOE0611 Evolution

®

 .61NX Engine with Muffler 

Evolution .61NX Glühzünder m. Schalldämpfer 

Moteur Evolution .61NX avec silencieux 

Motore Evolution .61NX con silenziatore

EVO13060 

Evolution Propeller, 13 x 6 

Evolution Propeller, 13 x 6 

Hélice Evolution, 13 x 6 

Elica Evolution, 13 x 6

EVO0616101 

8mm Muffler Extension EVO/OS 61 

8mm Auspuff Verlängerung Evo/OS 61 

Rallonge EVO/OS 61 8 mm pour silencieux 

Prolunga da 8 mm per silenziatore EVO/OS 61

HAN116 

Fuel Dot Filler with “T” Coupler 

Hangar 9 Tanknippel mit T Stück u. Überlauf Fitting 

Point de remplissage de carburant avec coupleur en T  Bocchettone di riempimento carburante con  


   giunto 

“T”

4-stroke•4-takt•4 temps•4-tempi

SAIE125AGK 

FA-125A Golden Knight 

FA-125A Golden Knight 

FA-125A Golden Knight 

FA-125A Golden Knight

EVO16060 

Evolution Propeller, 16 x 6 

Competition Propeller, 16 x 6 

Hélice  Competition 16 x 6 

Elica da competizione, 16 x 6

HAN116 

Fuel Dot Filler with “T” Coupler 

Hangar 9 Tanknippel mit T Stück u. Überlauf Fitting 

Point de remplissage de carburant avec coupleur en T  Bocchettone di riempimento carburante con  


   giunto 

“T”

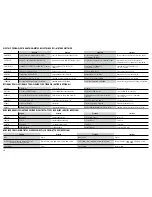
optional electric retracts•optionales elektrisches einziehFahrwerk•trains rétractables électriques optionnels•elementi retrattili elettrici opzionali

EFLG509 

81-degree Strut-Ready Main Electric Retract 

E-flite 60-120 81° BF109 EZFW 

Train rétractable électrique principal prêt avec 

Elemento retrattile elettrico principale a 81 gradi  


jambe de train 81 degrés 

per l’asta di controvento

EFLG510109 

Bf 109 Main Strut Set 

60-120 BF109 Fahrwerksstreben 

Ensemble de caisson principal Bf 109 

Set per asta di controvento principale Bf 109

SPMA3051 

Standard Servo Extension, 6-inch 

Spektrum Servokabelverlängerung 152mm 

Rallonge servo standard, 152mm 

Prolunga standard per servo, 152mm

Содержание Messerschmitt Bf 109F-2 60

Страница 1: ...1 Messerschmitt Bf 109F 2 60 Instruction Manual Bedienungsanleitung Manuel d utilisation Manuale di Istruzioni ...

Страница 2: ...ge at the sole discretion of Horizon Hobby Inc For up to date product literature visit horizonhobby com and click on the support tab for this product HINWEIS Alle Anweisungen Garantien und anderen zugehörigen Dokumente können im eigenen Ermessen von Horizon Hobby Inc jederzeit geändert werden Die aktuelle Produktliteratur finden Sie auf horizonhobby com unter der Registerkarte Support für das betr...

Страница 3: ...cumenti pertinenti sono soggetti a cambiamenti a totale discrezione di Horizon Hobby Inc Per una documentazione aggiornata sul prodotto visitare il sito www horizonhobby com e fare clic sulla sezione Support per questo prodotto REMARQUE La totalité des instructions garanties et autres documents est sujette à modification à la seule discrétion d Horizon Hobby Inc Pour obtenir la documentation à jou...

Страница 4: ...on Kindern gelassen werden da die Teile verschluckt werden könnten mit ernsthaften Verletzung zur Folge Avertissements relatifs à la sécurité Lisez et suivez toutes les instructions relatives à la sécurité avant utilisation Une utilisation inappropriée peut entraîner un incendie de graves blessures et des dégâts matériels Composants Utilisez uniquement des composants compatibles Si vous avez des q...

Страница 5: ...ne est libre de spectateurs avant de lancer votre modèle Soyez conscient des autres activités aux alentours de votre vol risque de conflit potentiel Planifiez votre vol avant de le commencer Raccomandazioni per operare in sicurezza Controllare attentamente il modello prima di ogni volo per accertarsi che sia idoneo Essere consapevoli che un altro utente della frequenza in uso potrebbe procurare de...

Страница 6: ... Brushless Moteur électrique EP Power 60 Brushless Motore elettrico Power 60 Brushless 5 channel or greater with 7 servos 6 for EP 5 Kanal oder größer mit 7 Servos 6 für Elektroantrieb 5 voies ou plus avec 7 servos 6 pour moteur EP a 5 canali o più con 7 servo 6 per EP Spinner Spinner Cône Ogiva dell elica 118mm included inklusive inclus inclusa Specifications Spezifikationen Spécifications Specif...

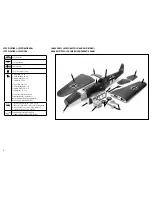
Страница 7: ...astique Componenti in plastica 11 HAN278513 3 50 Wheels 89mm Reifen Routes de 89mm Ruote da 89m 12 HAN278518 EP Mount Set E Motorhalter Set Jeu de renforts moteur EP Set di montaggio motore elettrico 13 HAN278520 Wing Tube Tragflächenverbinder Clé d aile Tubo dell ala Small Parts Not Shown KLEINTEILE NICHT ABGEBILDET PETITES PIÈCES NON REPRÉSENTÉES PARTI DI PICCOLE DIMENSIONI NON MOSTRATE HAN27850...

Страница 8: ... Serrez fortement Spingere forte Apply oil Öl verwenden Appliquez lubrifiant Applicare olio Attach temporarily Vorübergehend anbringen Attachez temporairement Attaccare temporaneamente Apply threadlock Schraubensicherungslack verwenden Utilisez du frein filet Applicare fuido threadlock Assemble right and left Links und rechts montieren Assemblez à droite et à gauche Assemblare destra e sinistra Re...

Страница 9: ...vo Extension 3 inch Spektrum Servokabelverlängerung 76mm Rallonge servo standard 76mm Prolunga standard per servo 76mm 2 Stroke 2 Takt 2 temps 2 Tempi EVOE0611 Evolution 61NX Engine with Muffler Evolution 61NX Glühzünder m Schalldämpfer Moteur Evolution 61NX avec silencieux Motore Evolution 61NX con silenziatore EVO13060 Evolution Propeller 13 x 6 Evolution Propeller 13 x 6 Hélice Evolution 13 x 6...

Страница 10: ... Meter E flite Lastmessgerät Wattmètre Misuratore di potenza EFLC3020 Celectra 200W DC Charger E flite 200W DC Multi Akku Ladegerät Chargeur CC 200W Celectra Celectra 200W DC Caricabatterie HAN9108 1 9 Scale Military Pilot with Vest Helmet and Goggles 1 9 Militärpilot m Weste Helm und Brille Pilote militaire avec gilet casque et lunettes Pilota militare in scala 1 9 con uniforme échelle 9 1 casco ...

Страница 11: ... bassa aderenza Nut driver 11 32 inch Steckschlüssel 11 32 inch Clés à douilles 11 32 pouce Chiave per dadi 8 7 mm Pencil Stift Crayon à papier Matita Phillips screwdriver 1 2 Phillips Schraubendreher 1 2 Tournevis cruciforme 1 2 Cacciavite a croce 1 2 Pin vise Handbohrer Porte forets Trapano manuale Pliers Spitzzange Pince Pinze Propeller reamer Propellerfeile Alésoir d hélice Alesatore per elich...

Страница 12: ...age Retirez toutes les pièces des sachets pour les inspecter Inspectez soigneusement le fuselage les ailes et les empennages Si un élément est endommagé contactez votre revendeur Si l entoilage présente quelque plis vous pouvez les lisser en utilisant le pistolet à air chaud HAN100 et le gant HAN150 ou le fer à entoiler HAN101 avec la chaussette de protection HAN141 Agissez soigneusement dans les ...

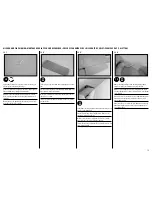
Страница 13: ...he flap with the wing Do not use glue on the flap hinges Passen Sie die Klappe an die Tragfläche an Kleben Sie die Scharniere jetzt noch nicht fest Monter le volet sur l aile en alignant le volet avec l aile Ne pas utiliser de colle sur les charnières de volet Fissare il flap all ala allineando il flap all ala Non usare colla sulle cerniere del flap 4 15 L R L R Remove the flap and hinges from the...

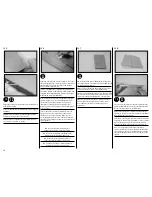
Страница 14: ...en Sie die Hinterkante der Klappe an der Hinterkante des montierten Querruders aus Î Î Nous avons installé l aileron pour aider à aligner correctement le bord de fuite du volet Î Î L alettone è installato per aiutare ad allineare correttamente il bordo posteriore del flap 7 L R L R Remove the inner flap from the flap mount Note the position of the hinges when they are removed as they are trimmed t...

Страница 15: ...n Sie eine T Nadel in die Mitte jedes Scharnieres Retirer les ailerons du panneau de l aile Placer une épingle en T sur chaque charnière en position centrale Rimuovere gli alettoni dal pannello delle ali Posizionare un perno a T al centro di ciascuna cerniera 11 L R L R Slide the hinges into position with the T pin resting against the edge of the control surface Schieben Sie die Scharniere in die ...

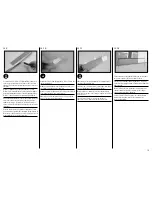
Страница 16: ... servo mounting screws through the backing plate of the servo mount Bohren Sie mit einem 1 5mm Handbohrer die Löcher für die Schrauben in die Servohalter Utiliser un porte foret et un foret de 1 5 mm pour percer les trous pour les vis de montage du servo à travers la plaque de support du servo Usare un trapano manuale e una punta per trapano da 1 5 mm per fare i fori per le viti di montaggio del s...

Страница 17: ...au câble du servo avec de la ficelle ou du fil dentaire Fissare saldamente una prolunga da 305mm al connettore che esce dal servo usando del filo interdentale 7 L R L R Tie the string located inside the wing to the end of the 12 inch 305mm extension Knoten Sie das Ende der Schnur in der Tragfläche an das Ende der 12 inch 305mm Verlängerung Attacher la ficelle située à l intérieur de l aile à l ext...

Страница 18: ...t et un foret de 1 5 mm pour percer les trous destinés aux supports de trappe du servo Mettere in posizione la copertura dell alettone Usare un trapano manuale e una punta per trapano da 1 5 mm per fare i fori nei supporti per la copertura dei servo 11 L R L R M2 x 10 x4 Thread a screw into each of the holes in the aileron servo cover mounting holes Remove the screws before proceeding Drehen Sie i...

Страница 19: ...rn With the ruler perpendicular to the hinge line mark the location for the control horn on the aileron Richten Sie ein Lineal rechtwinklig zum Servohorn aus und markieren die Position des Querruderruderhorns Placer une règle le long du côté du palonnier En plaçant la règle perpendiculairement à l axe de charnière marquer l emplacement pour le guignol de commande sur l aileron Posizionare un righe...

Страница 20: ...ne 18 L R L R Apply a small amount of thin CA to harden the threads made in the previous step Geben Sie einen kleinen Tropfen dünnflüssigen Sekundenkleber in die Gewindelöcher um diese zu härten Appliquer une petite quantité de colle cyano fine pour durcir les filetages faits lors de l étape précédente Mettere una piccola quantità di colla CA nei fori per indurire il filetto fatto nel passaggio pr...

Страница 21: ...urite sur la fourche de la chape pour l arrimer au guignol de commande Inserire la piegatura a Z nel foro che si trova a 13 5 mm dal centro terzo foro della squadretta del servo dell alettone Collegare la cambra al foro centrale della squadretta di controllo dell alettone Con il radiocomando acceso e il servo dell alettone centrato regolare la lunghezza del tirante in modo che l alettone sia centr...

Страница 22: ...Endpunkte auf 0 wenn Sie einen Computersender verwenden Dieses hilft später bei dem Einbau des Servos Î Î Avant de monter le palonnier définir les points d extrémité à 0 lors de l utilisation d une radio ordinateur L installation du servo s en trouvera facilitée voir plus loin dans cette section du manuel Î Î Prima di montare la squadretta del servo impostare gli estremi sullo 0 quando si utilizza...

Страница 23: ...a copertura del servo dell alettone Fissare la copertura del servo all ala usando quattro viti autofilettanti M2 x 10 7 L R L R Fit the servo cover into position Check the operation of the flap adjusting the end points until the flap is aligned with the trailing edge of the wing Set the full flap position at this time as well Setzen Sie die Servoabdeckung auf Prüfen Sie die Funktion und justieren ...

Страница 24: ...date ultérieure Î Î A questo punto è necessario decidere se i flap interni saranno funzionanti I flap fissi sono bloccati usando un adesivo a base di silicone che può essere rimosso usando un taglierino e una lama n 11 se si vogliono installare dei flap operativi in un secondo momento 1 Remove the inner flap cover from the wing Use a small amount of clear tape to secure the aileron and flap servo ...

Страница 25: ...n kann Fixer la trappe du servo à l aile à l aide de quatre vis auto taraudeuses M2 x 10 Utiliser un cutter pour ôter le revêtement des trois autres écrous borgnes de sorte que le support du volet intérieur puisse être fixé à l aile Fissare la copertura del servo all ala usando quattro viti autofilettanti M2 x 10 Usare un taglierino per rimuovere il rivestimento dai tre dadi ciechi restanti in mod...

Страница 26: ...o del flap interno Applicare uno strato sottile di colla CA per indurire il legno circostante in modo che le viti che bloccano il supporto non danneggino in legno quando vengono installate 2 L R L R Remove the covering so the blind nut in the servo cover can be accessed A screw attaches the inner flap mount Nehmen Sie die Abdeckung ab so dass sie die Blindmutter erreichen können Der innere Klappen...

Страница 27: ...der verwenden Dieses hilft später bei dem Einbau des Servos Î Î Avant de monter le palonnier définir les points d extrémité à 0 lors de l utilisation d une radio ordinateur L installation du servo s en trouvera facilitée voir plus loin dans cette section du manuel Î Î Prima di montare la squadretta del servo impostare gli estremi sullo 0 quando si utilizza una radio computer Ciò agevola l installa...

Страница 28: ... pour vérifier le fonctionnement de la trappe en ajustant les extrémités des positions HAUT et BAS du volet Ajuster la liaison selon les besoins Mettere in posizione il supporto del flap interno bloccandolo con due viti Posizionare la copertura in modo che il flap possa muoversi senza interferire con l ala Usare il radiocomando per controllare il funzionamento del flap regolando gli estremi per le...

Страница 29: ... installerà l ala 2 L R L R Secure the wheel collar to the axle Tighten the setscrew on the flat area made in the previous step Schrauben Sie einen Stellring auf die Achse Ziehen Sie die Madenschraube auf der abgeflachten Stelle an die Sie in den vorherigen Schritten gefeilt haben Fixer la bague d arrêt de roue sur l axe Serrer la vis de réglage sur le méplat réalisé dans l étape précédente Fissar...

Страница 30: ...ion de la roue et de la bobine sur le fil lors de l installation du train d atterrissage afin de s assurer qu il est correctement positionné Fissare il carrello di atterraggio all ala Controllare la posizione della ruota quando si installa il carrello di atterraggio per accertarsi del corretto posizionamento 7 L R L R Draw a center line on the inside of the landing gear door Draw an intersection l...

Страница 31: ...hardware Use a small amount of silicone adhesive between the door and strut to prevent the cover from rotating in flight Montieren Sie die Fahrwerkstür an dem Fahrwerksbein Geben Sie etwas Silikonklebstoff zwischen Fahrwerkstür und Fahrwerksbein damit sich die Abdeckung nicht während des Fluges verdrehen kann Fixer la trappe de train à la jambe du train d atterrissage en utilisant la sangle de tra...

Страница 32: ...tructions for the installation of the strut into the retract unit Stecken Sie die Achse mit Rad in das Fahrwerk so das Sie diese kürzen können Lesen Sie zum einbauen der Fahrwerkstrebe bitte in der Anleitung des Einziehfahrwerkes nach Avec l axe placé sur le train rétractable marquer l axe de sorte qu il puisse être coupé Consulter les instructions de l ensemble de rétraction pour l installation d...

Страница 33: ...sser die Kante nah des Fahrwerkhalters ein Bügeln Sie mit einem kleinem Folienbügeleisen die Folie in der Fahrwerksöffnung fest Couper le revêtement de 3 mm à l intérieur de l ouverture pour le train rétractable Utiliser un cutter pour couper l attache près du support du train rétractable Avec un outil de réalisation de joints repasser le revêtement dans le passage de roue Rifinire il rivestimento...

Страница 34: ...lla copertura per indicare le posizioni per i supporti dello sportello del carrello 13 L R L R Use a pin vise and 1 8 inch 3mm drill bit to drill the holes for the gear door mounting screws Bohren Sie mit einem 3mm Handbohrer die Löcher für die Fahrwerkstürhalter Utiliser un porte foret et un foret de 3 mm pour percer les trous destinés aux vis de fixation de la trappe de train Usare un trapano ma...

Страница 35: ... un trapano manuale e una punta per trapano da 1 5 mm per fare i fori per le viti di montaggio del servo nella piastra di sostengo del supporto del servo 3 Thread a servo mounting screw into each hole to cut threads in the surrounding wood Drehen Sie in jede Bohrung eine Servo Befestigungsschraube um ein Gewinde in das Holz zu schneiden Visser une vis de fixation de servo dans chaque trou pour cré...

Страница 36: ...a fusoliera Esso viene fornito in due dimensioni per adattarsi a un ampia gamma di interruttori 7 Secure the receiver battery in the fuselage using a hook and loop strap Secure the leads between the battery and switch harness using string or dental floss Sichern Sie den Empfängerakku mit Klettband im Rumpf Sichern Sie die Steckverbindungen mit etwas festem Garn oder Zahnseide Fixer la batterie du ...

Страница 37: ... the leading edge of the wing Entfernen Sie die Bespannung an der Öffnung für den Flächendübel Kleben Sie den Dübel in die Öffnung an der Tragflachvorderseite Retirer le revêtement pour exposer le trou destiné aux chevilles d aile Coller les chevilles d aile dans le bord d attaque de l aile Rimuovere il rivestimento per scoprire il foro per le spinette dell ala Incollare le spinette dell ala nel b...

Страница 38: ...bullone dell ala per inserire il dado cieco nella piastra di sostegno dell ala all interno della fusoliera Accertarsi che il dado cieco sia completamente inserito 8 M5 x2 M5 x 25 x2 Remove the covering from the holes in the wing bolt plate Fit the wing to the fuselage guiding the dowels into the former at the leading edge of the wing Secure the wing to the fuselage using the hardware and the wing ...

Страница 39: ... degli stabilizzatori e usare un tovagliolo di carta con alcol isopropilico per rimuovere eventuali tracce di olio e detriti dai tubi Applicare un sottile strato di resina epossidica al lato esterno dei tubi di entrambi gli stabilizzatori 2 Fit the stabilizers to the fin They will fit tightly to the fin as shown Passen Sie das Höhenruder in der Seitenleitwerksfinne an Ajuster les stabilisateurs à ...

Страница 40: ...izers Place a T pin in the center of each hinge Slide the hinges into position with the T pin resting against the edge of the control surface Entfernen Sie die Ruder vom Höhenleitwerk Bohren Sie mit einem Handbohrer ein Loch in die Mitte jeden Scharnierspaltes auf Ruder und Leitwerksseite Stecken Sie eine T Nadel in die Mitte jedes Fließscharnieres und schieben das Scharnier in das Ruder so dass d...

Страница 41: ...o the gap between the stabilizer and elevators can be minimized Center the elevator so the gap between the stabilizer and elevators at the tips are equal Once the epoxy has fully cured remove the tape and proceed to the next step Wickeln Sie Klebeband mit geringer Klebekraft um das Ruder um zu verhindern dass sich der Bügel am Leitwerk verklebt Nehmen Sie die T Nadeln aus den Scharnieren heraus so...

Страница 42: ...n Sie das Schlauchstück auf den Gabelkopf und drehen ihn dann auf das Gestänge am Ende des Rumpfes Préparer la chape et le morceau de durite puis visser la clavette sur la tringle à l arrière du fuselage Preparare la cambra e il tubo poi inserire la cambra sull asta di spinta sul retro della fusoliera 1 Insert the 763mm pushrod rod threaded end first into the tube near the elevator servo Schieben ...

Страница 43: ...e fente de charnière dans les gouvernes de profondeur et les stabilisateurs Placer une épingle en T au centre des deux charnières Mettre en place les charnières en les faisant glisser dans leurs fentes respectives avec l épingle en T en appui contre le bord de la gouverne Usare un trapano manuale e una punta per trapano da 1 5 mm per fare un foro al centro della scanalatura di ogni cerniera sia ne...

Страница 44: ...a fusoliera come mostrato 3 L R L R Apply thin CA to both sides of each hinge Once the CA cures gently pull on the fixed surface and control surface to make sure the hinges are glued securely If not apply additional CA to secure each of the hinges Geben Sie dünnflüssigen Sekundenkleber auf jede Seite des Scharnieres Ziehen Sie vorsichtig nachdem der Kleber getrocknet ist am Ruder und Finne um zu ü...

Страница 45: ... Posizionare la squadretta di controllo 1 5 mm dietro alla ruota dentata sul timone Segnare le posizioni per le viti di montaggio della squadretta di controllo 5 M2 x 10 x3 Thread an M2 x 10 self tapping screw into each hole to cut threads in the surrounding wood Drehen Sie in jede Bohrung eine M2 x 10 Schneidschraube um ein Gewinde in das Holz zu schneiden Visser une vis auto taraudeuse M2 x 10 d...

Страница 46: ...ise le palonnier de dérive Plier la tringle à 90 degrés puis fixer la tige au palonnier à l aide d un connecteur de tige Attivare il radiocomando e installare la squadretta del servo sul servo del timone Una volta centrati il timone e il servo del timone fare un segno sul rinvio di comando nel punto in cui essa incrocia la squadretta del servo del timone Piegare di 90 gradi rinvio di comando poi f...

Страница 47: ...vorsichtig ein Î Î Insérer en premier le fil de tringle de l intérieur du fuselage pour identifier l emplacement du tube car il se trouve légèrement à l intérieur du fuselage Faire preuve de patience lors de l insertion du fil de tringle Î Î Inserire il rinvio di comando dall interno della fusoliera per identificare la posizione per il tubo poiché è leggermente dentro alla fusoliera Mantenere la p...

Страница 48: ...lar Inside the fuselage slide the steering arm down to capture the wire in the bracket With the arm parallel to the axle tighten the setscrew in the steering arm Remove the wire from the fuselage at this time Positionieren Sie den Spornradraht so dass sich die Achse wie abgebildet unter dem Rumpf befindet Schieben Sie den Stellring gegen den Halter und ziehen die Madenschraube an Schieben Sie im R...

Страница 49: ...o locate the holes for the tail wheel access cover screws Punktieren Sie mit einer T Nadel die Öffnungen für die Schraublöcher der Heckklappe Utiliser une épingle en T pour perforer le revêtement afin de repérer les trous des vis de la trappe d accès à la roulette de queue Usare un perno a T per forare il rivestimento e individuare i fori per le viti della copertura dell accesso al ruotino di coda...

Страница 50: ...pporto del motore Segnare sul blocco la posizione dei fori di montaggio Spostare il blocco poi usare un trapano con punta da 4 5 mm per eseguire i due fori nel blocco 2 Remove the template from the firewall Use a drill and 7 32 inch 4mm drill bit to enlarge the holes in the firewall Nehmen Sie die Schablone von dem Brandschott ab Vergrößern Sie mit einem 4mm Bohrer die Löcher in dem Brandschott Re...

Страница 51: ...uratore in modo che sia rivolto verso la parte alta della fusoliera Segnare la posizione del tubo dell asta di spinta sulla paratia parafiamma usando il braccio dell acceleratore come guida Î Î The position of the throttle arm can be seen clearly in Step 11 Î Î Die Position des Gashebel ist bei Schritt 11 deutlich zu sehen Î Î La position du bras d accélération est clairement visible à l étape 11 ...

Страница 52: ... posizionare correttamente le viti e usare un bloccafiletti su tutte le viti per evitare che si allentino a causa delle vibrazioni 10 Slide the pushrod tube into the hole drilled in the firewall Use medium CA to glue the pushrod to the firewall Schieben Sie das Röhrchen in das Loch im Motorspant und kleben es mit mittleren Sekundenkleber fest Faire glisser la gaine de la tringlerie dans le trou pe...

Страница 53: ...min Serrer la vis de réglage pour fixer le fil de tringlerie au connecteur Régler les points d extrémité sur l émetteur pour obtenir la poussée suffisante pour faire fonctionner le carburateur d une position complètement ouverte à une position complètement fermée Centrare il servo e spostare il carburatore in modo che sia aperto per metà Serrare la vite di fermo per fissare il rinvio di comando al...

Страница 54: ...ant sur la tubulure de remplissage dans le réservoir Î Î Per facilitare la rimozione del carburante dal modello consigliamo di installare un secondo pendolino e una seconda linea del carburante nel tubo di riempimento all interno del serbatoio 18 M3 x 20 x2 Slide the fuel tank into the fuselage guiding the tubes through the hole in the firewall Secure the tank brace at the rear of the tank to secu...

Страница 55: ...arge the holes in the firewall Nehmen Sie die Schablone von dem Brandschott ab Vergrößern Sie mit einem 4mm Bohrer die Löcher in dem Brandschott Retirer le gabarit de la cloison pare feu Utiliser une mini perceuse et un foret 7 32 inch 4 mm pour agrandir les trous dans la cloison pare feu Togliere la dima dall ordinata parafiamma Usare un trapano con punta da 4mm per allargare i fori sull ordinata...

Страница 56: ...e in un punto facilmente accessibile Il cavo che va verso il ricevitore richiede una prolunga da 305 mm per collegare il regolatore di velocità al ricevitore 7 Prepare the speed control by soldering the appropriate connector to the speed control leads Secure the speed control to the motor box Connect the motor leads and secure them so they don t interfere with the operation of the motor Löten Sie ...

Страница 57: ... tableau de bord de la planche de décoration Appliquer le tableau de bord dans le cockpit Rimuovere la decalcomania del pannello strumenti dal foglio delle decalcomanie Applicare il pannello strumenti all abitacolo 12 Connect the motor and battery leads Make sure all objects are clear of the motor before connecting the leads Schließen Sie den Motor und Akkukabel an Achten Sie bitte darauf dass der...

Страница 58: ...d mit geringer Haltkraft bis der Kleber vollständig getrocknet ist Positionner la verrière de sorte que son bord arrière soit aligné avec le bord arrière du capot de la verrière Placer le capot de la verrière sur le fuselage et utiliser de la colle spéciale pour fixer celle ci au capot Utiliser de l adhésif de masquage pour maintenir la verrière en place jusqu à ce que la colle durcisse complèteme...

Страница 59: ...his time as well Schieben Sie die Motorhaube auf den Rumpf in Position Setzen Sie die Spinnerrückplatte auf die Motorwelle Verwenden Sie zu dem gewählten Motortyp die richtigen Distanzringe Sichern Sie die Rückplatte dass sie korrekt am Motor gehalten wird Montieren Sie auch den Spinneradapter Faire glisser le capot en place sur le fuselage Placer le flasque du cône sur l arbre du moteur Utiliser ...

Страница 60: ...Retirer l hélice le flasque arrière du cône et le capot du fuselage Visser une vis de montage de capot dans chacun des trous Togliere l elica il piattello dell ogiva e la capottina dalla fusoliera Avvitare una vite in ognuno dei fori 9 Connect the fuel tubing from the clunk to the carburetor Trim the tubing as necessary to prevent it from folding over preventing fuel flow to the carburetor Schließ...

Страница 61: ...giva e l elica Fissare l elica usando il dado adattatore idoneo allo specifico motore in uso Bloccare l adattatore dell elica usando una chiave da 10 mm 11 Attach the muffler header to the engine then attach the muffler to the header Position the muffler and header so they provide clearance over the radiator scoop and away from the cowling Connect the line from the vent to the muffler Schrauben Si...

Страница 62: ... ports to the cowling Note the position of the ports in the photo and on the box Kleben Sie die Auspuffattrappen mit Silikonklebstoff an der Motorhaube fest Bitte beachten Sie die Position des Auspuff auf dem Foto und auf der Verpackung Utiliser de la colle silicone pour coller les sorties d échappement au capot moteur Noter la position des sorties sur la photo et sur la boîte Usare un adesivo a b...

Страница 63: ... mm du bois sous le revêtement Rifinire con attenzione il rivestimento all interno della sagoma disegnata nel passaggio precedente scoprendo 3 mm del legno al di sotto del rivestimento 6 Position the intake scoop on the side of the fuselage Make the outline of the scoop on the side of the fuselage Setzen Sie den Lufteinlass auf die Seites des Rumpfes Markieren Sie die Außenlinie auf dem Rumpf Posi...

Страница 64: ...64 9 M2 x 10 x3 Attach the antenna mast to the fuselage Schrauben Sie die Antenne an den Rumpf Fixer le mât de l antenne sur le fuselage Fissare l asta dell antenna alla fusoliera ...

Страница 65: ... les câbles ne dépassent pas du fuselage avant de serrer les ailes Votre modèle doit être prêt à voler pour effectuer l équilibrage 2 Le centre de gravité CG recommandé de votre modèle se situe à 75 89 mm en retrait du bord d attaque de l aile comme illustré Marquer l emplacement du centre de gravité sur l aile 3 Avant de procéder à l équilibrage de votre modèle assurez vous qu il est correctement...

Страница 66: ...g to their endpoints until the transmitter and receiver connect Ruderausschläge 1 Schalten Sie den Sender und Empfänger ihres Modells ein Prüfen Sie die Seitenruderaussschläge mit dem Sender Bewegen Sie den Seitenruderstick nach rechts sollte sich das Ruder auch nach rechts bewegen Reversieren Sie falls notwendig die Funktion am Sender 2 Prüfen Sie die Höhenruderfunktion am Sender Ziehen Sie den H...

Страница 67: ...réglages de débattements sont effectués Cela empêchera les servos d aller en butée lors de la connexion de l émetteur et du récepteur Corse Dei Comandi 1 Accendere trasmettitore e ricevitore del modello Controllare i movimenti del timone agendo sul trasmettitore Quando lo stick va a destra anche il timone deve andare a destra Se questo non avvenisse bisogna invertire il verso del servo dal trasmet...

Страница 68: ...einflußt werden Ist dieses der Fall fliegen Sie nicht Bauen Sie die RC Komponenten aus und lassen diese vom Hersteller überprüfen Checklist d avant vol Chargez la batterie de votre émetteur de réception et d allumage Utilisez le chargeur fourni avec votre radio Suivez les instructions fournies avec votre radio Charger votre radio la nuit qui précède la session de vol Chargez la batterie de l émett...

Страница 69: ...egen kann Contrôles systématiques Contrôlez la tension de la batterie de l émetteur Ne volez jamais en dessous de la tension minimale recommandée par le fabricant Le non respect de cette consigne pourrait entraîner un crash Quand vous contrôlez les batteries soyez certain de respecter les polarités avec votre voltmètre Contrôlez tous les accessoires guignols palonniers et chapes pour être sûr qu i...

Страница 70: ...istributor or Horizon directly This will enable Horizon to better answer your questions and service you in the event that you may need any assistance For questions or assistance please visit our website at www horizonhobby com submit a Product Support Inquiry or call 877 504 0233 toll free to speak to a Product Support representative Inspection or Services If this Product needs to be inspected or ...

Страница 71: ...and in der Originalverpackung vollständig bei dem Verkäufer zurückzugeben Sicherheitshinweise Dieses ist ein hochwertiges Hobby Produkt und kein Spielzeug Es muss mit Vorsicht und Umsicht eingesetzt werden und erfordert einige mechanische wie auch mentale Fähigkeiten Ein Versagen das Produkt sicher und umsichtig zu betreiben kann zu Verletzungen von Lebewesen und Sachbeschädigungen erheblichen Aus...

Страница 72: ...nt Si vous n êtes pas prêt en tant qu acheteur à accepter ces dispositions en relation avec l utilisation du produit nous vous demandons de restituer au vendeur le produit complet non utilisé et dans son emballage d origine Indications relatives à la sécurité Ceci est un produit de loisirs perfectionné et non un jouet Il doit être utilisé avec précaution et bon sens et nécessite quelques aptitudes...

Страница 73: ...e responsabilità associata all uso del prodotto si suggerisce di di restituire il prodotto intatto mai usato e immediatamente presso il venditore Indicazioni di sicurezza Questo è un prodotto sofisticato di hobbistica e non è un giocattolo Esso deve essere manipolato con cautela con giudizio e richiede delle conoscenze basilari di meccanica e delle facoltà mentali di base Se il prodotto non verrà ...

Страница 74: ...ntact your local city office your household waste disposal service or where you purchased the product Anweisungen zur Entsorgung von Elektro und Elektronik Altgeräten für Benutzer in der Europäischen Union Dieses Produkt darf nicht zusammen mit anderem Abfall entsorgt werden Stattdessen ist der Benutzer dafür verantwortlich unbrauchbare Geräte durch Abgabe bei einer speziellen Sammelstelle für das...

Страница 75: ...An inexperienced pilot is assisted by an experienced pilot 4 When and where required by rule helmets must be properly worn and fastened They must be OSHA DOT ANSI SNELL or NOCSAE approved or comply with comparable standards B RADIO CONTROL RC 1 All pilots shall avoid flying directly over unprotected people vessels vehicles or structures and shall avoid endangerment of life and property of others 2...

Страница 76: ... Celectra are trademarks or registered trademarks of Horizon Hobby Inc The Spektrum trademark is used with permission of Bachmann Industries Inc All other trademarks service marks and logos are the property of their respective owners Job 28902 Created 11 2012 ...

Отзывы: